
DIY Serpentine Belt Conversion for all A-series MG Midgets, Austin Healey Sprites, Morris Minors and Classic Mini Coopers
A first step in preparing the A-series engine for our DIY intercooled supercharger conversion was engineering a serpentine belt drive. However, a naturally-aspirated A-series engine can also benefit from a serpentine belt drive. Serpentine belts last longer, run smoother, and grip better than old-style V-belts.
Another benefit is that you can change or remove the belt if servicing the water pump or alternator in just seconds using a regular 3/8” ratchet!
Existing supercharger conversions use a 4-rib belt, which experience has shown is prone to slipping under heavy use. So, we designed matching 5-rib serpentine crankshaft and water pump pulleys, which are now available by clicking here.
*NOTE: the A-Series water pump pulley is produced by Smoothflow Pulleys based on specifications we provided that were extrapolated from a modern, aluminum water pump. Its design may not fit original, cast-iron water pumps.
Click these links for videos showing quality control runout tests on our pulley and a competitor, 4-rib pulley.
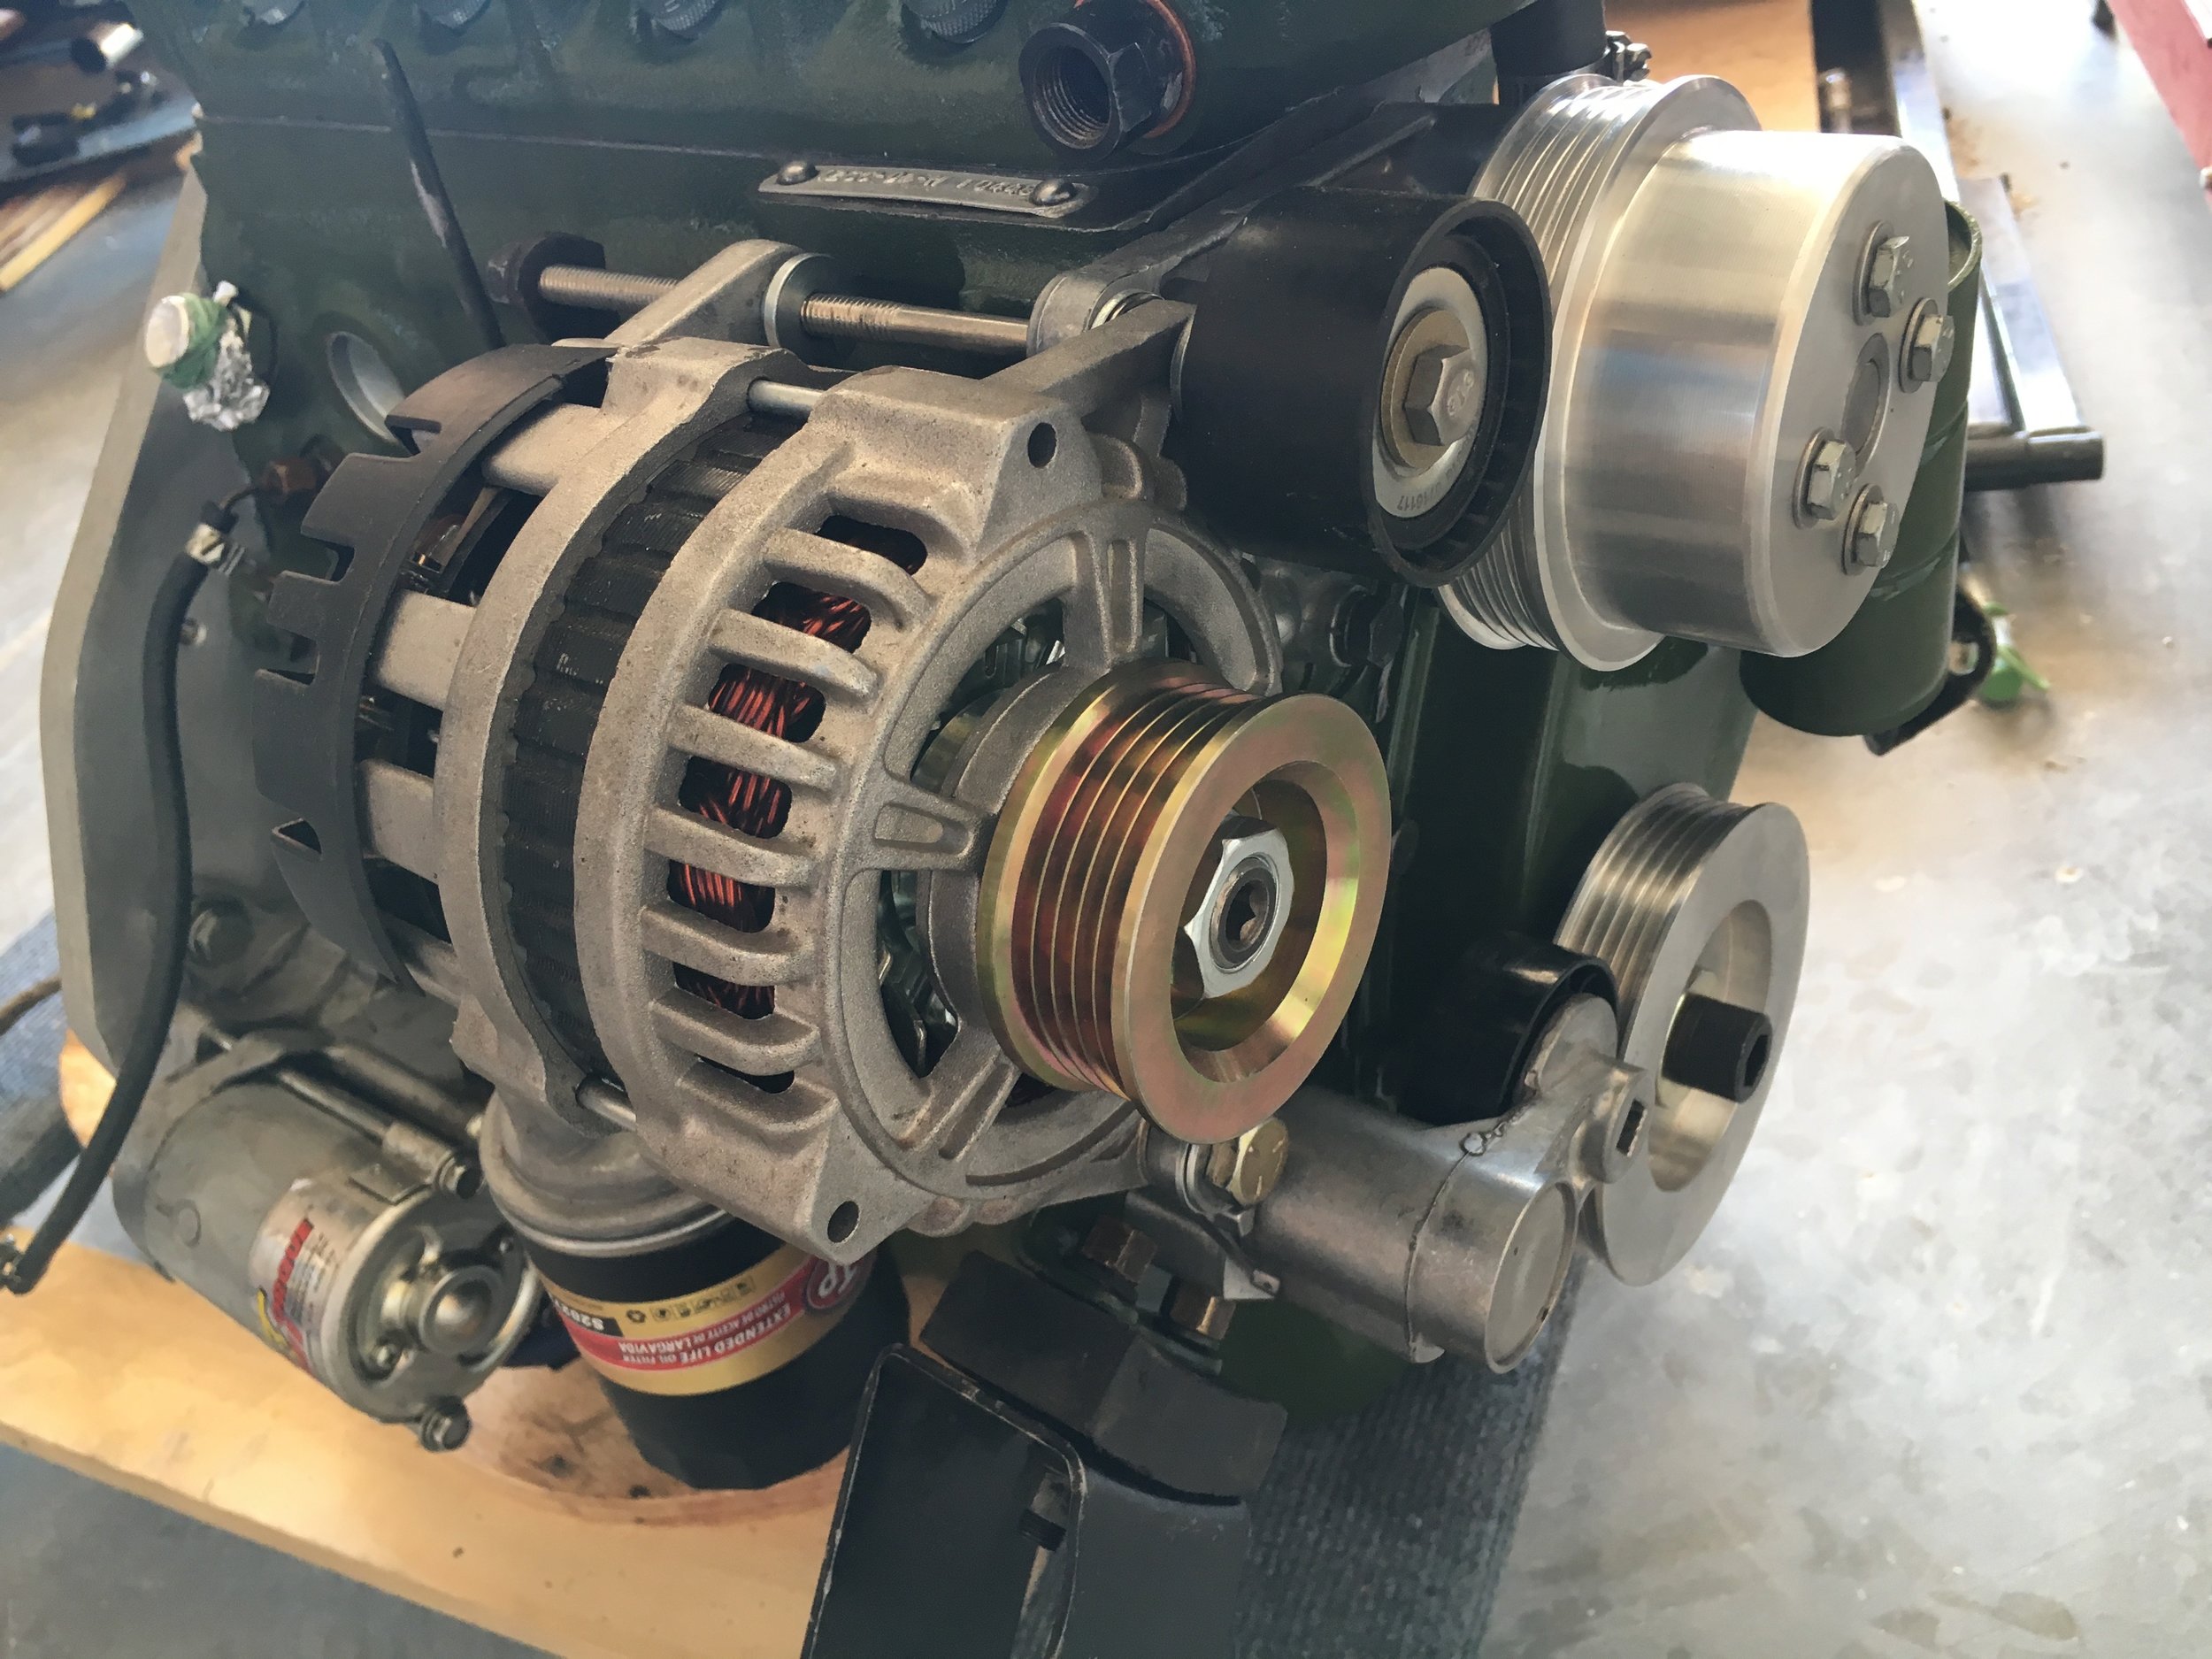
On naturally aspirated engines, these bespoke pulleys combine with an inexpensive serpentine belt, compact spring-loaded tensioner, and a simple aluminum mount that you can make in minutes using a hacksaw, file or sandpaper, drill, and a 3/8-24 tap and the free downloadable template pictured farther down on this page.
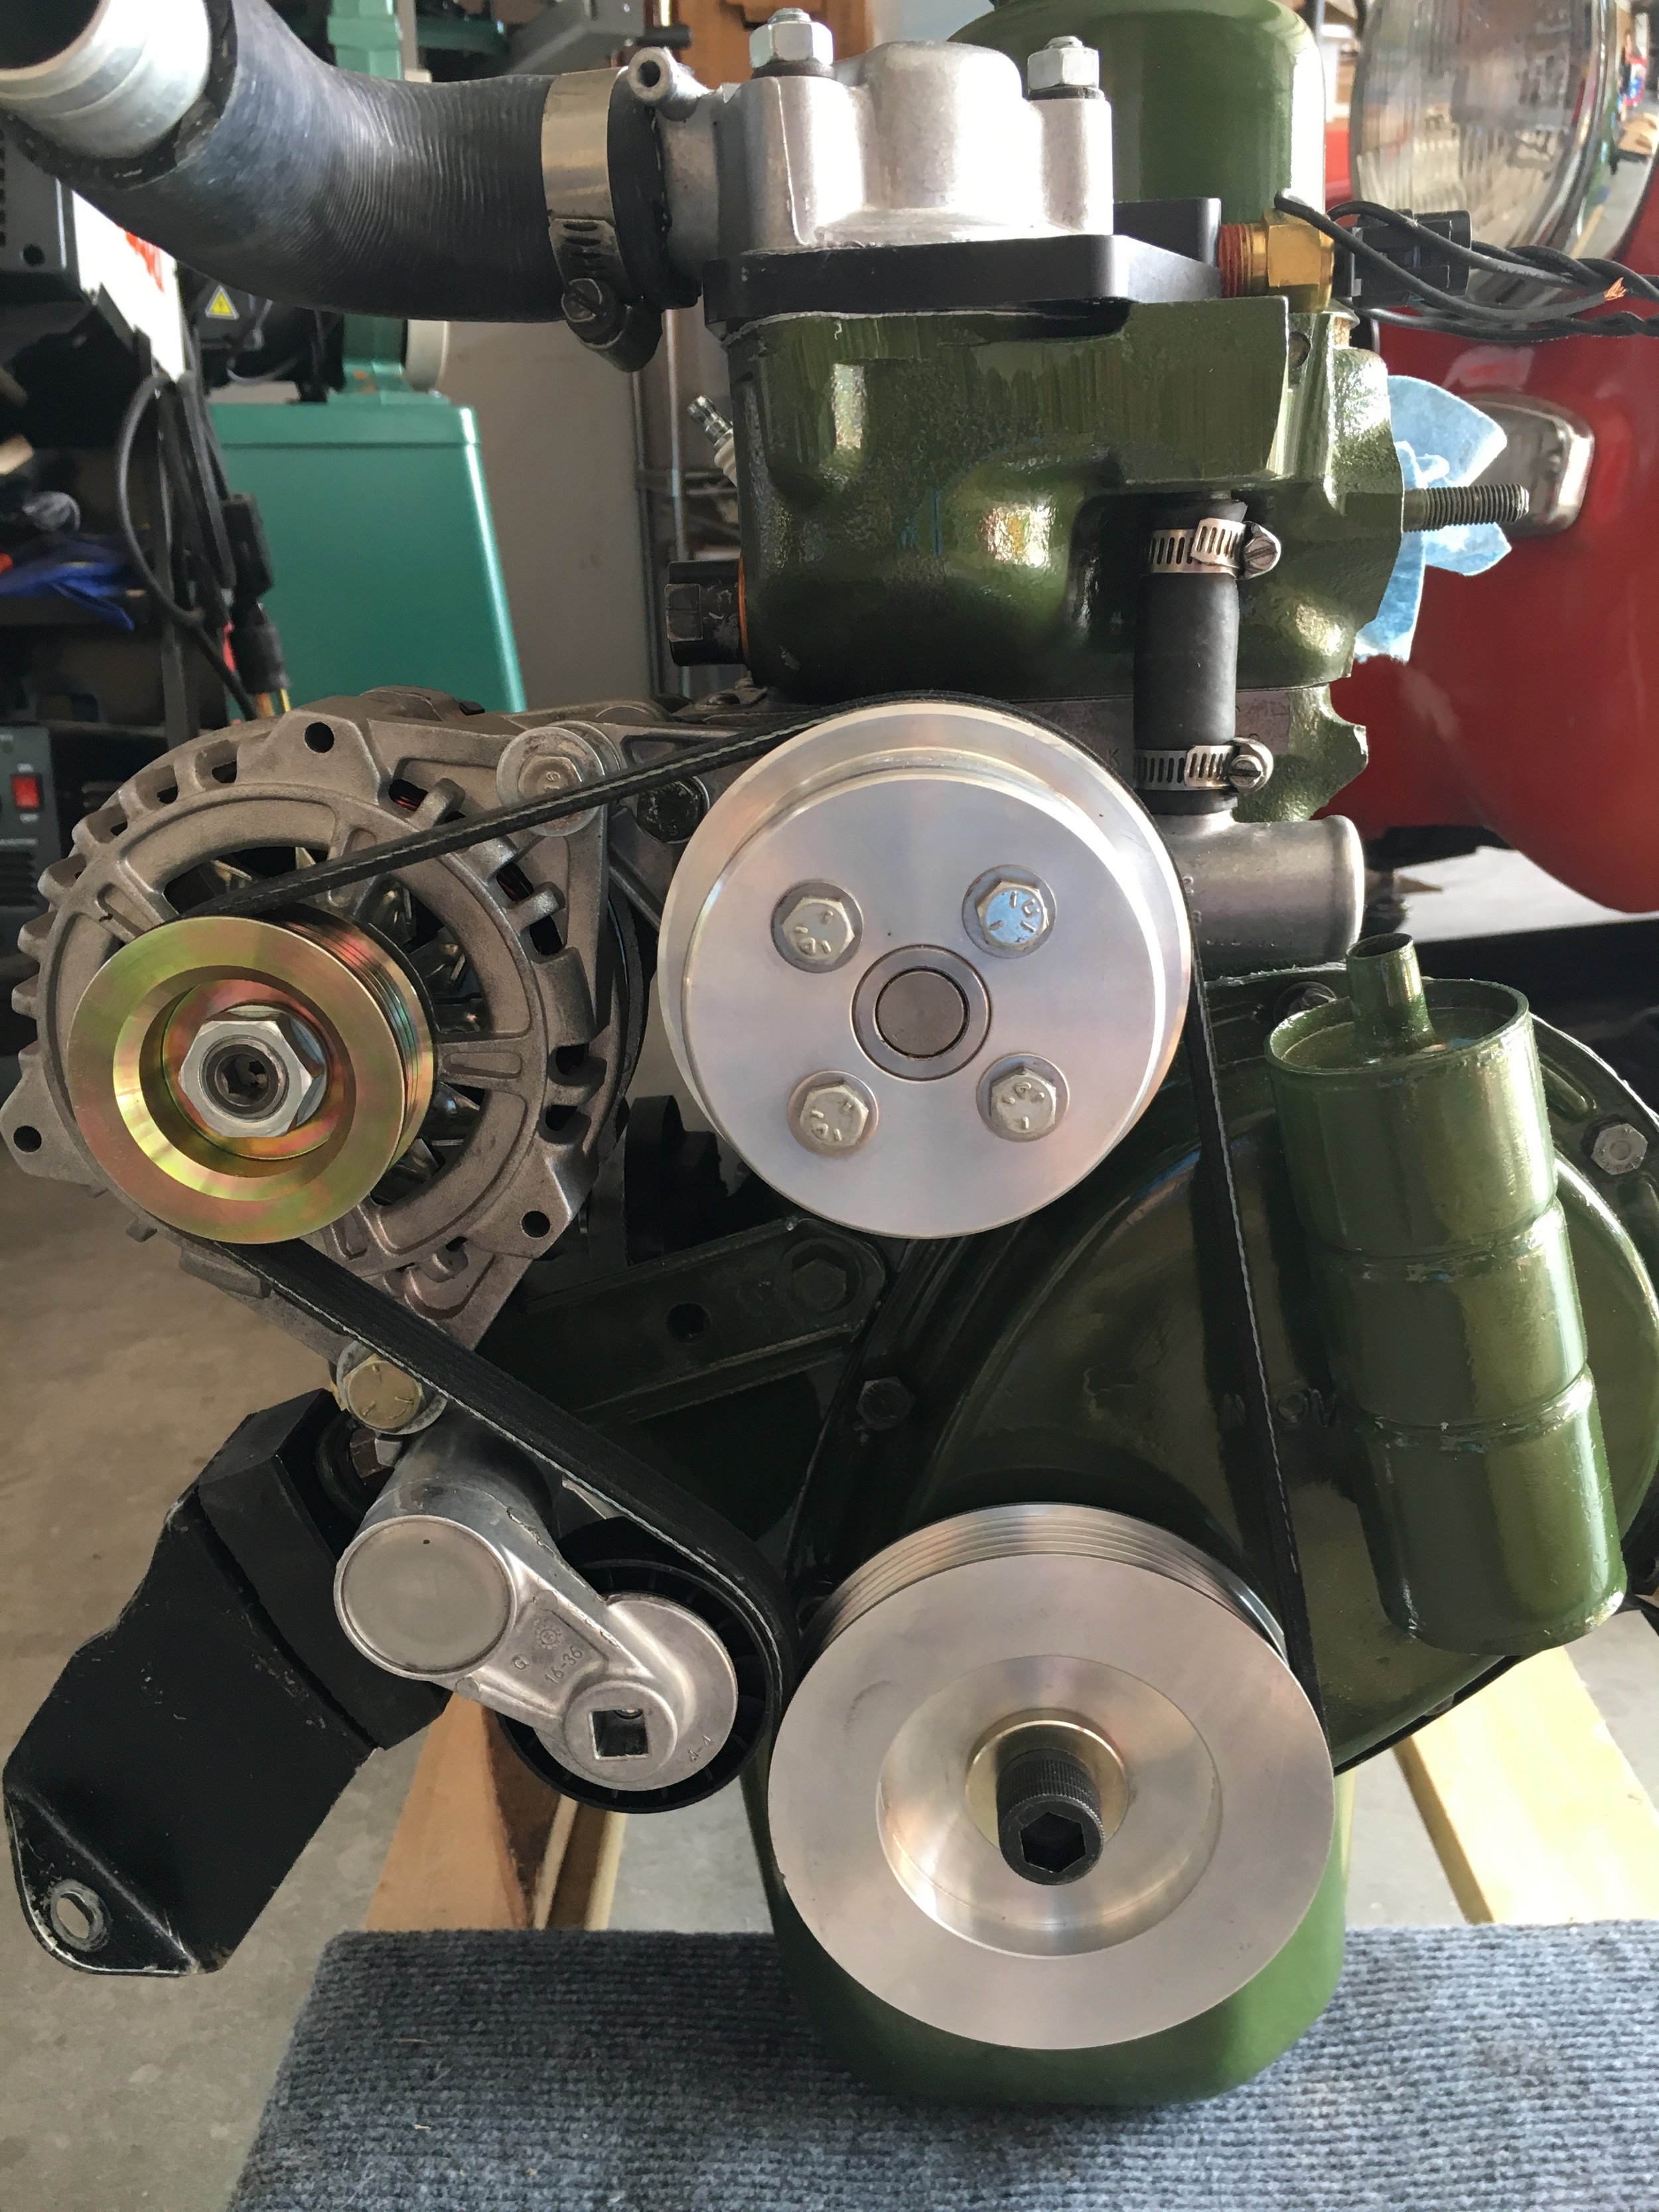
Here is the result, which can be accomplished with a morning’s work:

In addition to the pulleys, you will need the following:
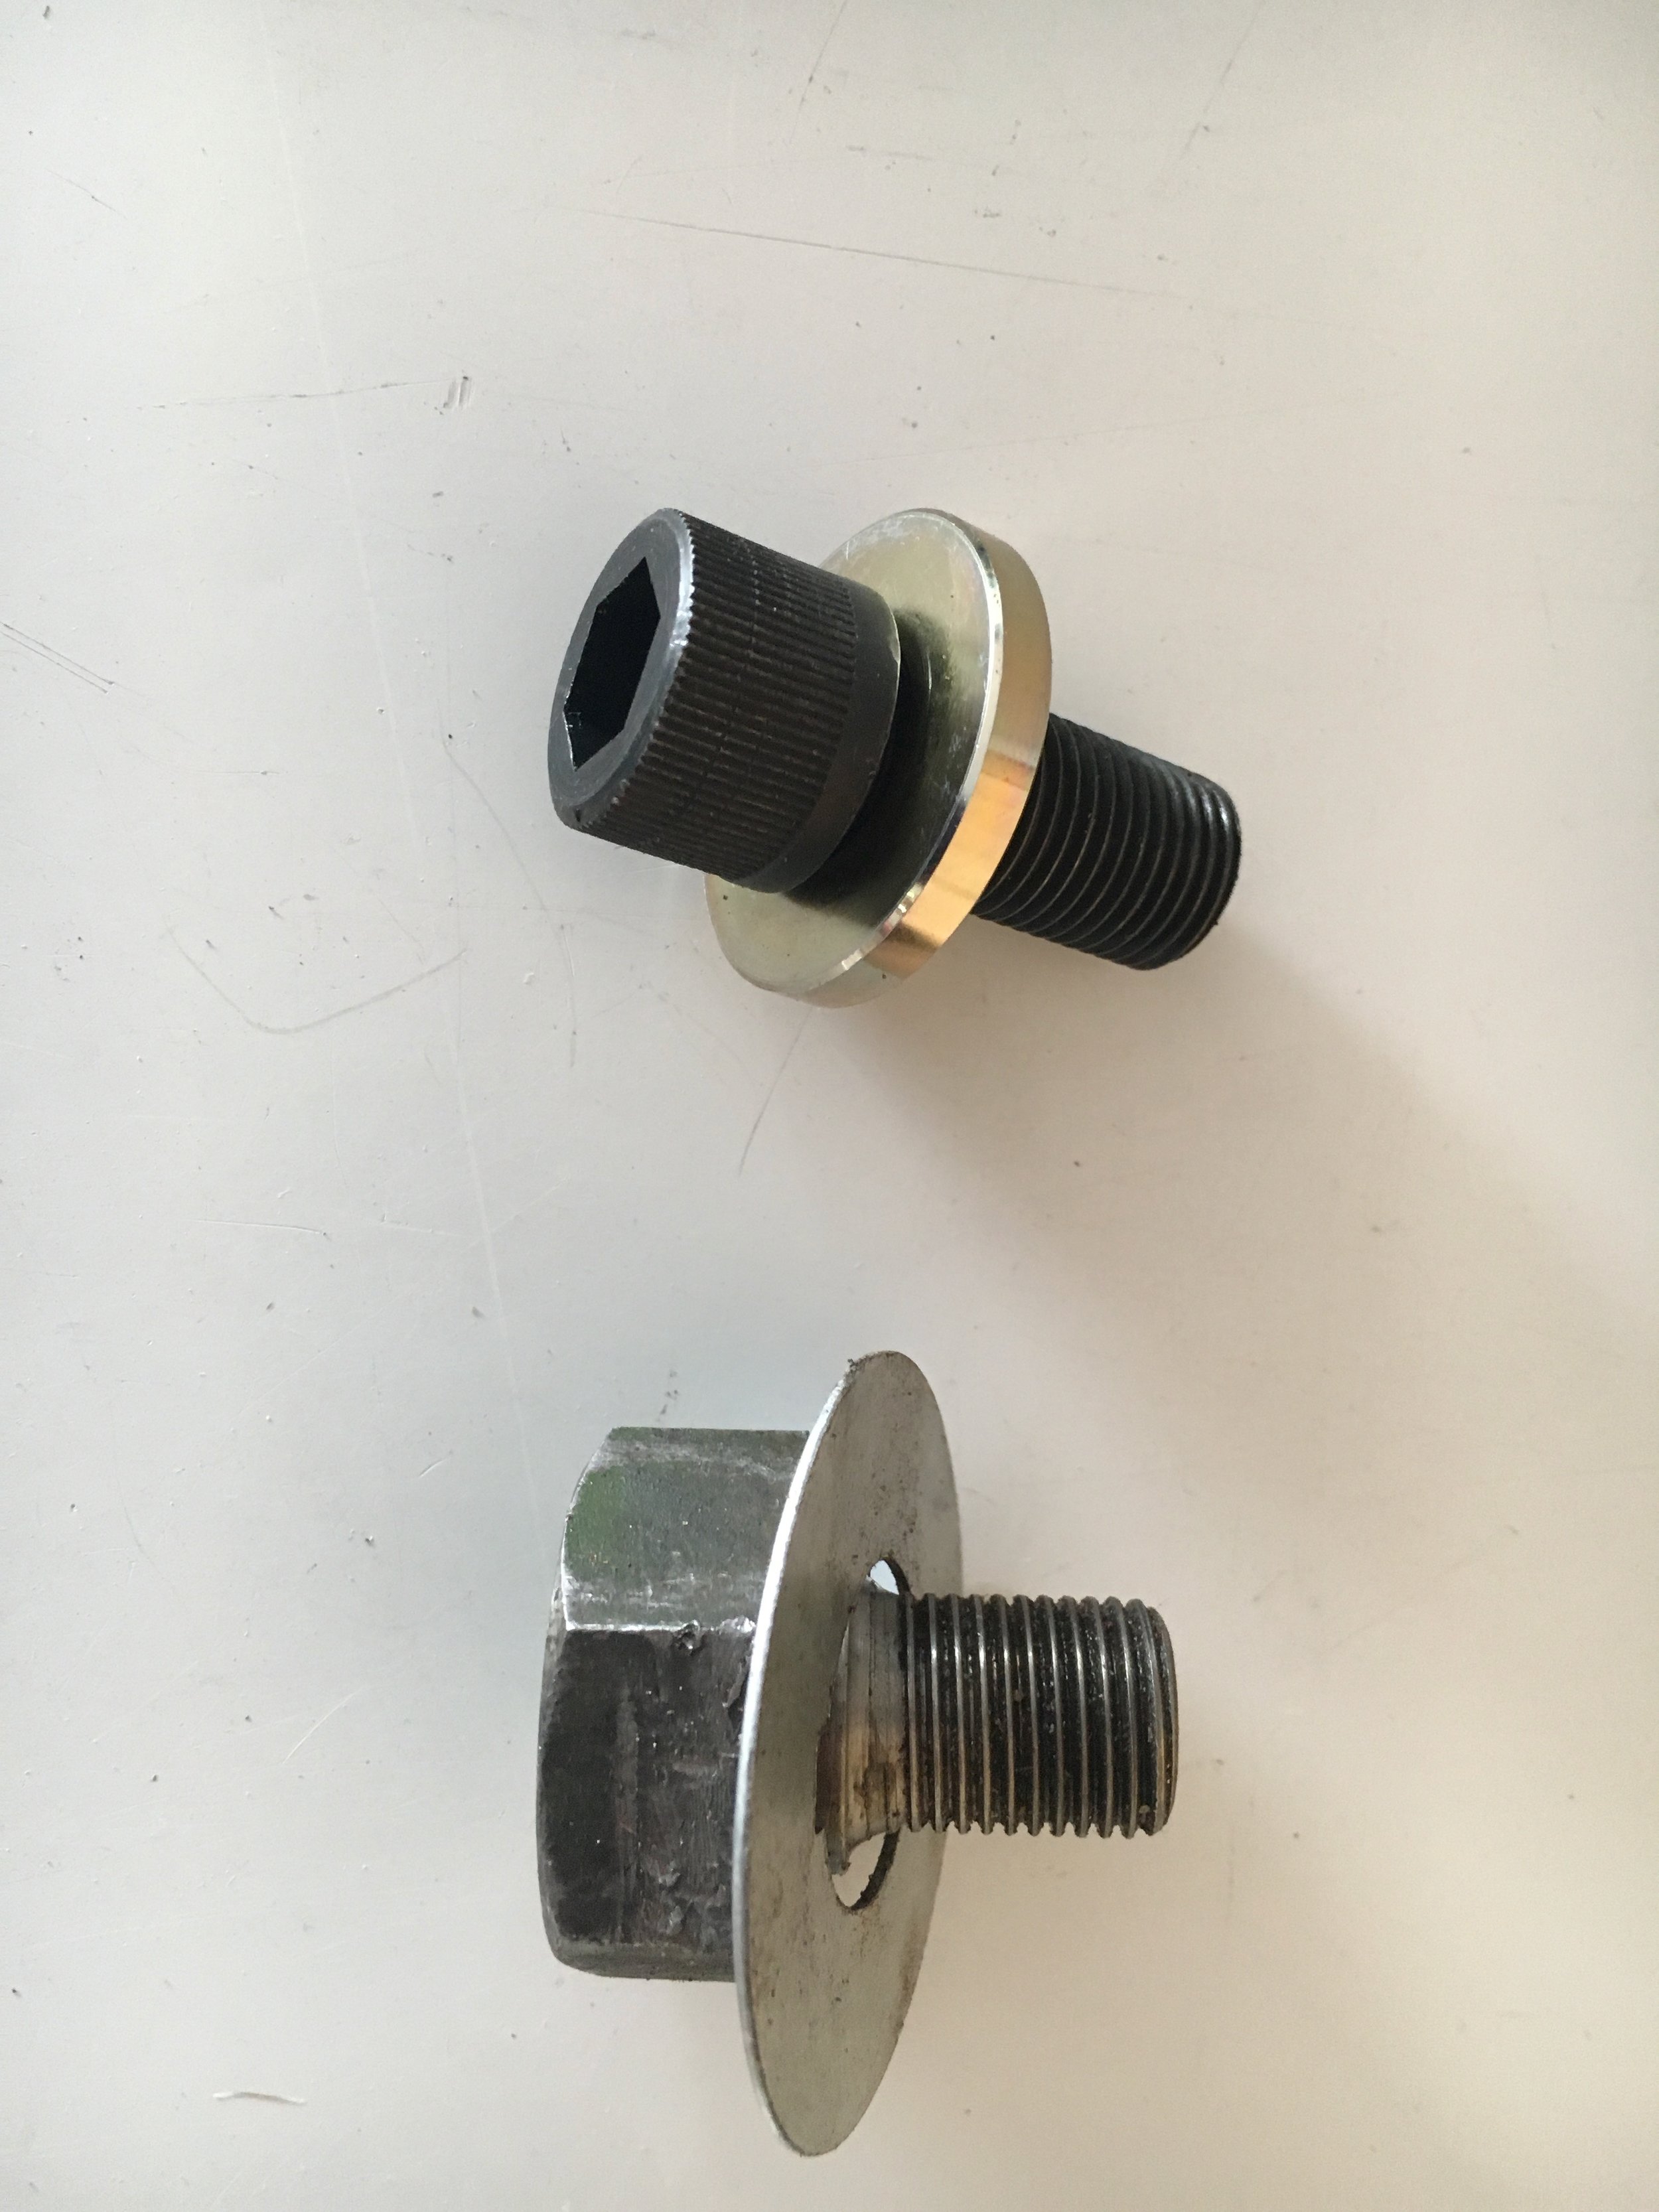
Moss Motors camshaft locking tab washer, part no. 460-550 (if using OEM crankshaft pulley bolt)
3/8-24 bolt x 1” long, and lock washer
5/16-24 bolt x 1-3/4” long, and lock washer
1” x 1-1/2” flat aluminum bar x 4” long (available at Online Metals and elsewhere, on the web and in many cities worldwide)
33.5~34” or 848~864mm long, 5-rib serpentine belt sold by numerous manufacturers such as Dayco part no. 5050335, NAPA 25050335, Gates/Carquest K050335, ACDelco 5K335, Contitech 5K847, Volvo 30777530, and which may be purchased online or at your local auto parts store. Prices range from $5 to $22.
Automatic spring tensioner used on dozens of General Motors vehicles, available online or at a ‘brick-and-motor’ store near you. Popular part numbers include ACDelco 12580196 , Continental 49276, Dayco 89258, Gates 38159, Autozone/Duralast 305258. Prices range from $25 to $37.
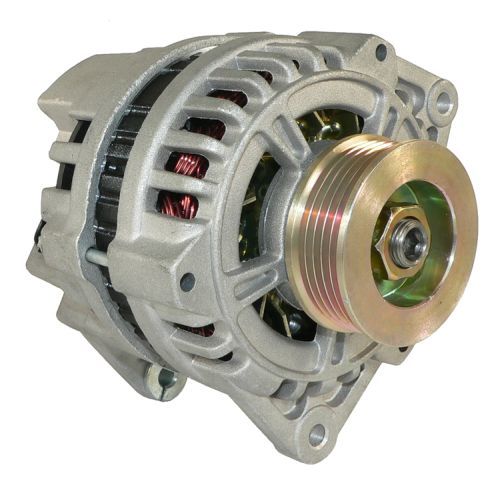
Alternator or generator fitted with a 5-rib serpentine belt pulley. We prefer the CS121D late model Saturn alternator pictured below, but you can use the popular, early model CS130-style Saturn alternator many have already fitted to their Spridgets. Note Saturn alternators typically come fitted with a 5-rib pulley out of the box.
You may also use a late model Spridget (Lucas or Bosch) alternator, or even an OEM generator as in the above photo, so long as your choice is fitted with a 5-rib serpentine belt pulley
**Optional is a heavy duty, longer fastener to replace the OEM crank pulley bolt as shown in the below slide show. Click here for Spridget Mania’s offering.
The CS121D can be had for $109 brand new, including free shipping, from Rock Auto. Wiring is straightforward, and is essentially the same as with the older, CS130-style Saturn alternator.
installation instructions
Installation is simple, and the only fabrication is making a simple mount for the spring tensioner from a piece of 1”x1-1/2” aluminum bar 4” in length.
Also, depending on the alternator you choose, you may need to modify the mounting ear on the water pump—which can be done without removing it from the engine or draining the coolant.
Step 1 - Preparing for installation.
Remove the old fan belt, steel tensioner strap, and the bolt that passes through the front engine plate’s motor mount extension.
Next, remove the original alternator or generator pulley and replace with a 5-rib serpentine belt pulley. The fastest, easiest method is an air impact driver. Many auto parts stores will do this for you free of charge.
If you are buying a new CS121D or CS 130-style alternator, it will come with a 5-rib pulley already installed. You will have to ‘clock’ the alternator, which takes 5~10 minutes and does not require dismantling the unit. (We will be adding instructions at this portion of this page to show you how.)
Finally, remove the fan and original water pump and crankshaft pulleys. If you are running an original ‘ribcase’ 4-speed transmission, removing the crankshaft pulley may be possible with the engine still in the car. Check your shop manual, but to tilt up the engine slightly you will likely need to:
disconnect the battery ground strap and any engine-to-body straps;
drain the coolant;
disconnect or loosen the radiator and heater hoses sufficiently to allow engine movement;
disconnect the fuel feed line (use caution with any spilled fuel);
disconnect the exhaust down-pipe from the manifold and any support straps from the bodywork or bellhousing;
unbolt the motor mounts from the front engine plate and frame members;
loosen the two long bolts that extend upward through the rear crossmember and secure the transmission mount;
put a block under the oil pan to cushion it from your hydraulic jack’s metal lifting disc.
When jacking, keep a close eye on the clutch slave cylinder’s hose to avoid rupturing it. Similarly, watch the temperature sender and oil pressure sender connections, too.
Step 2 - Prepare Crankshaft Pulley
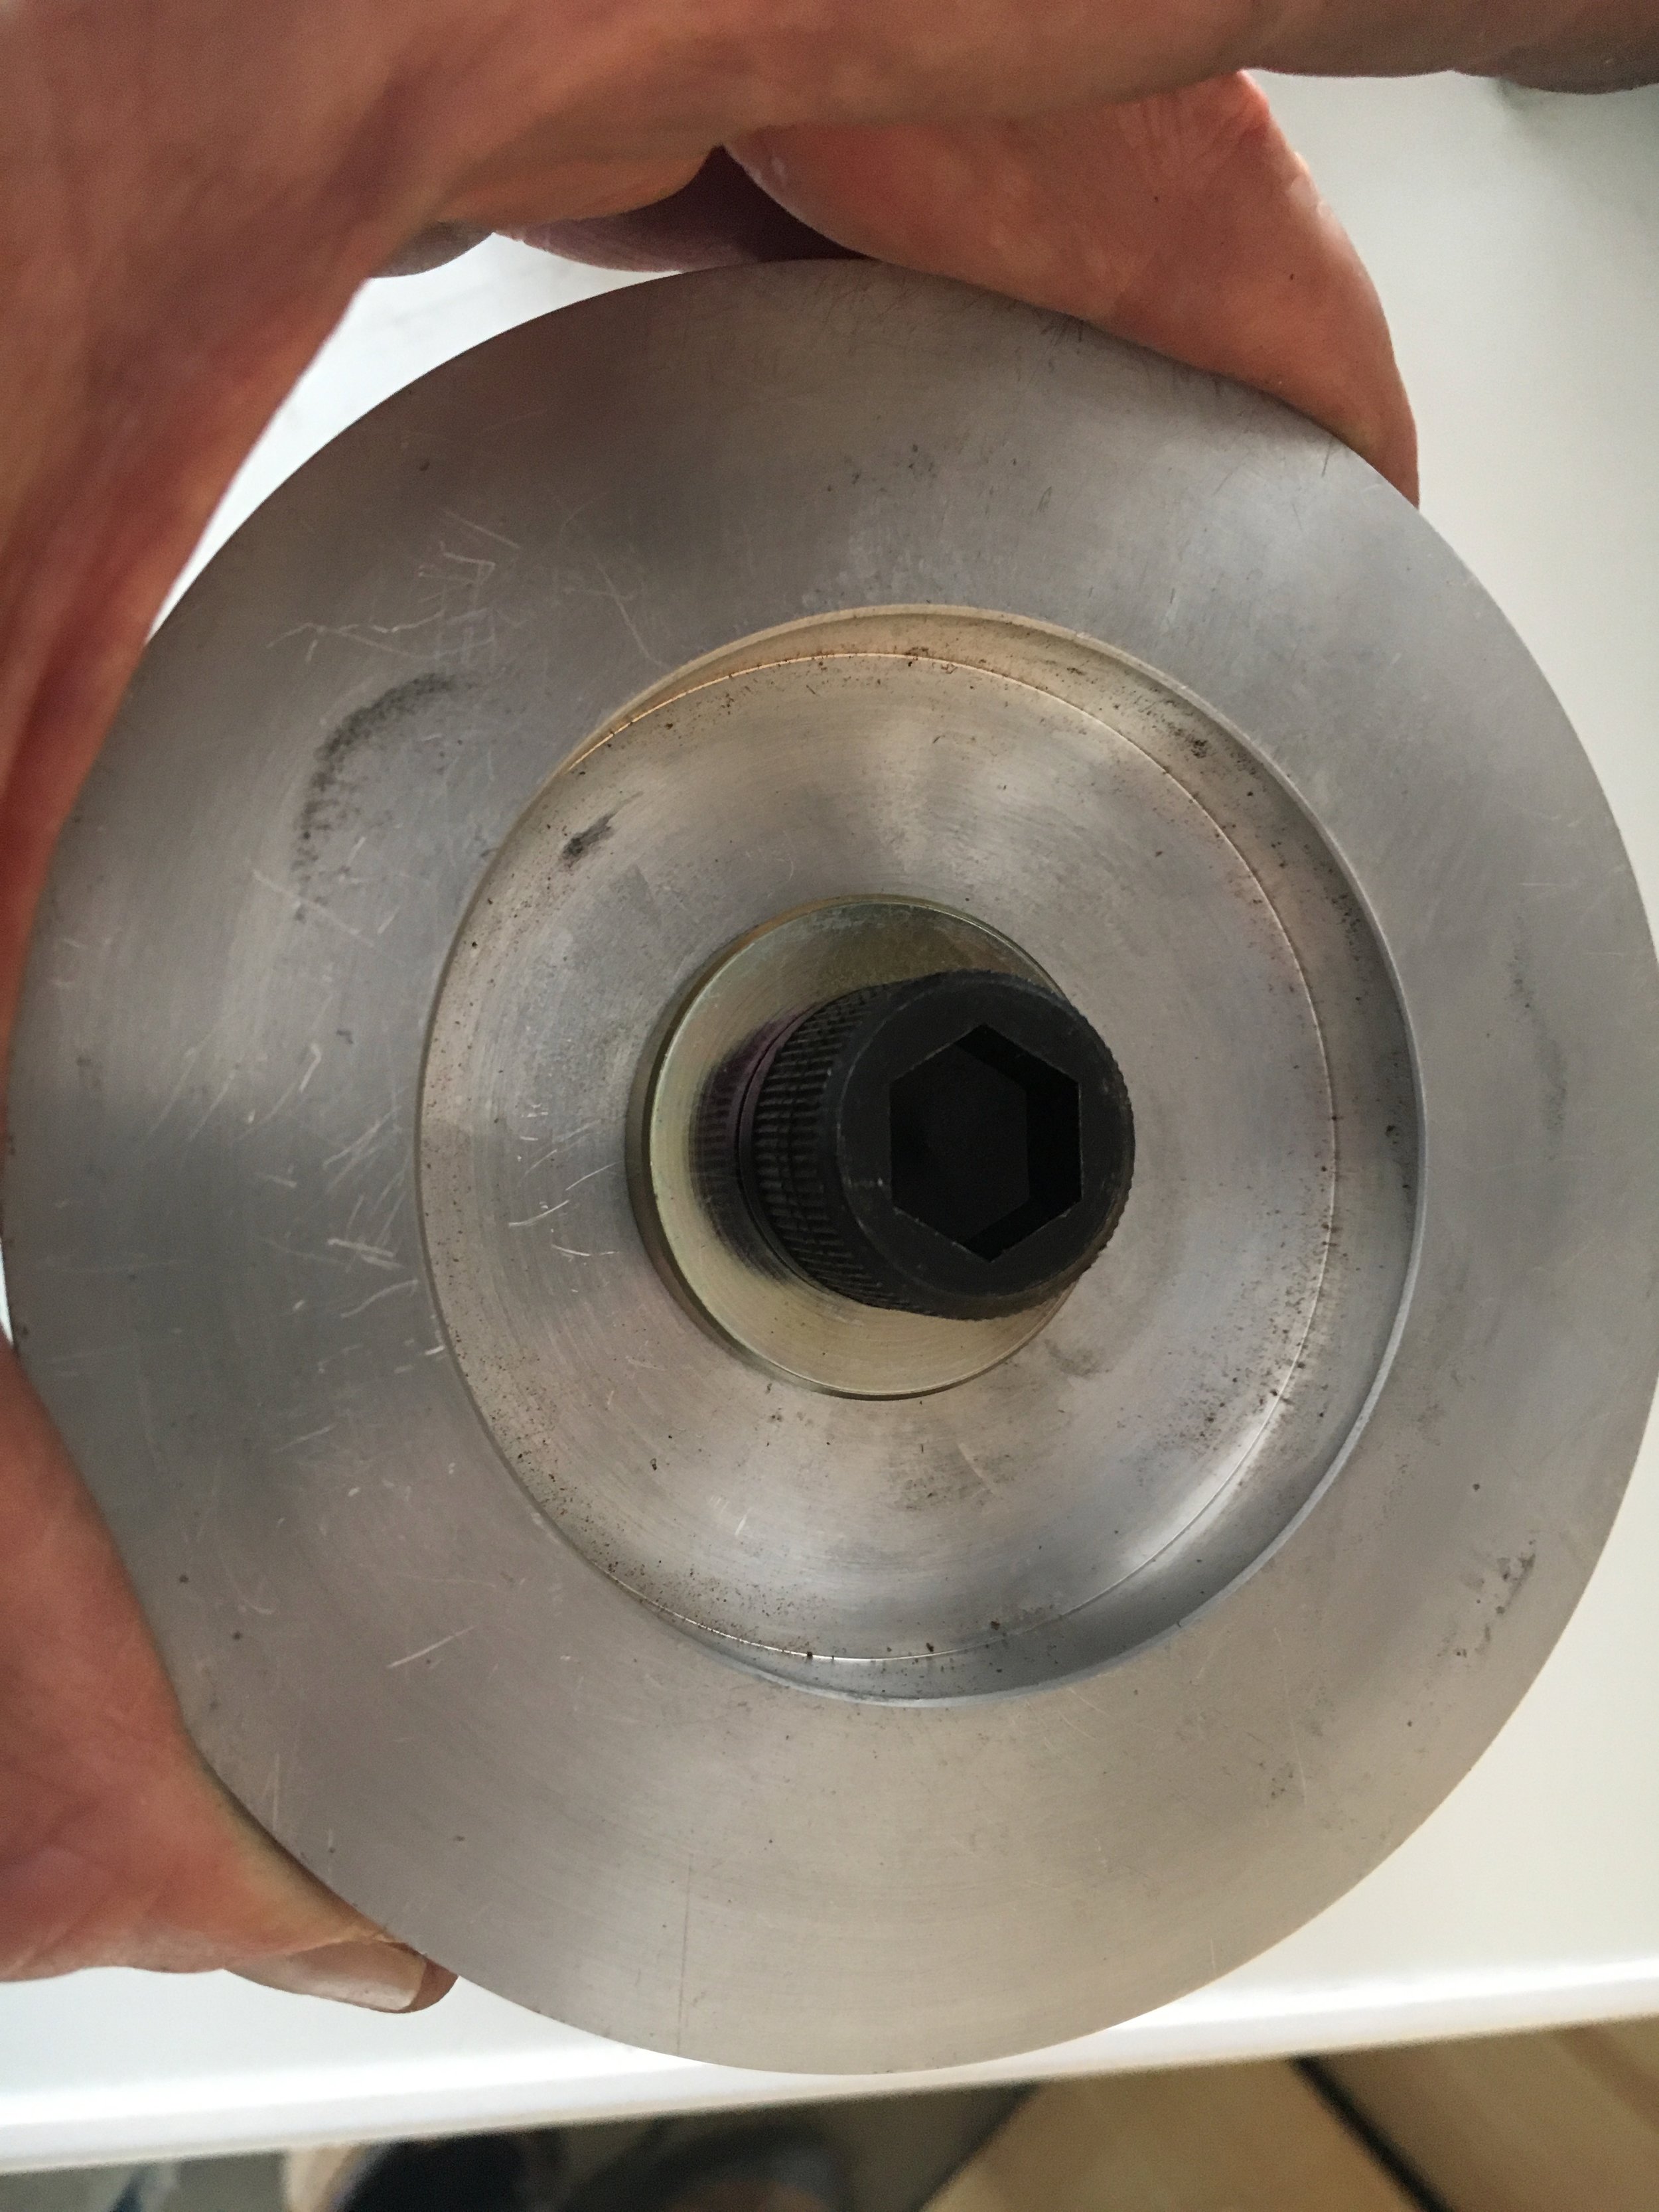
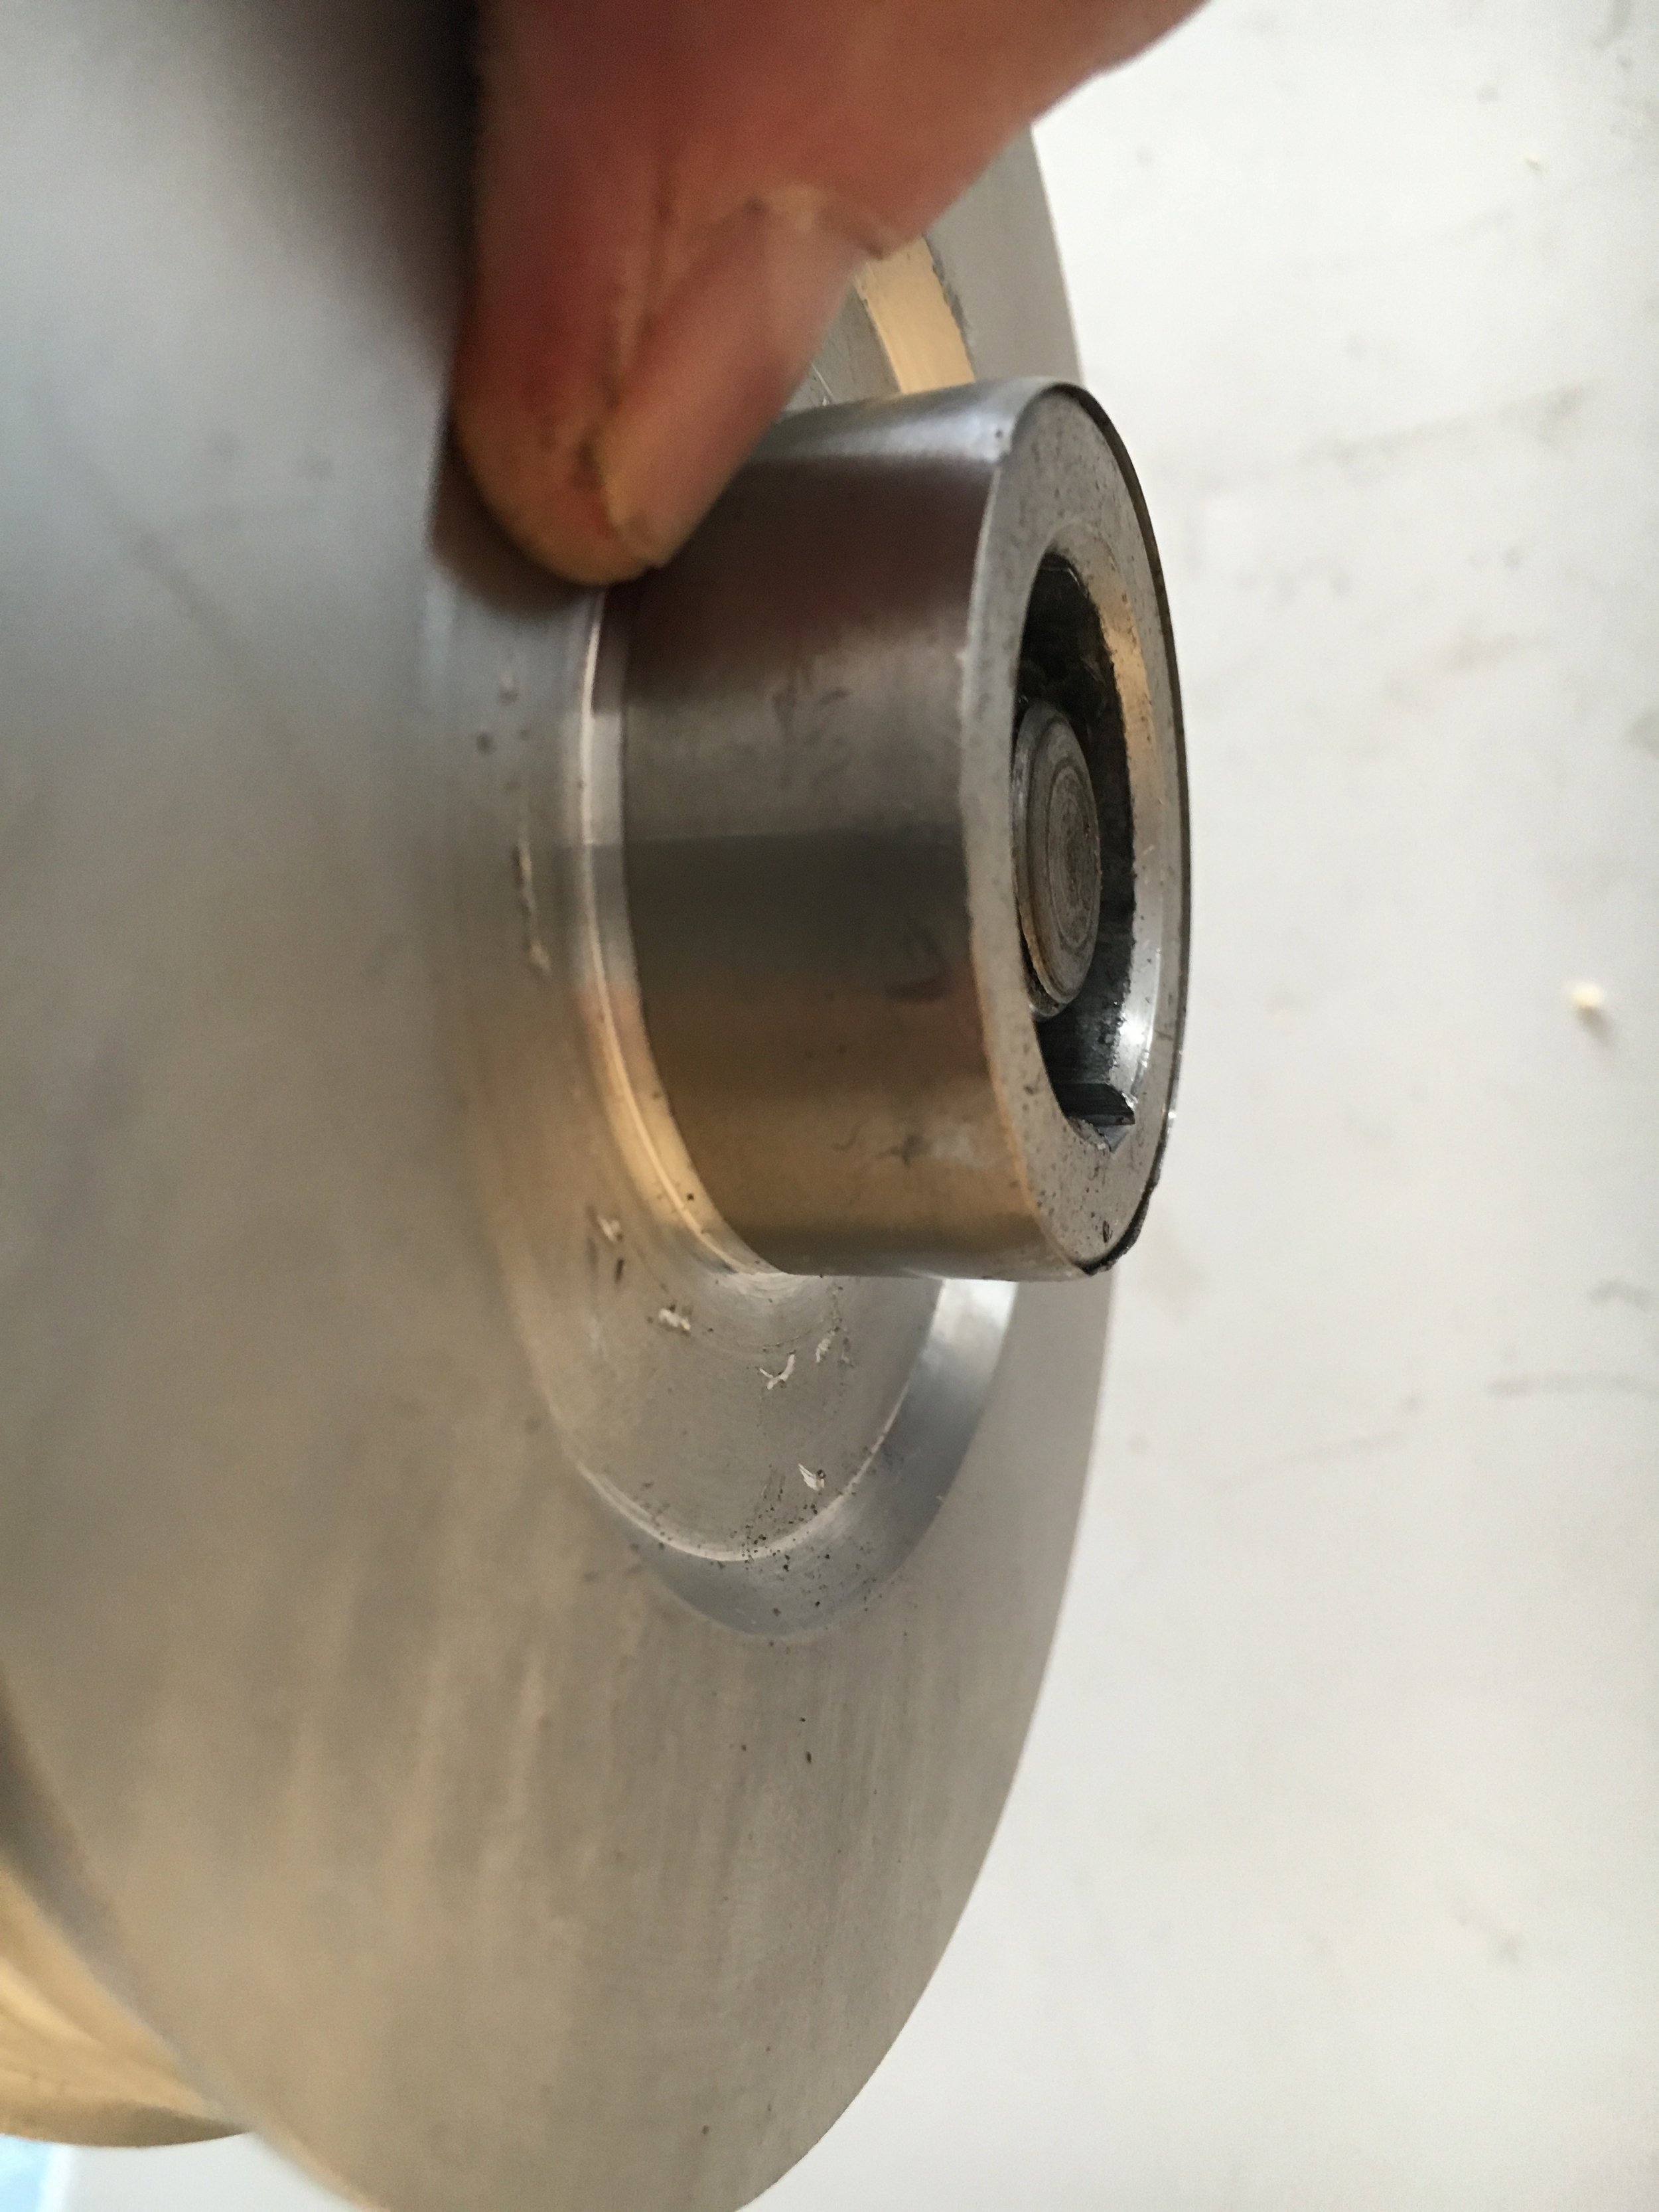
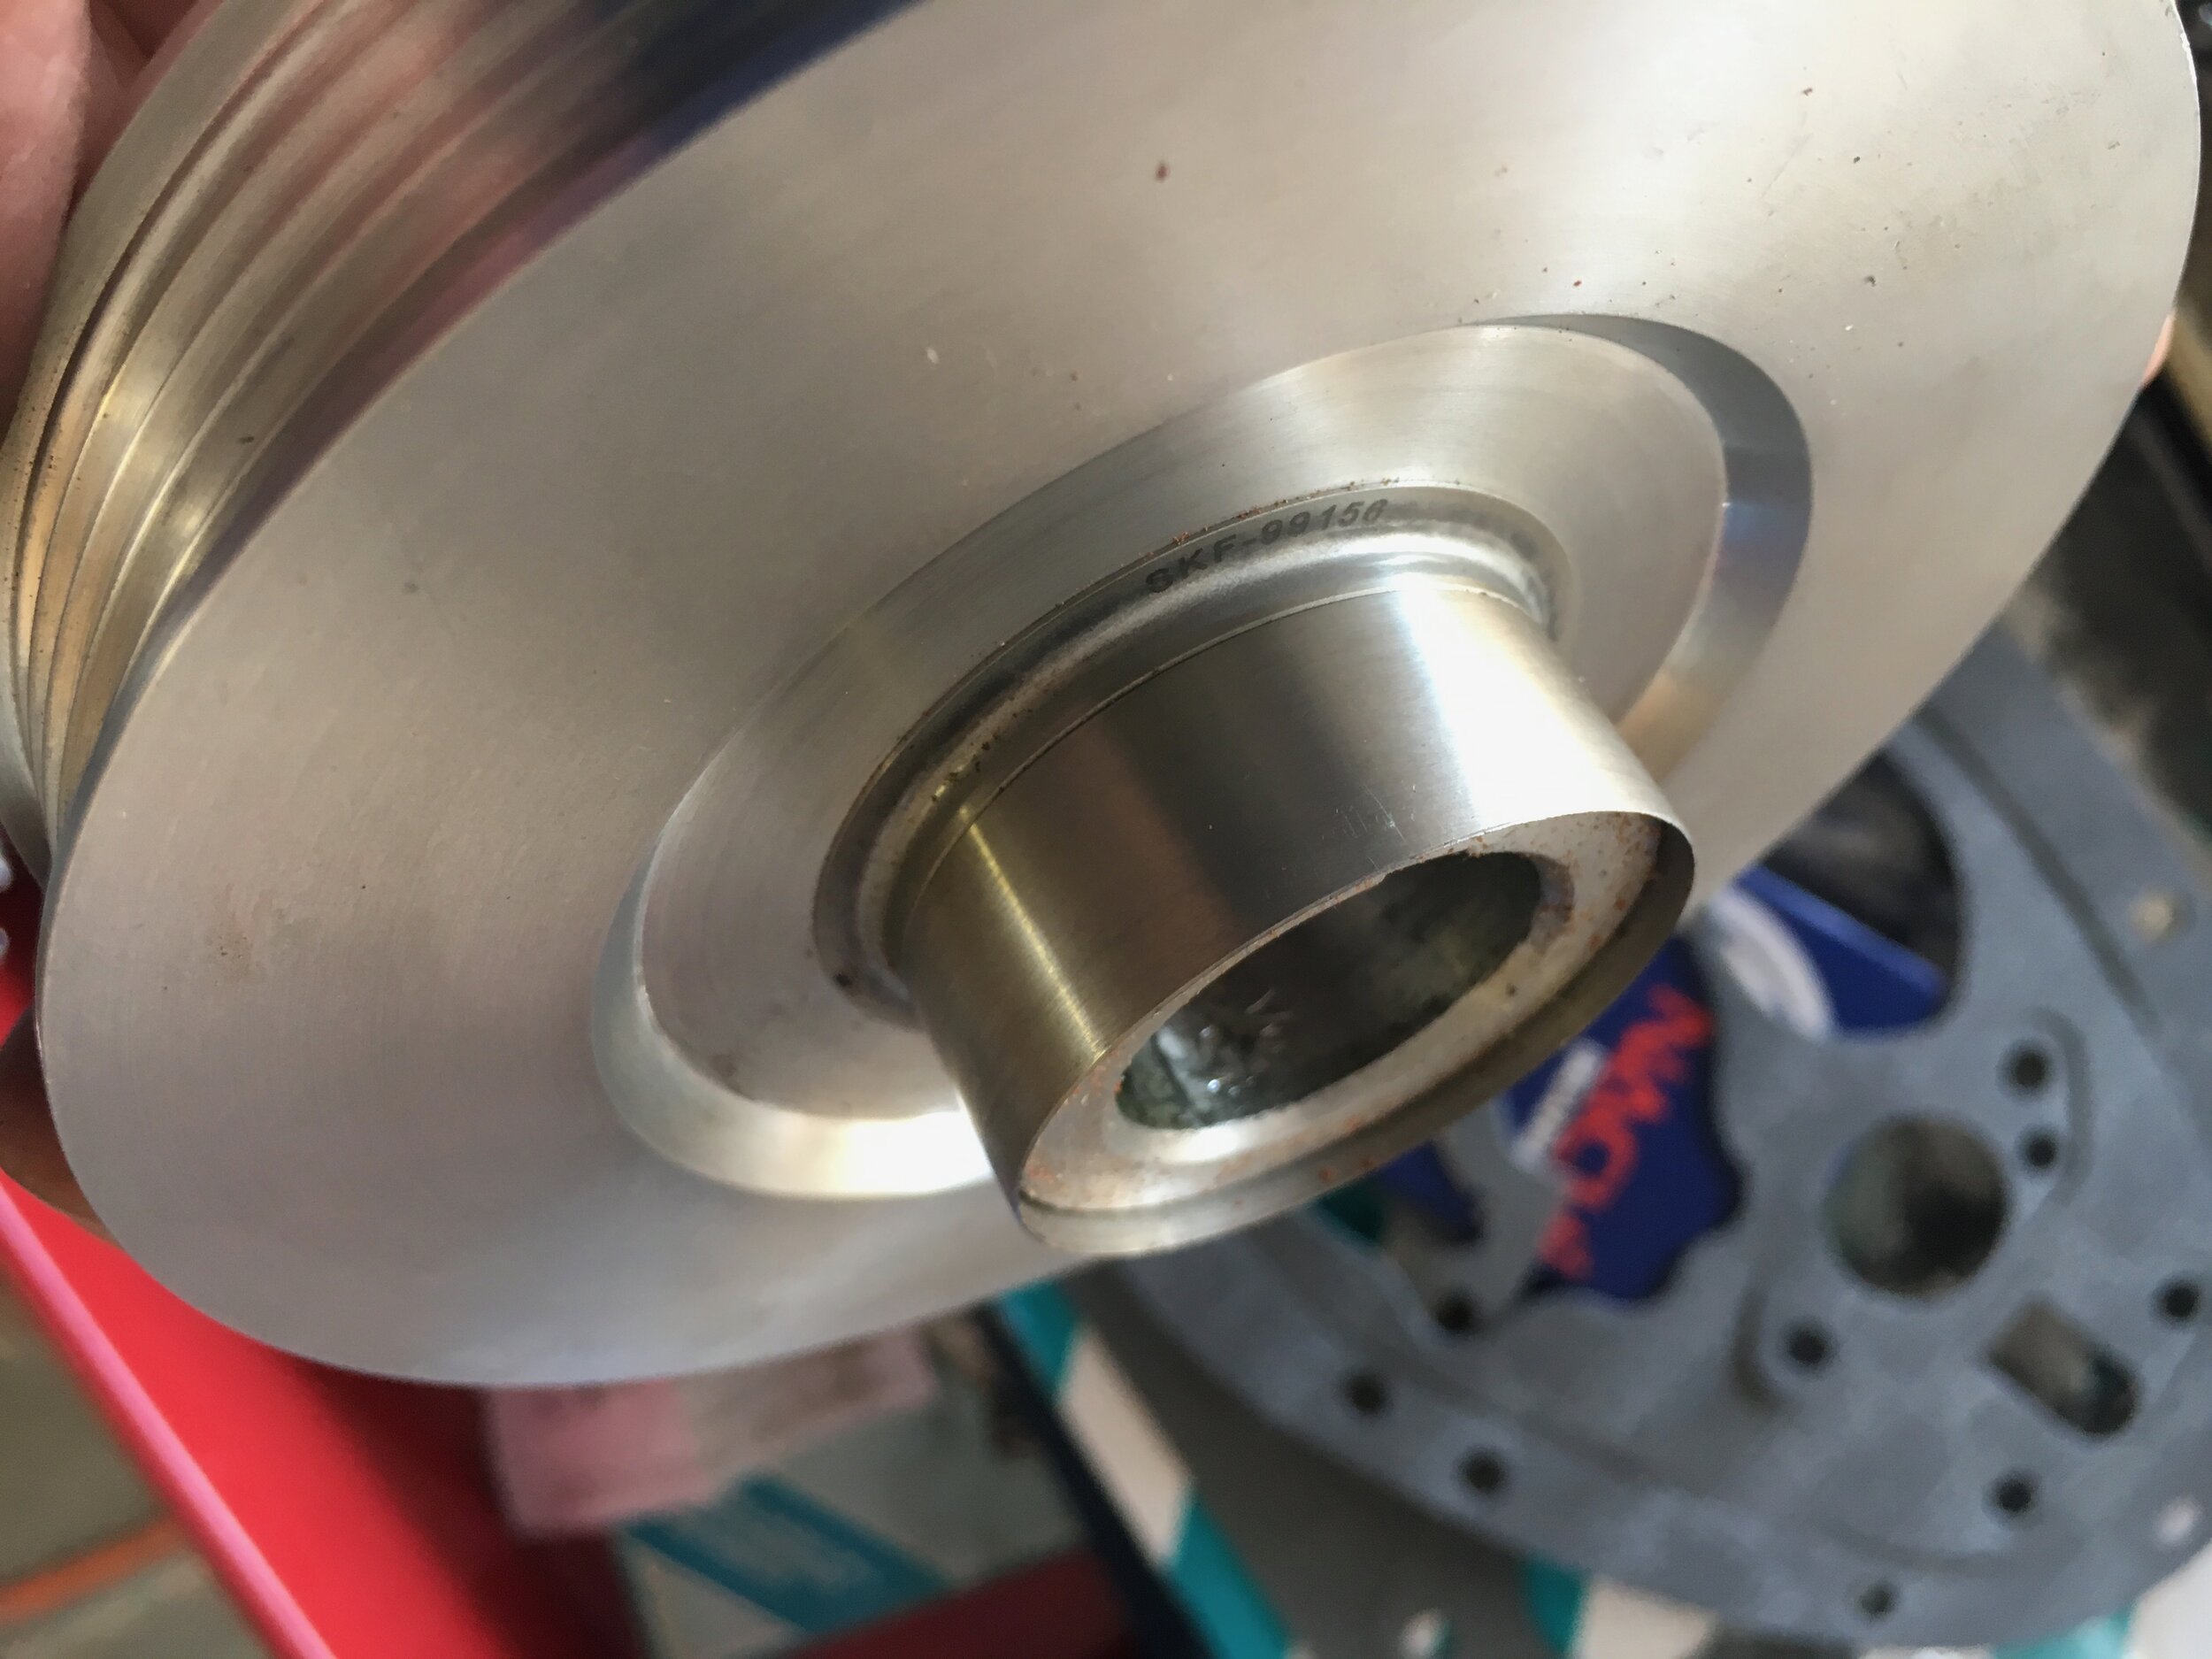
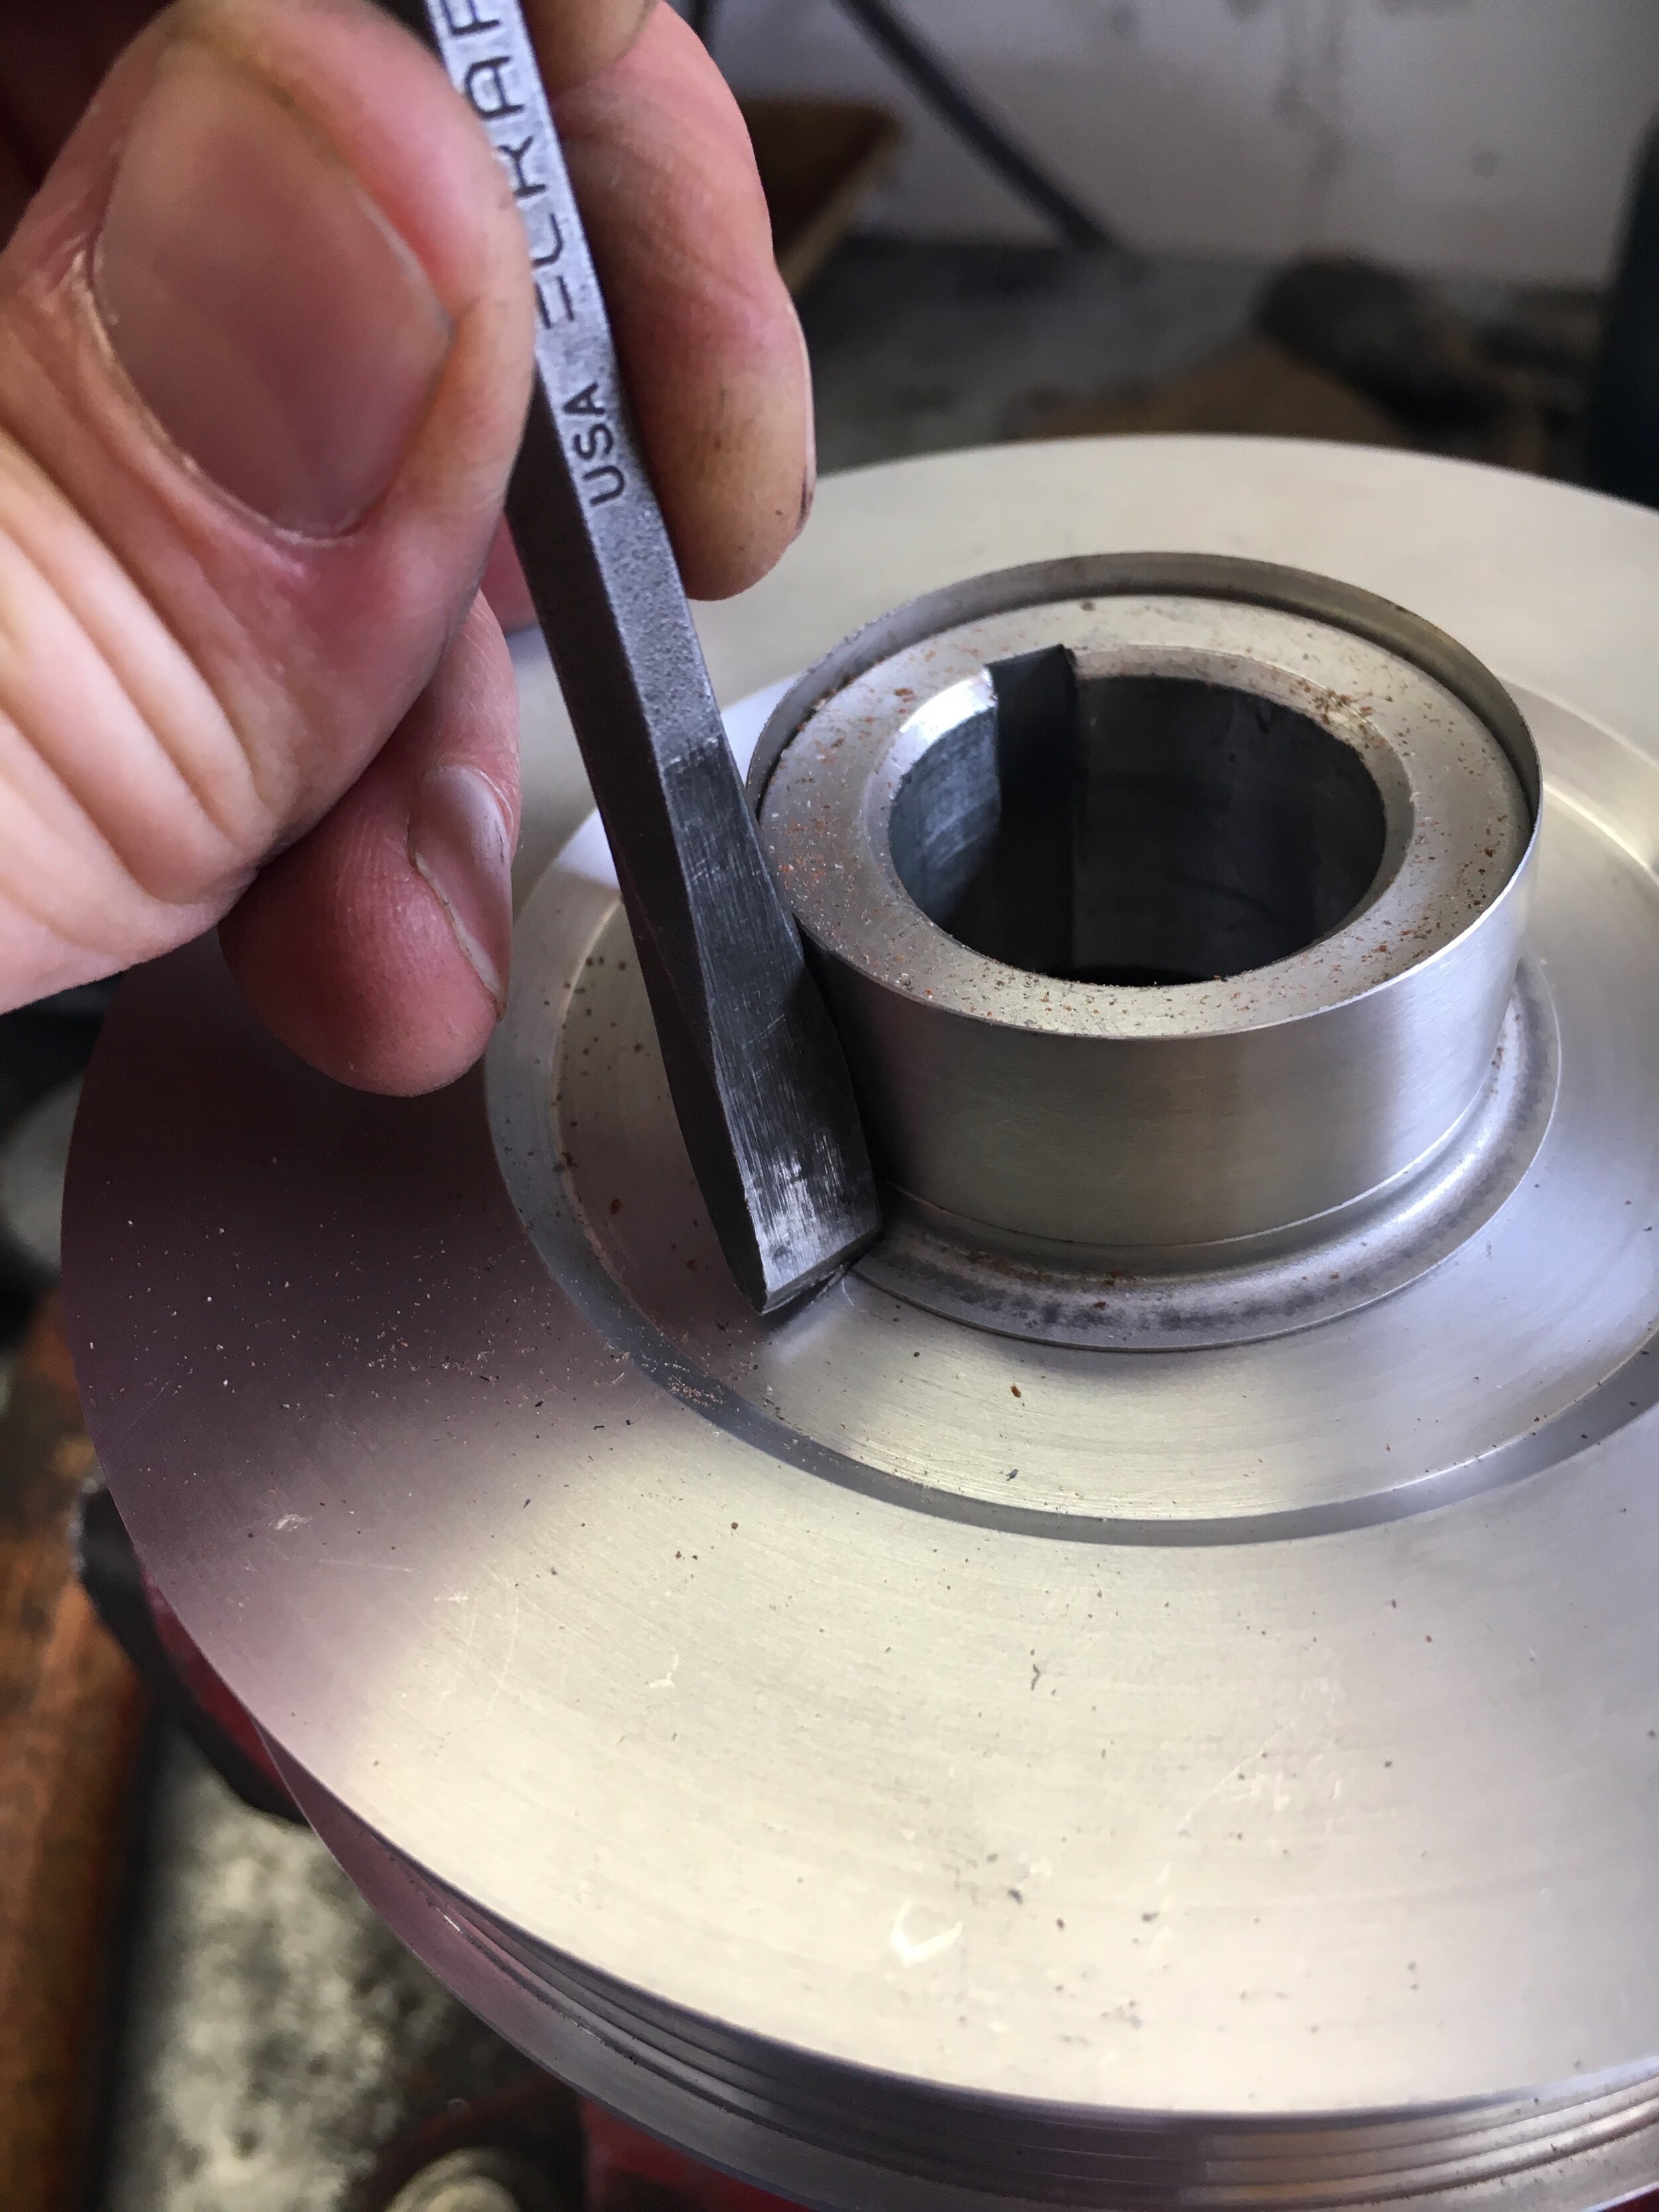
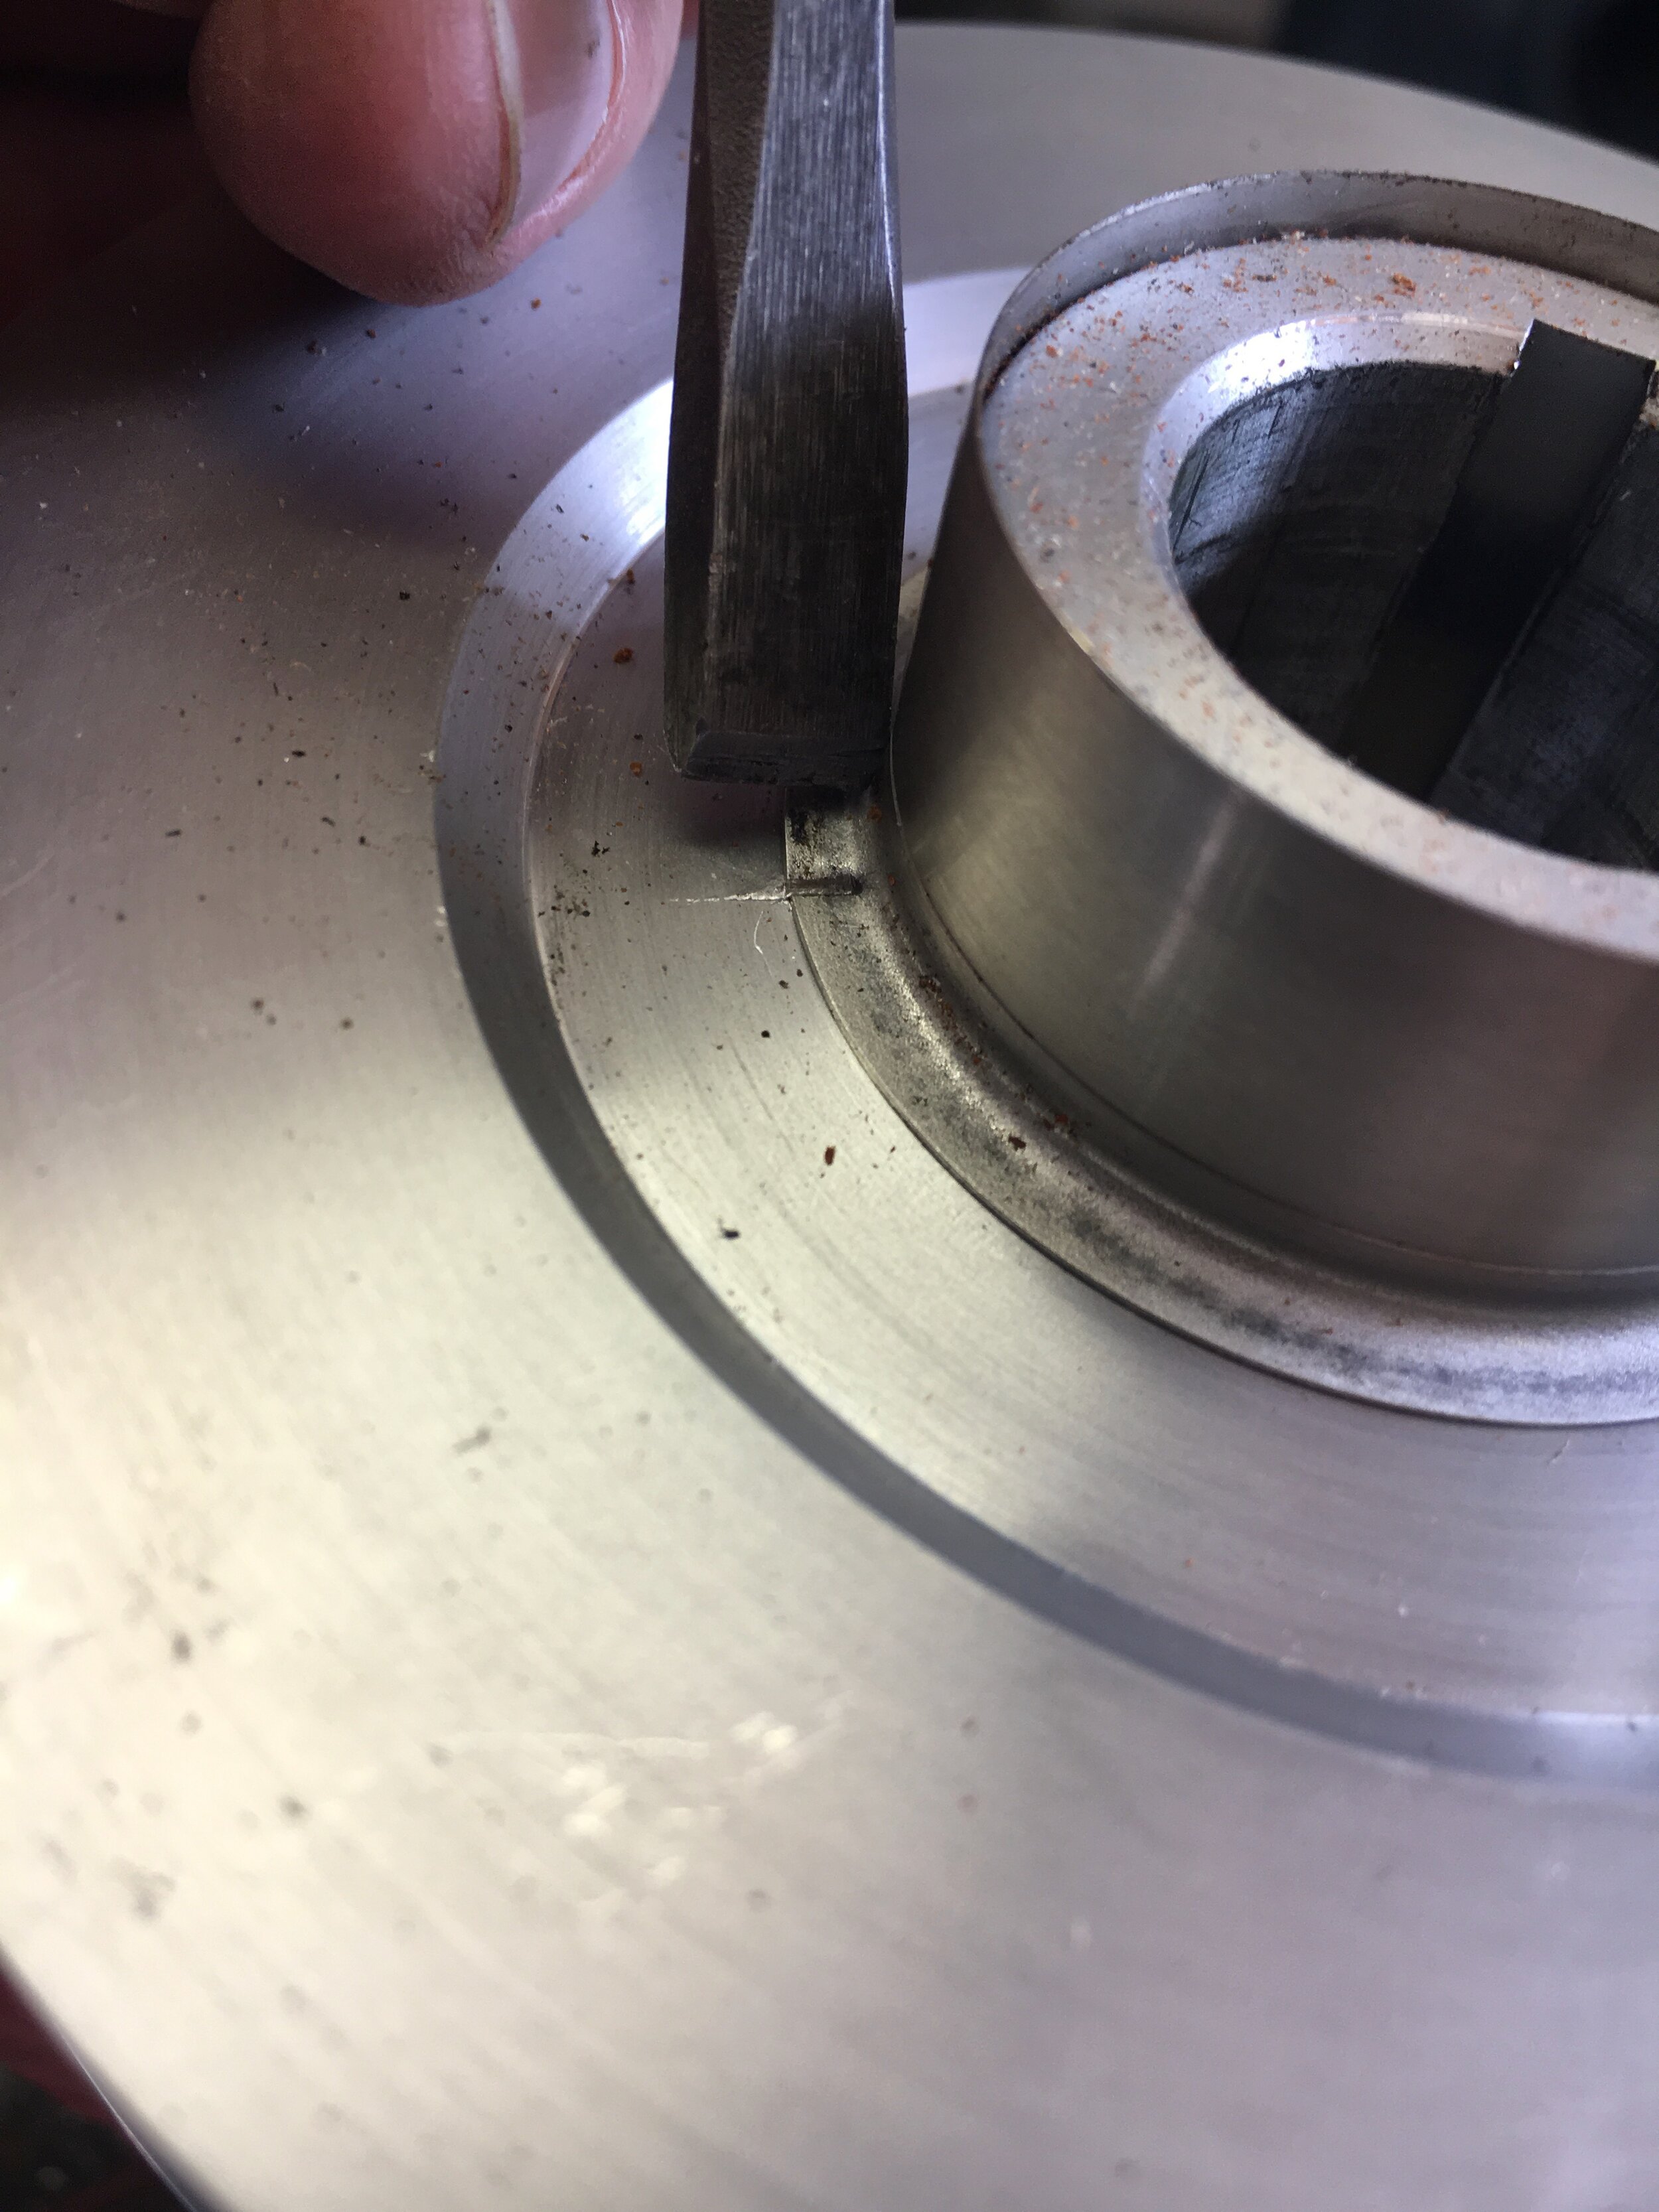
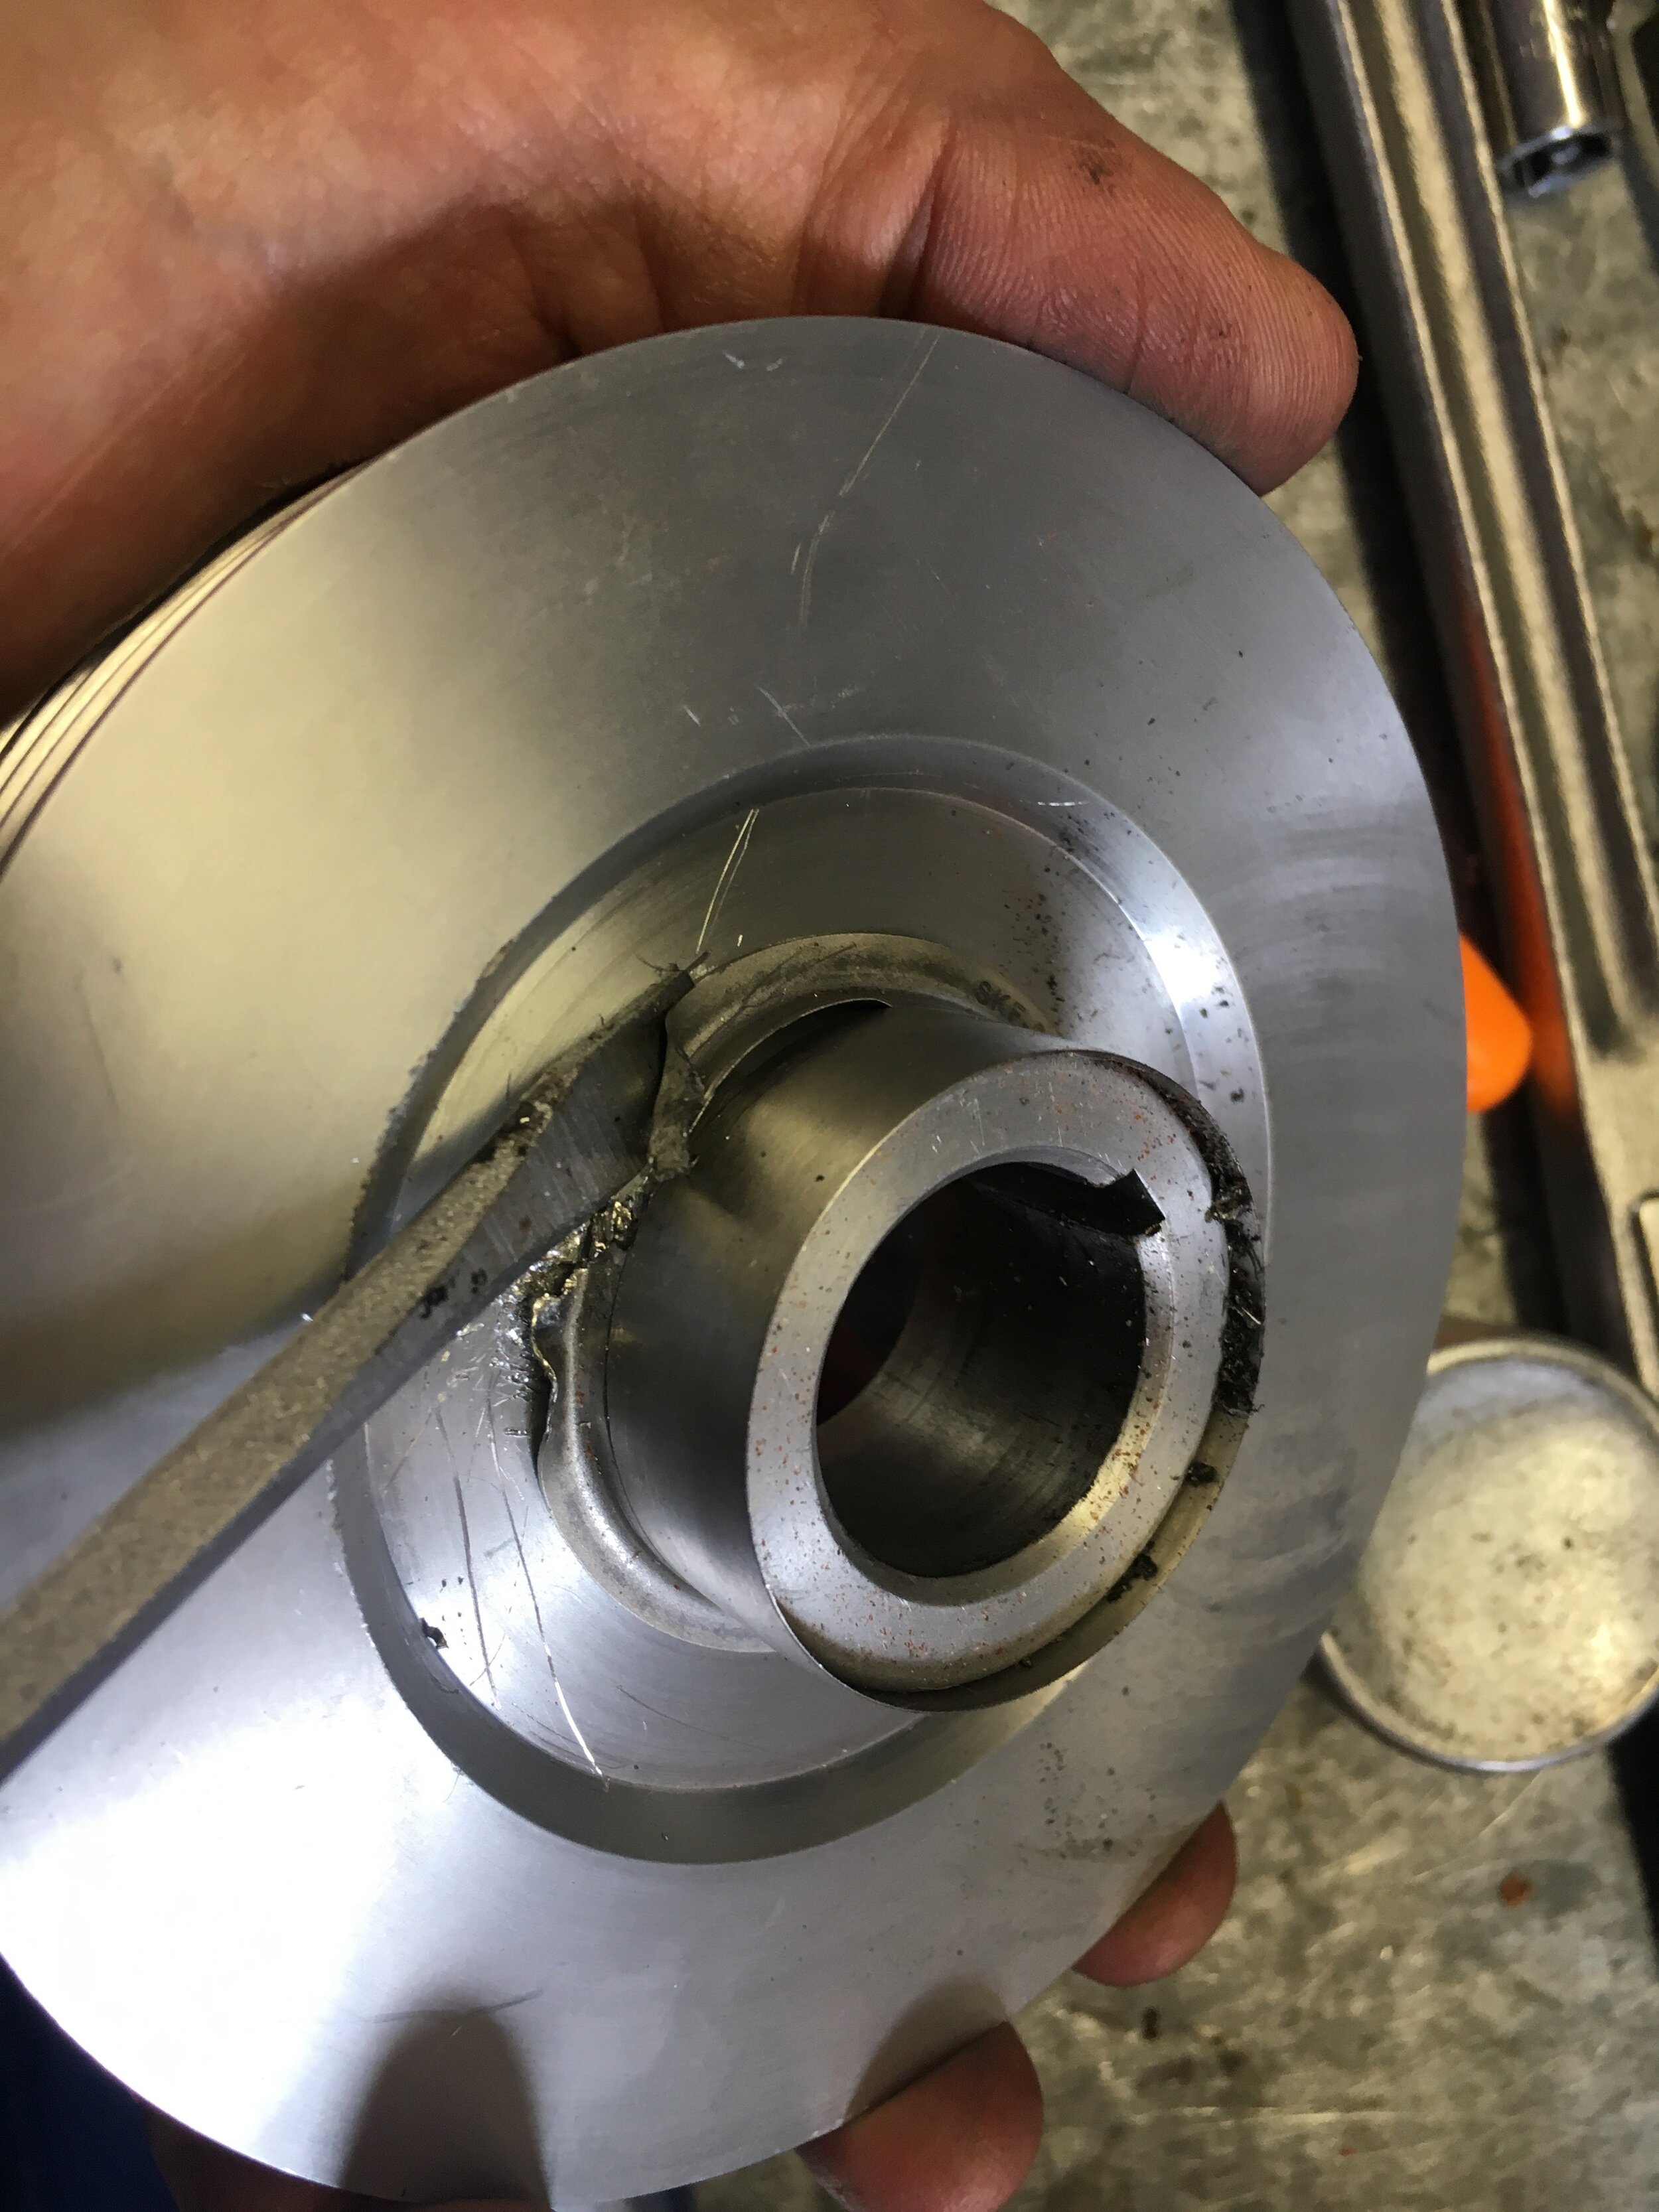
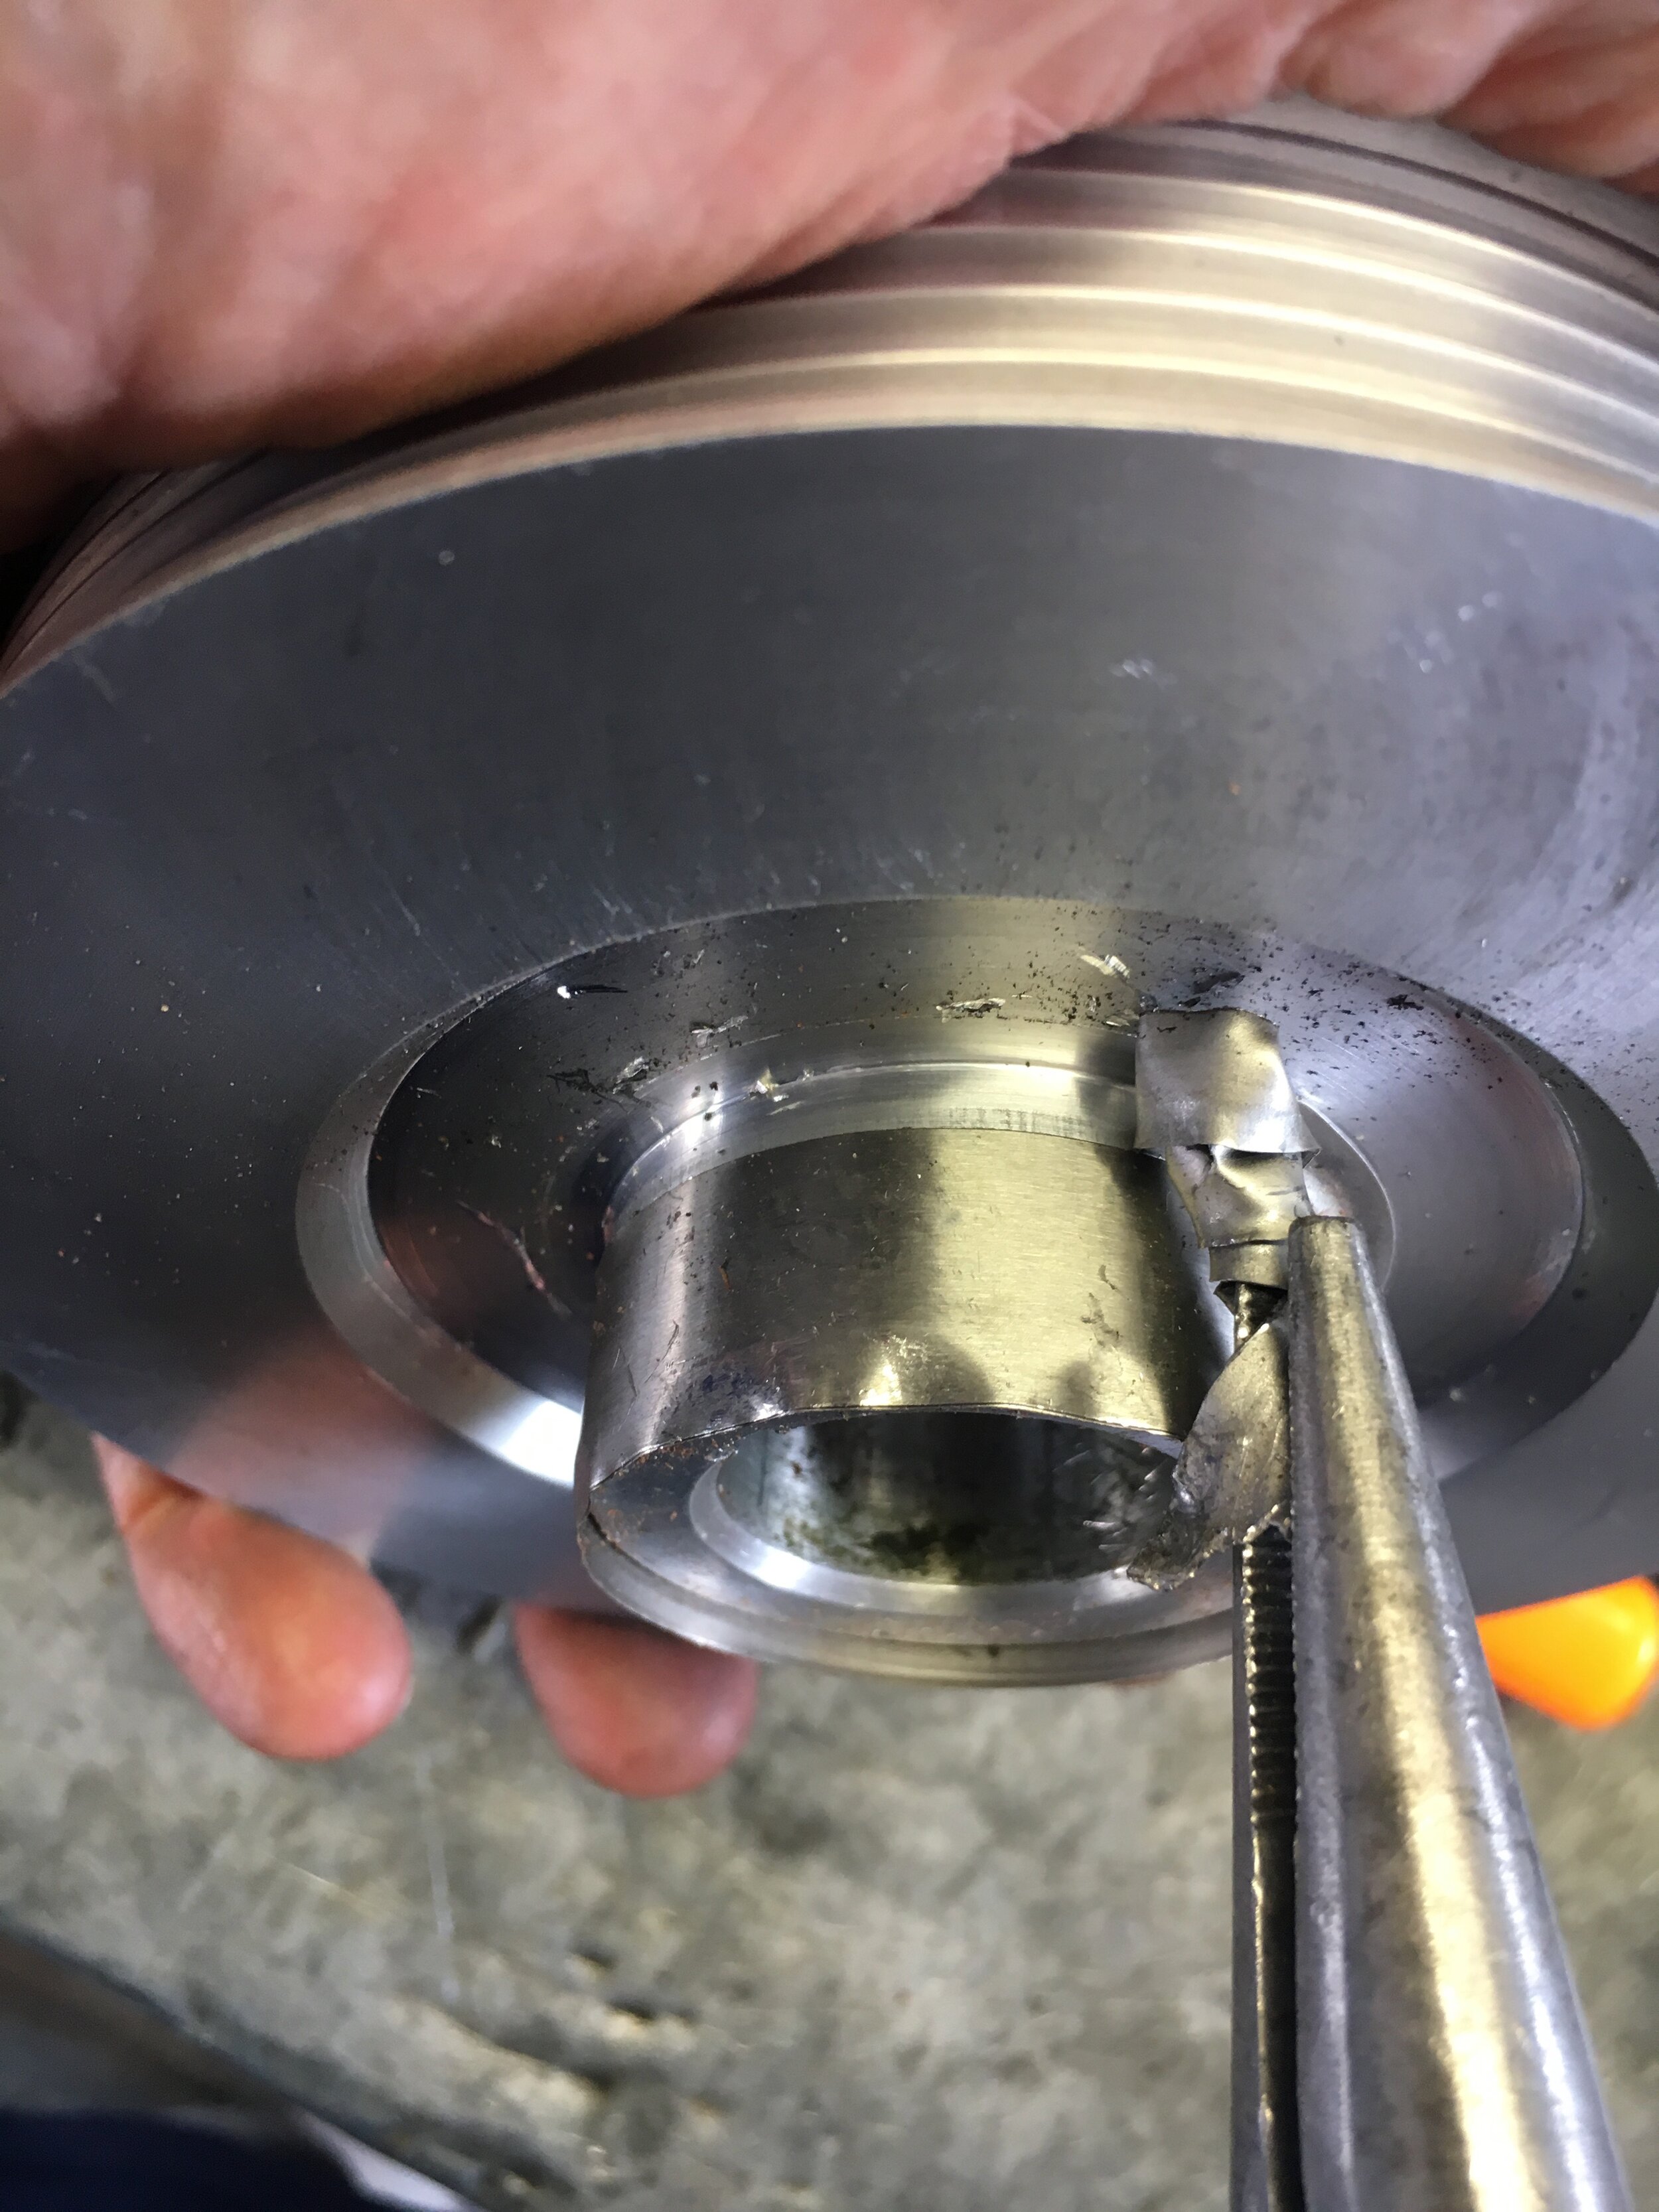
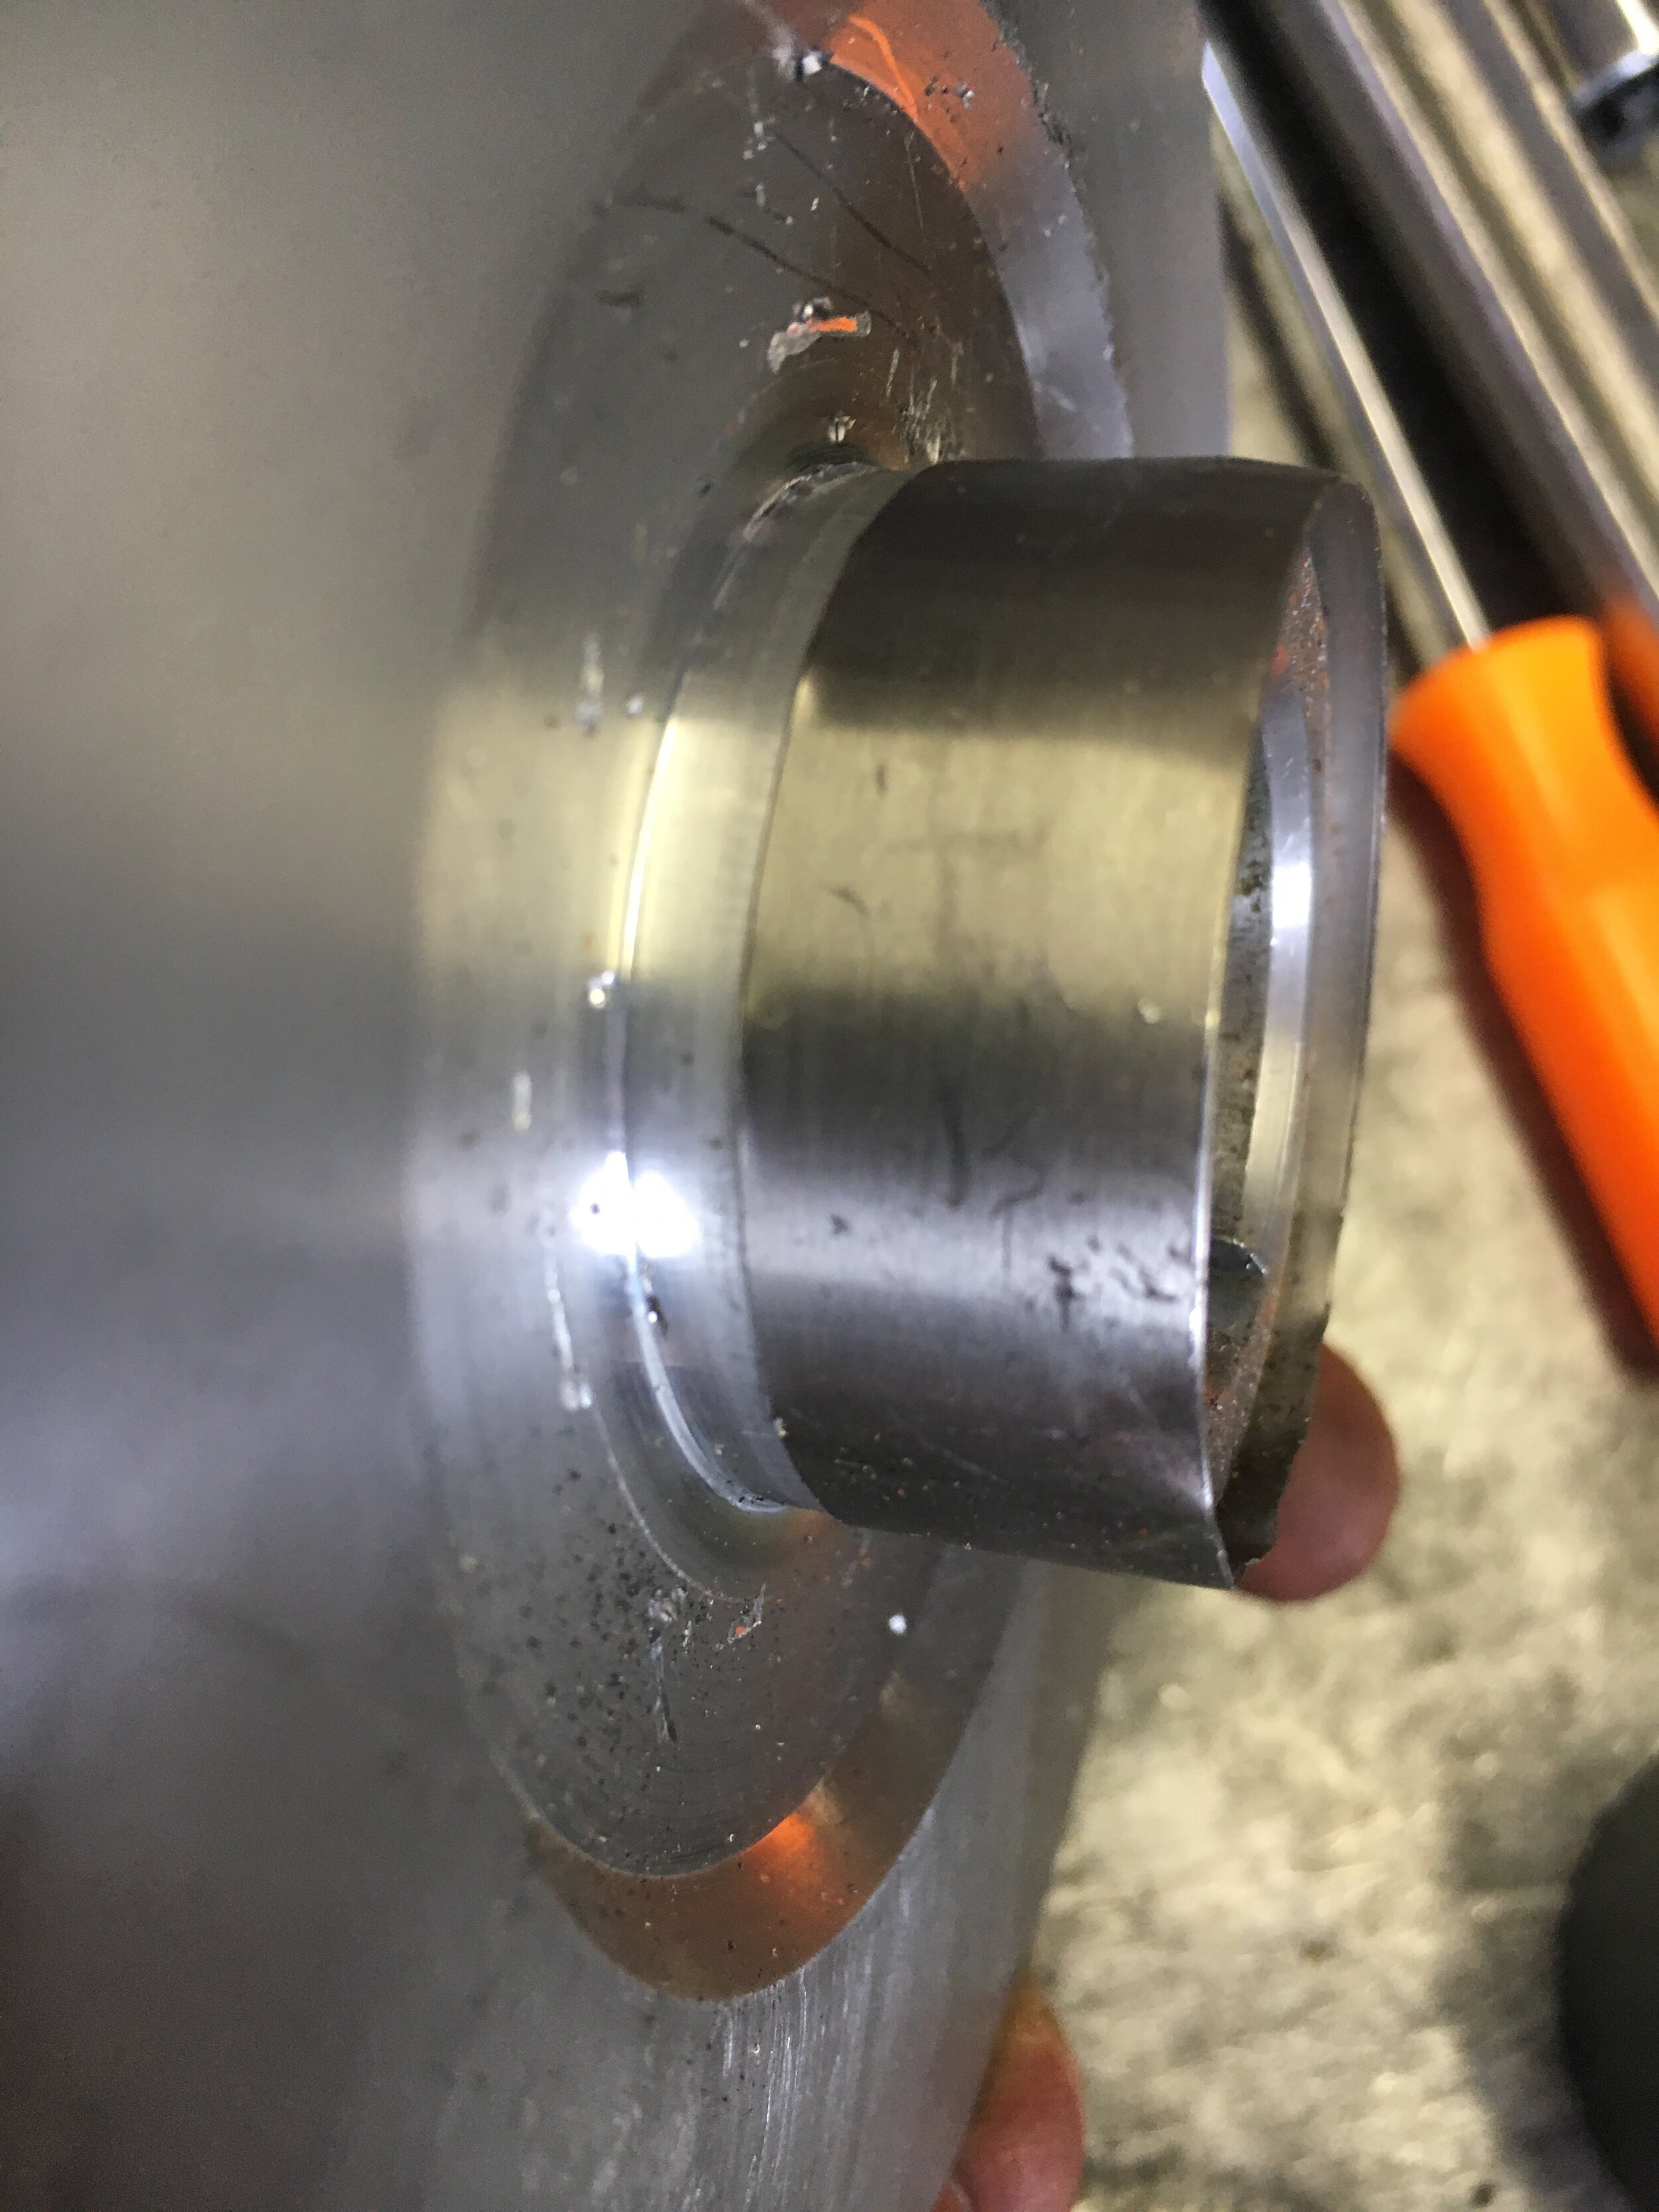
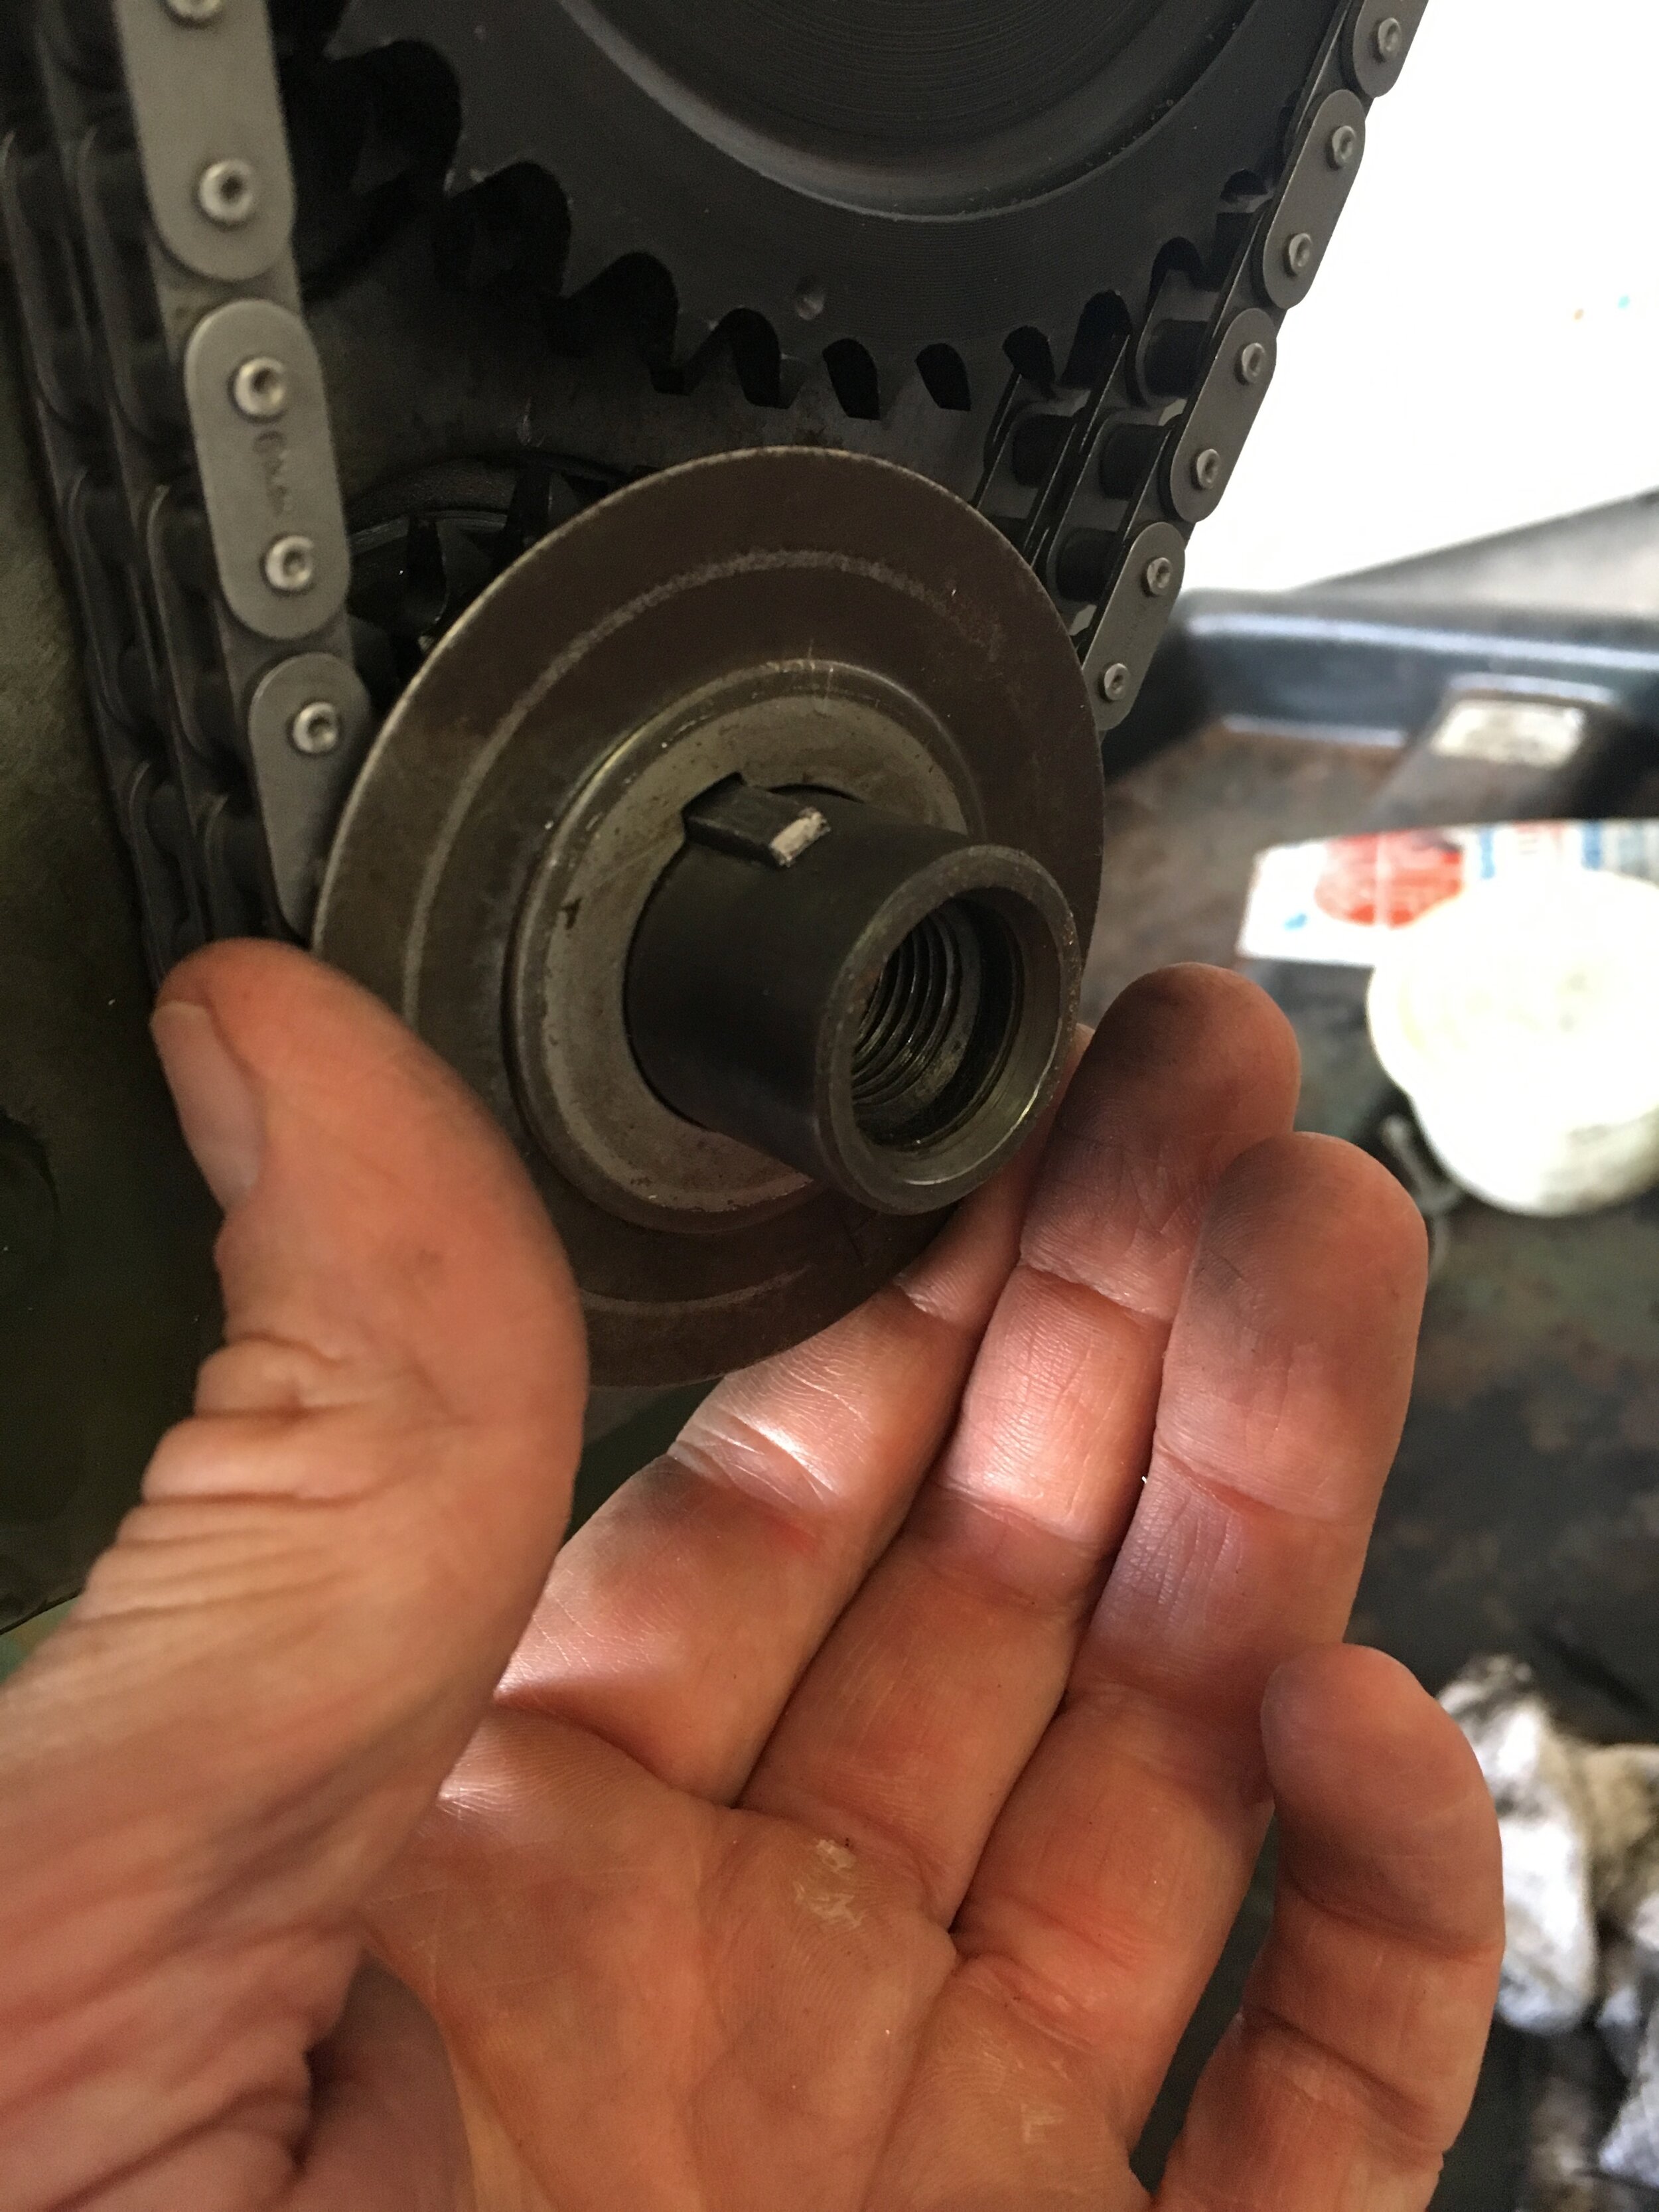
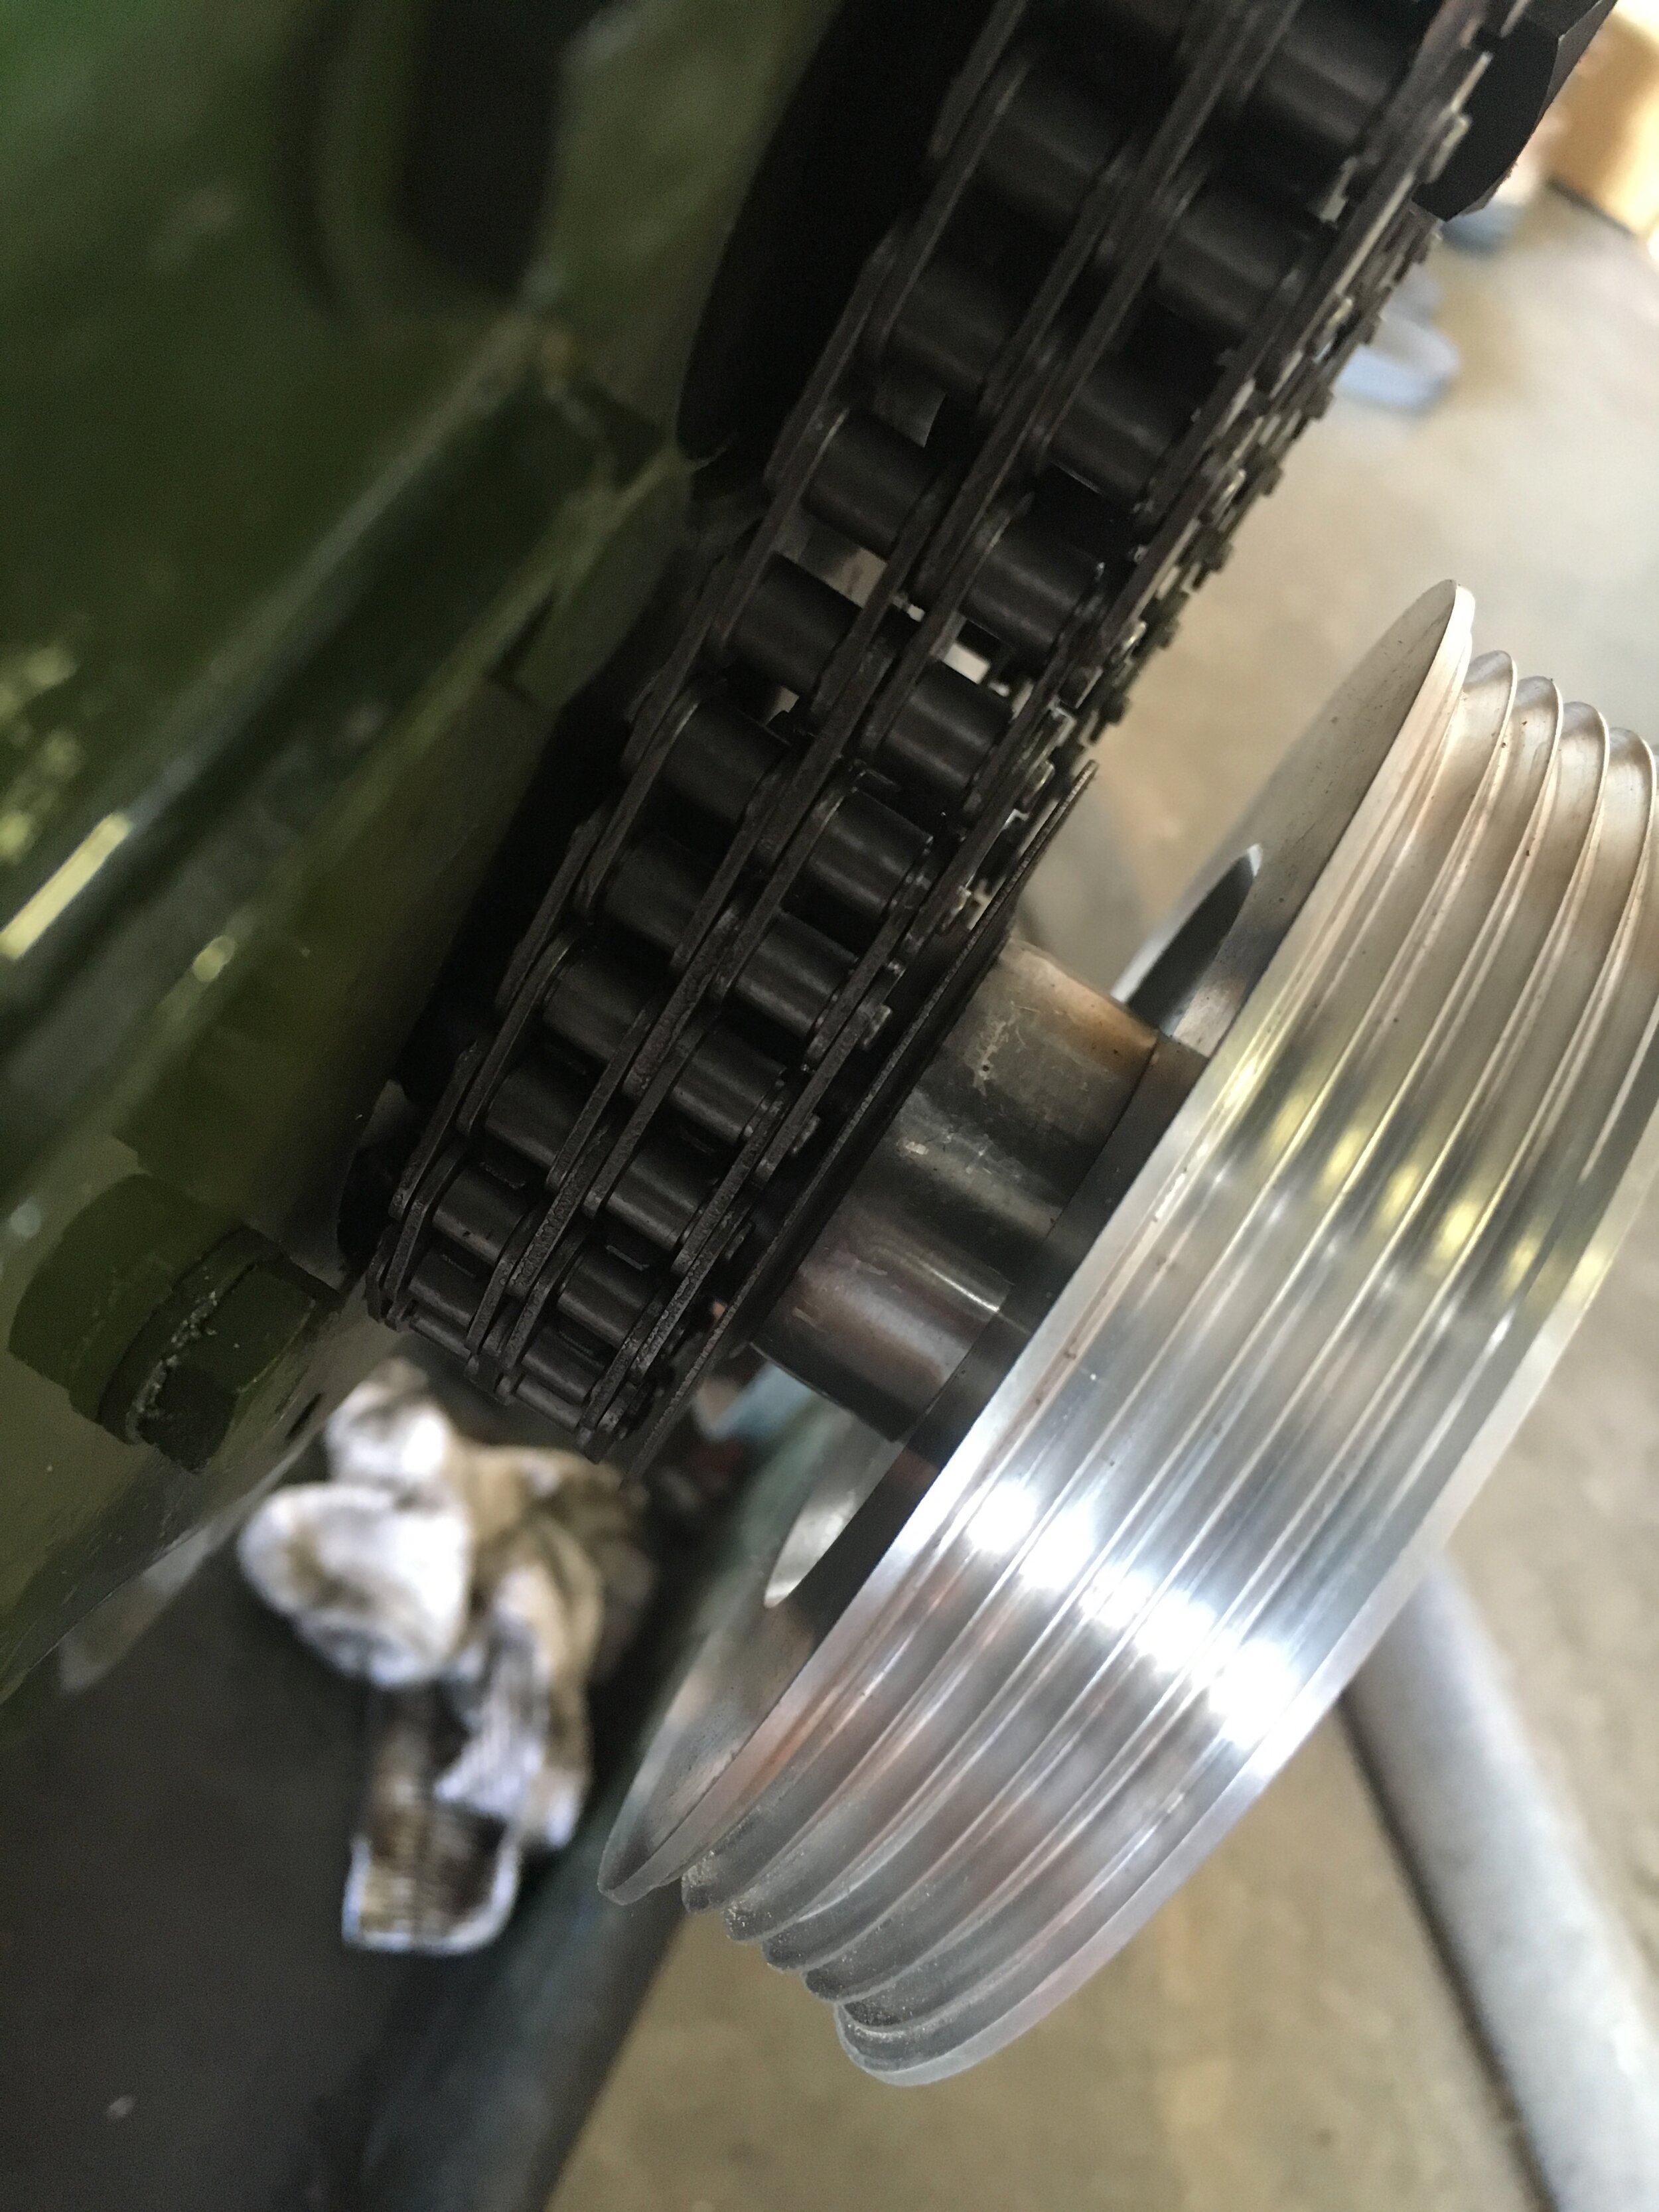
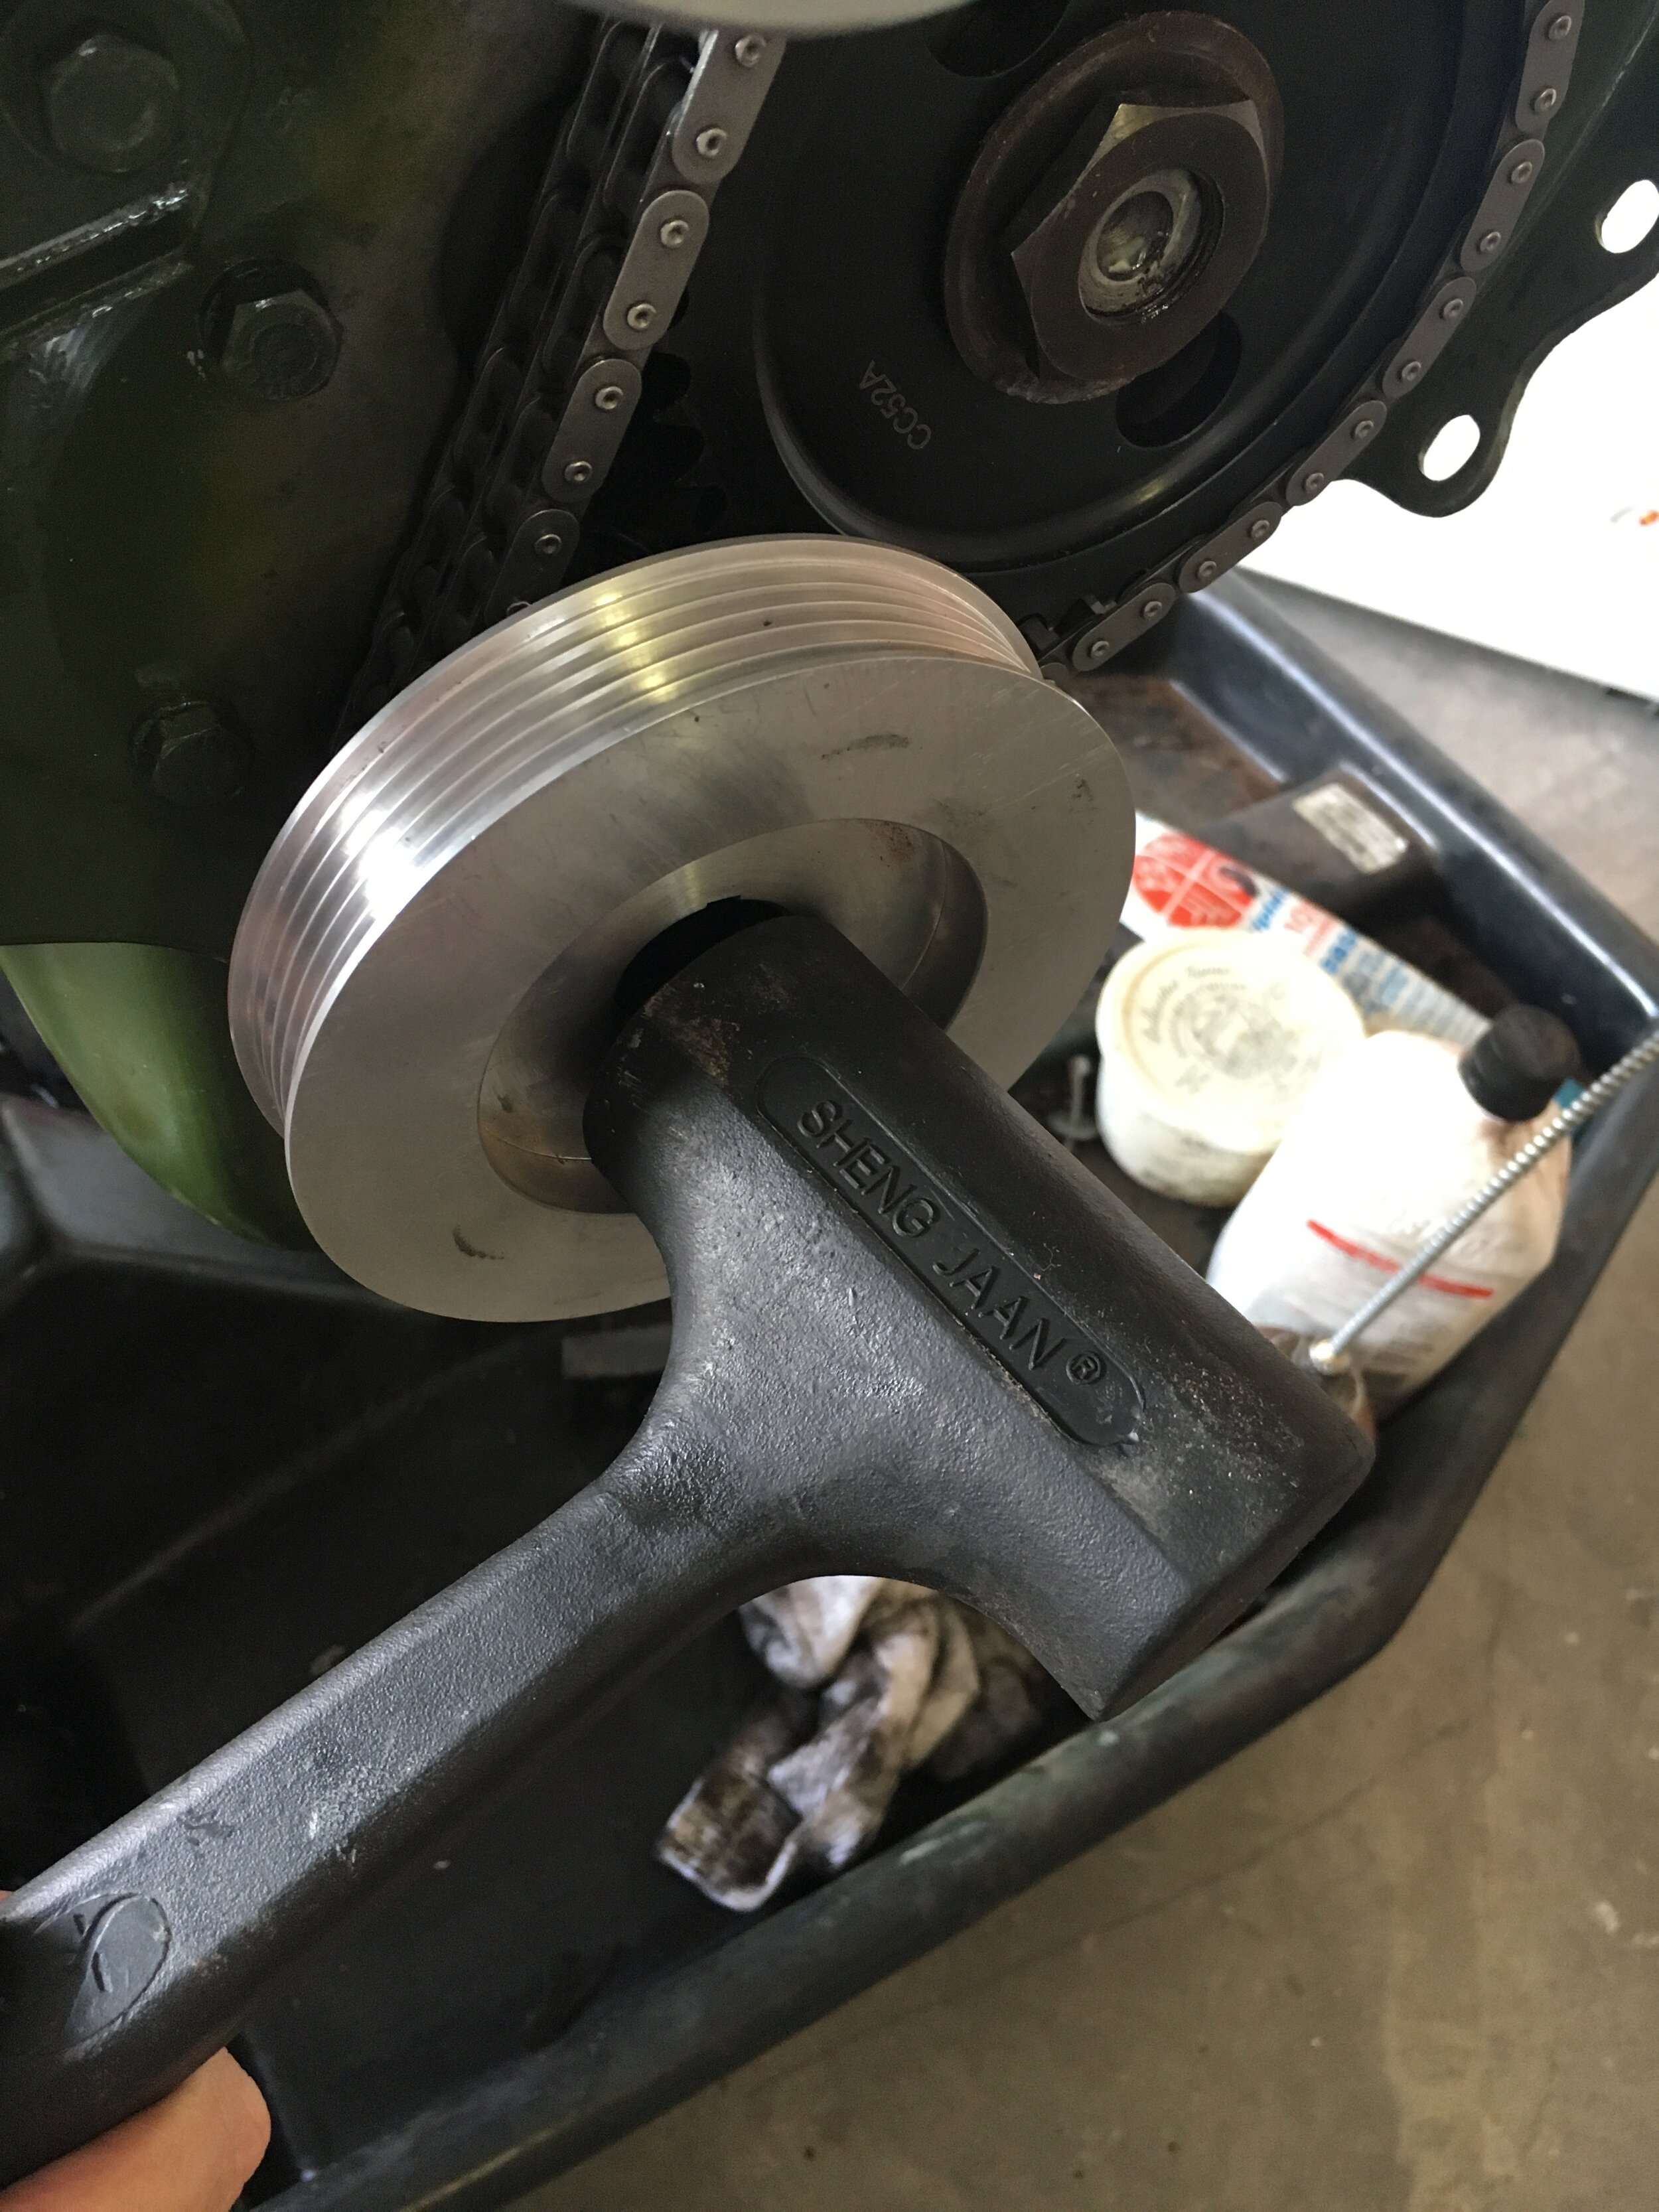
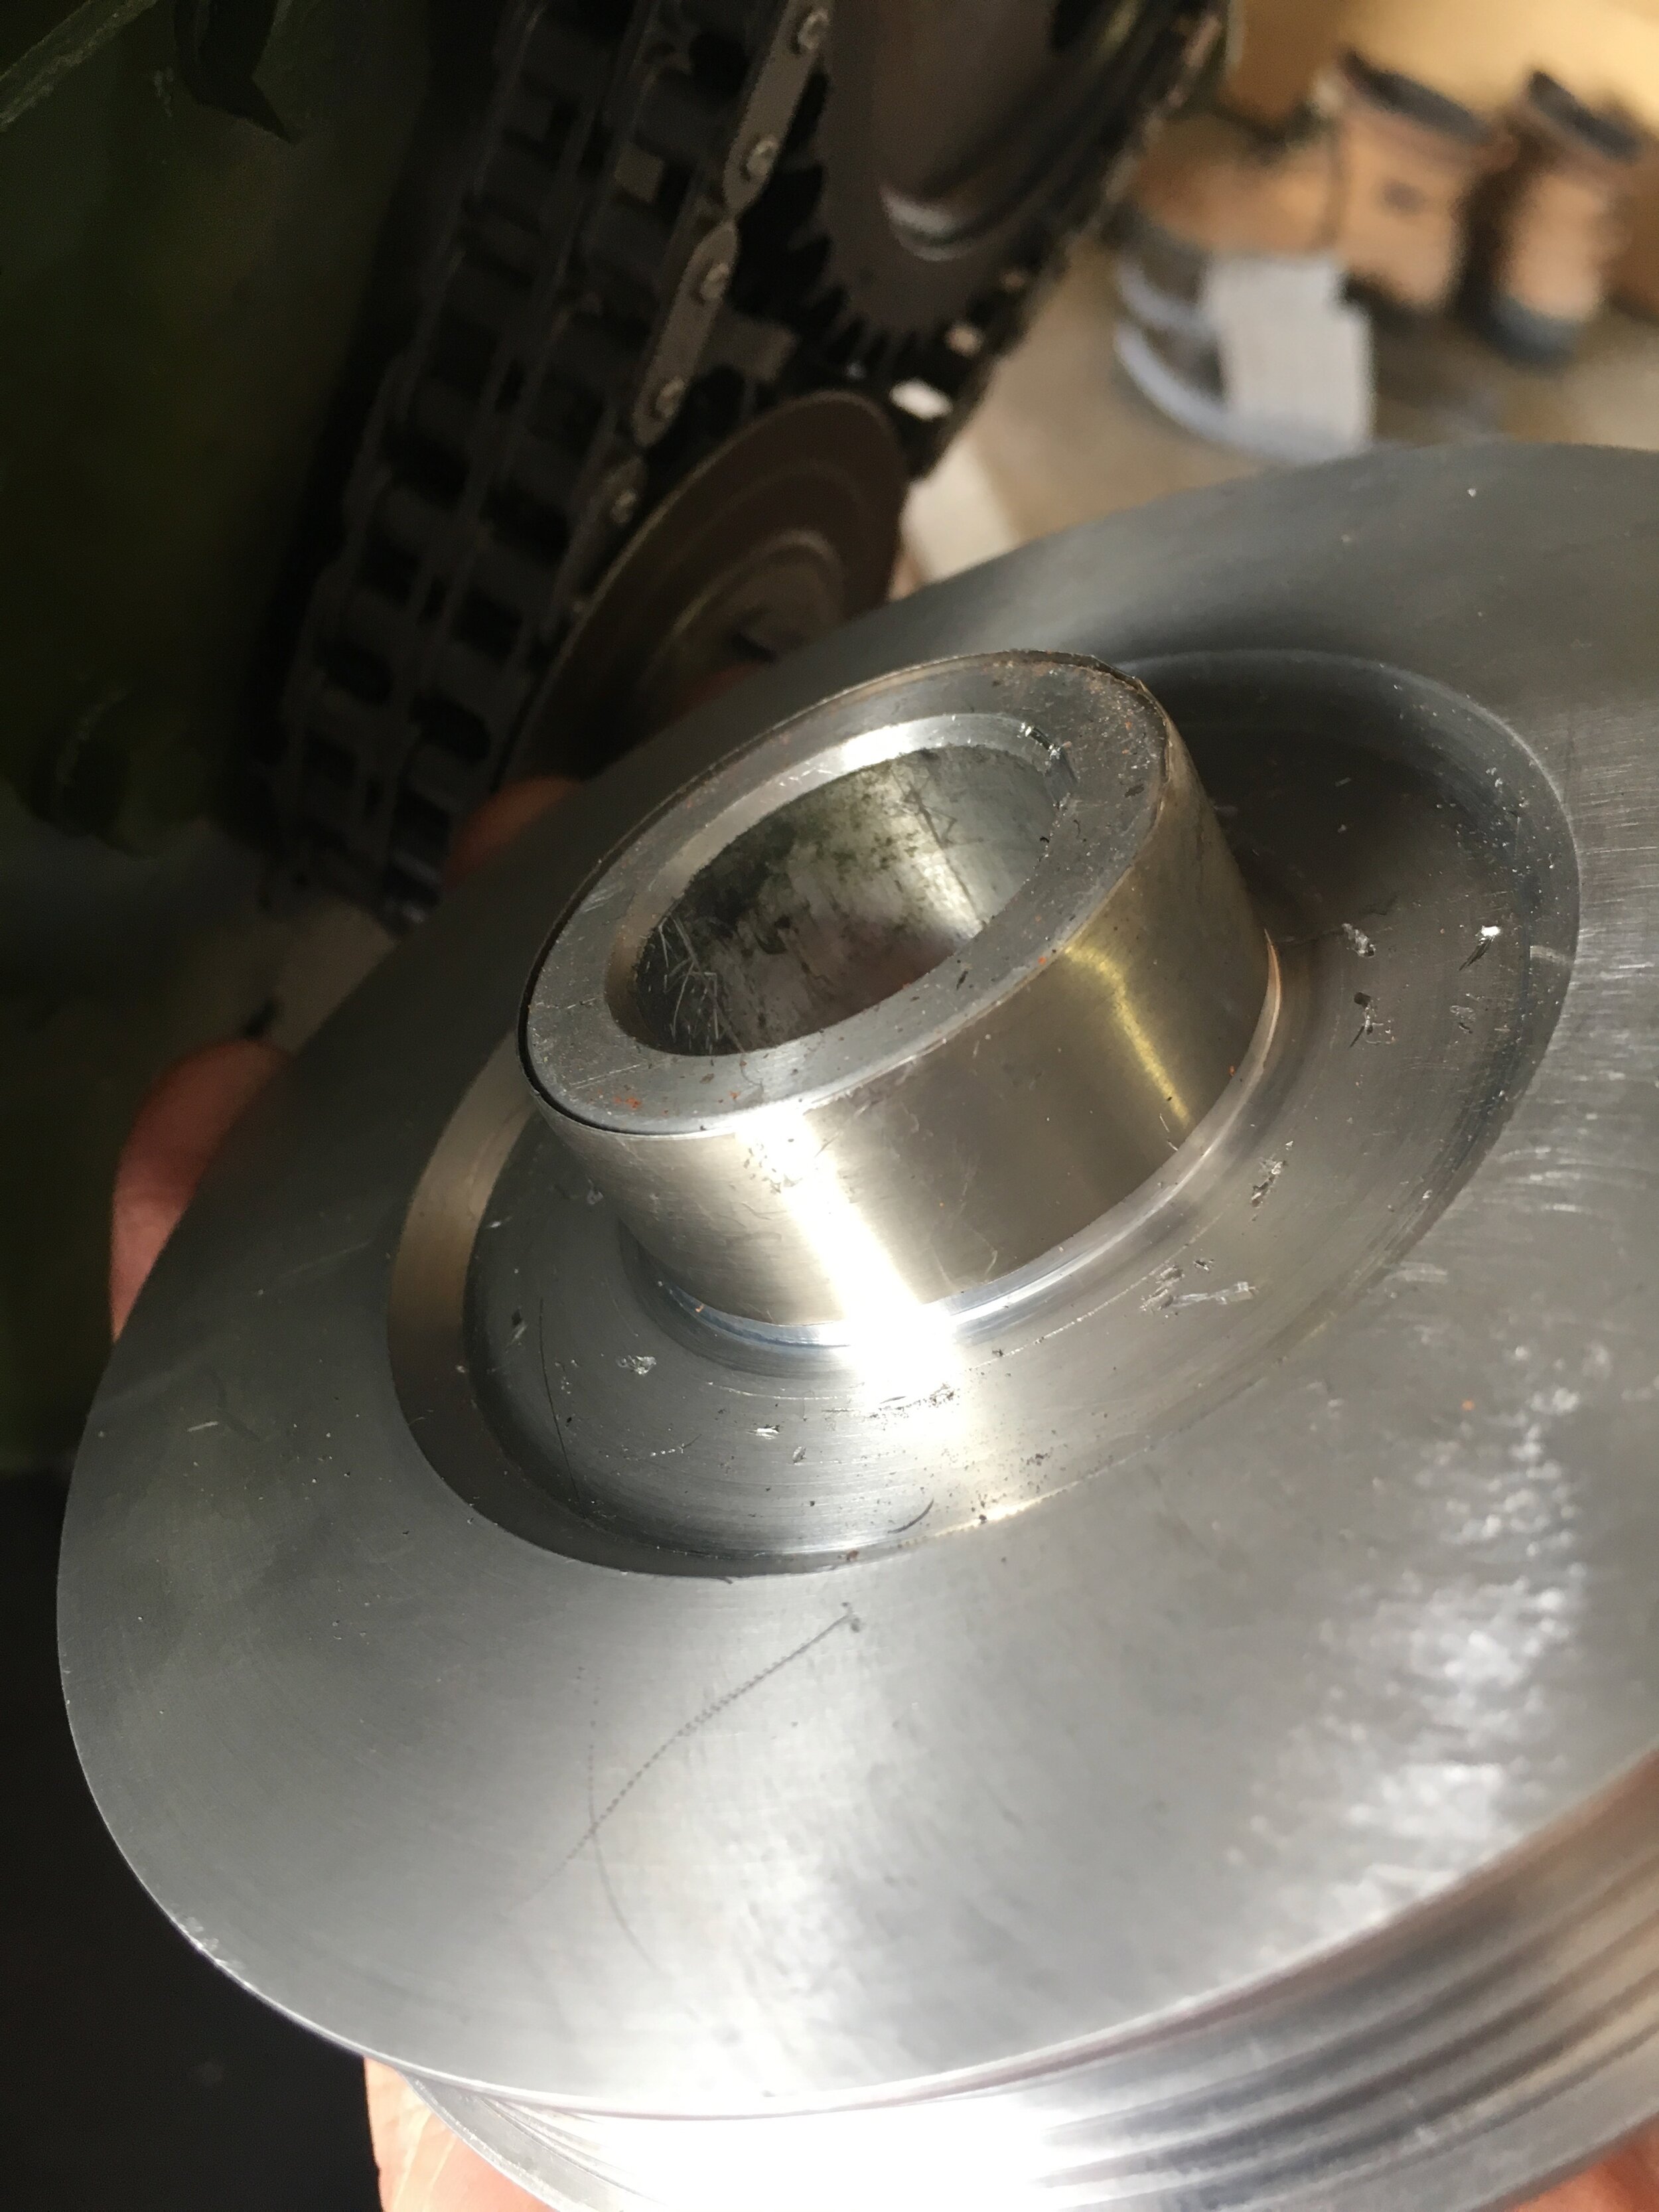
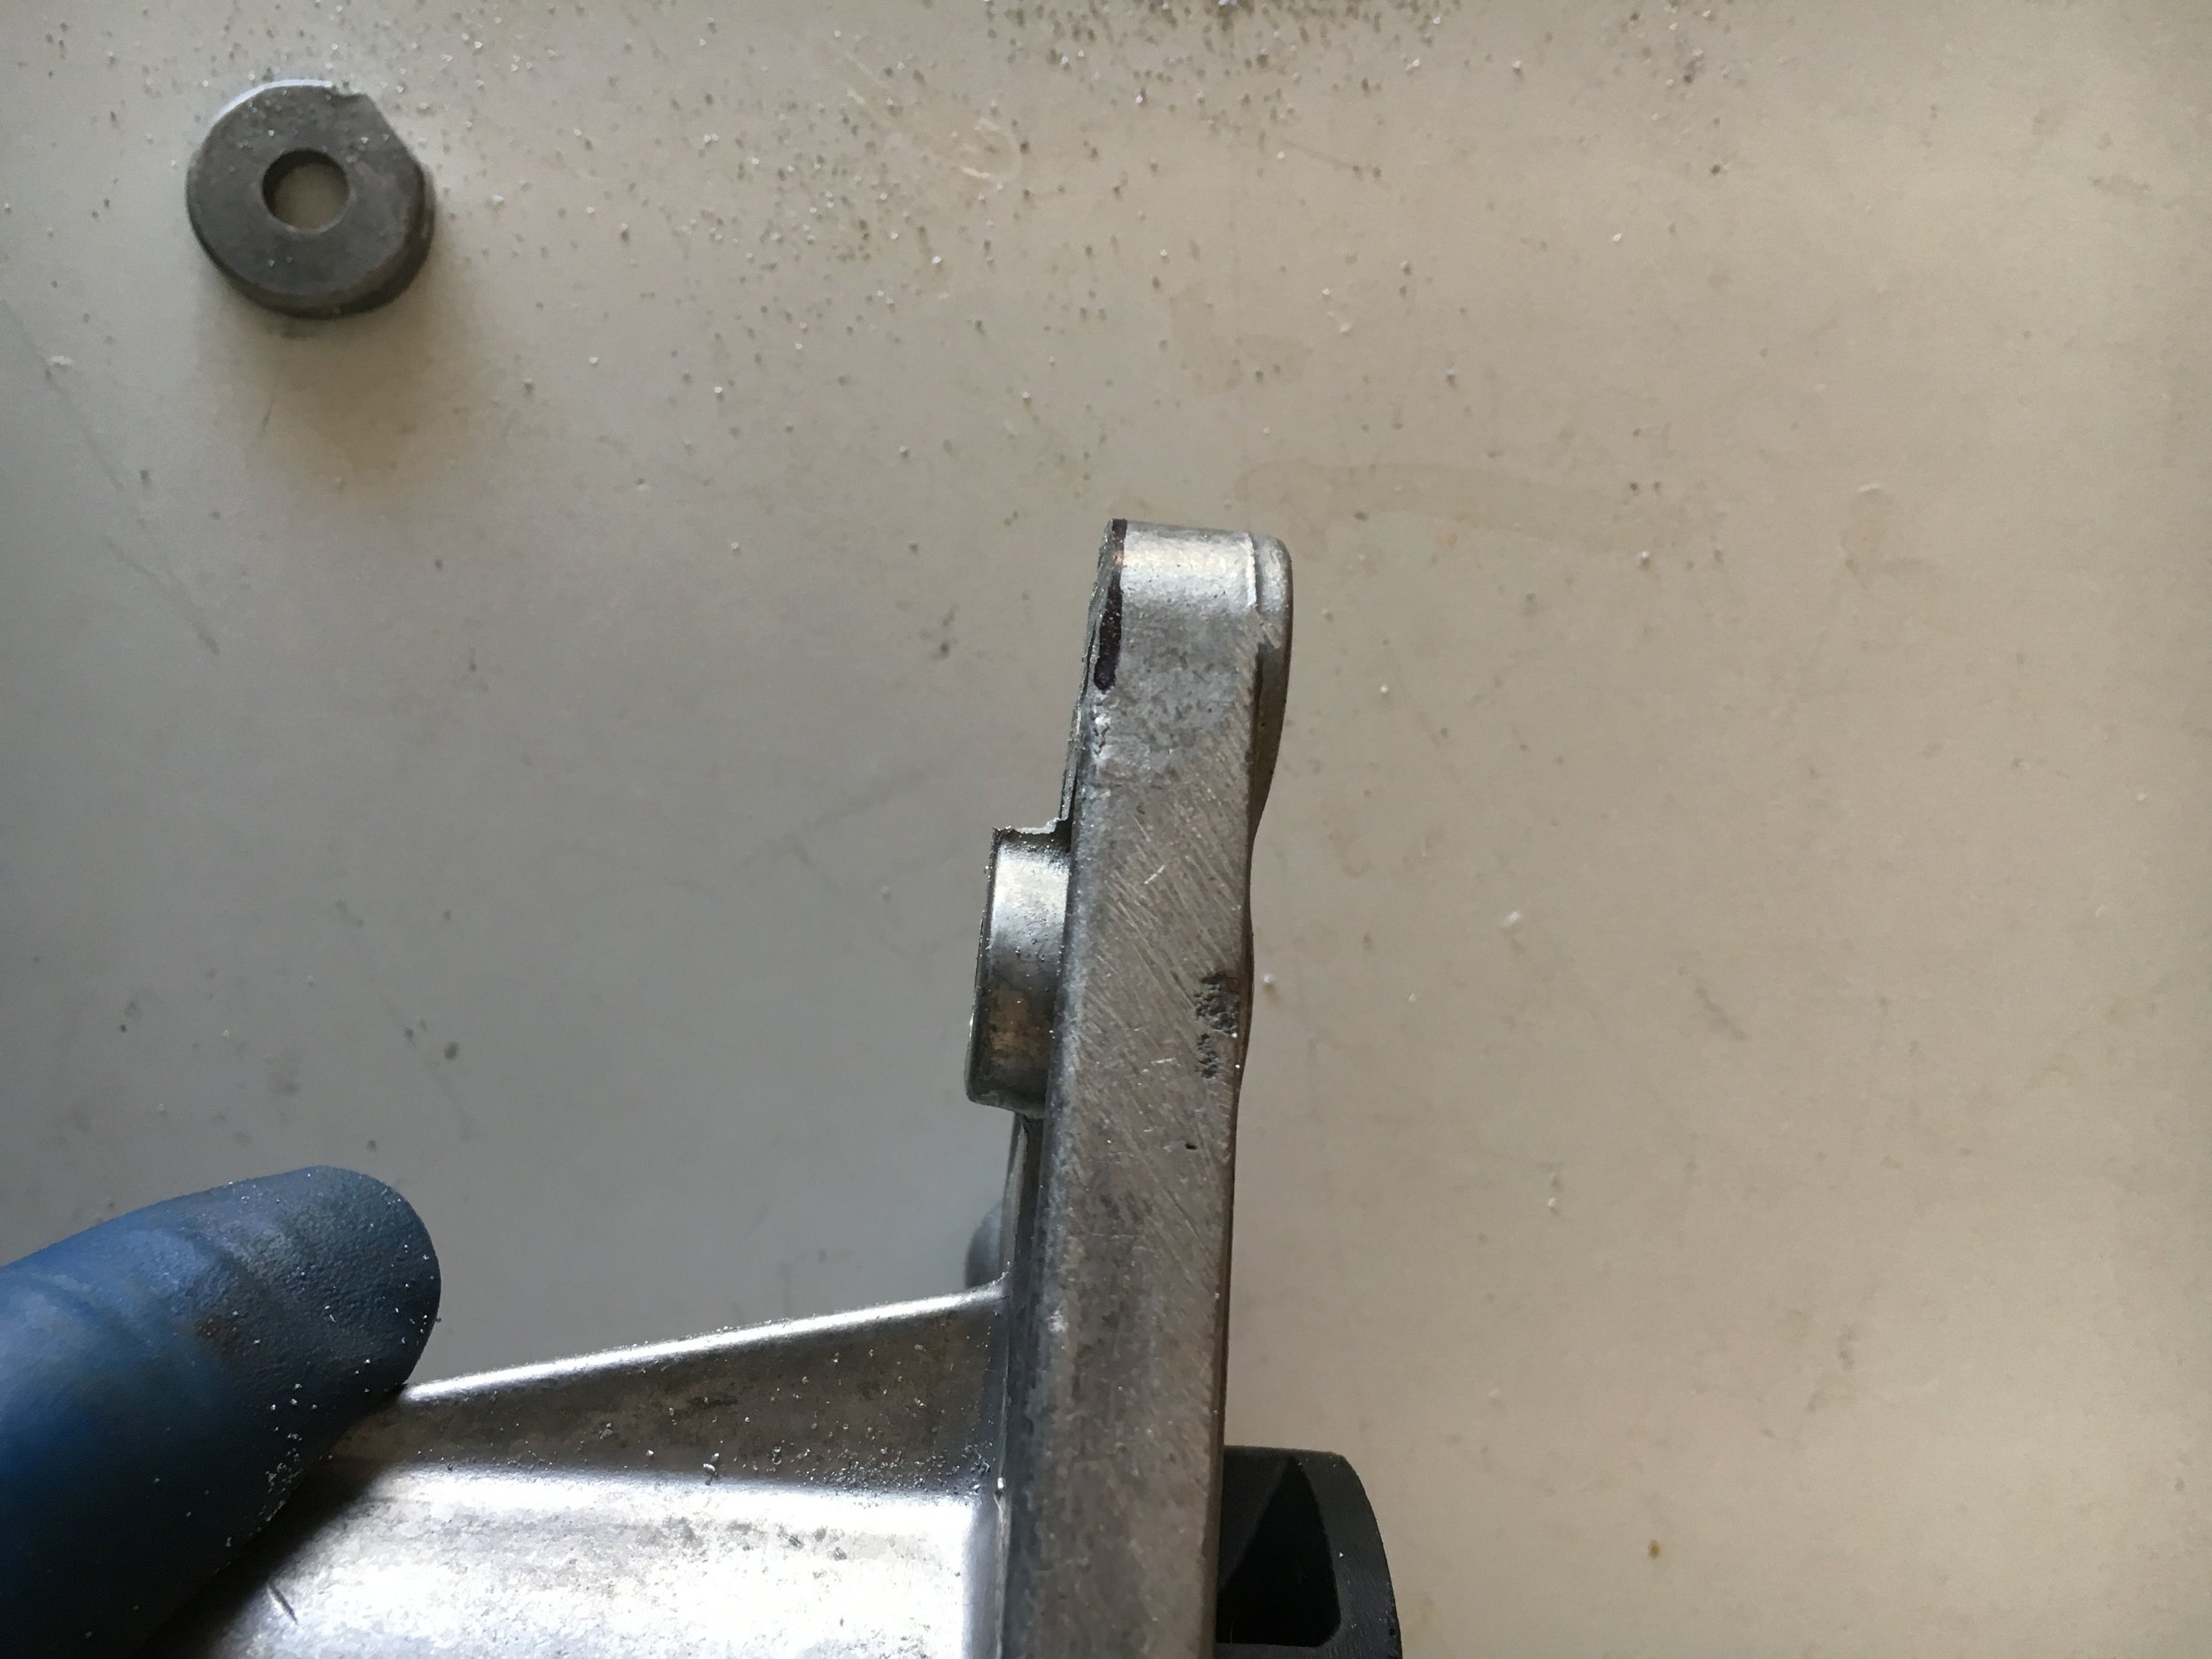
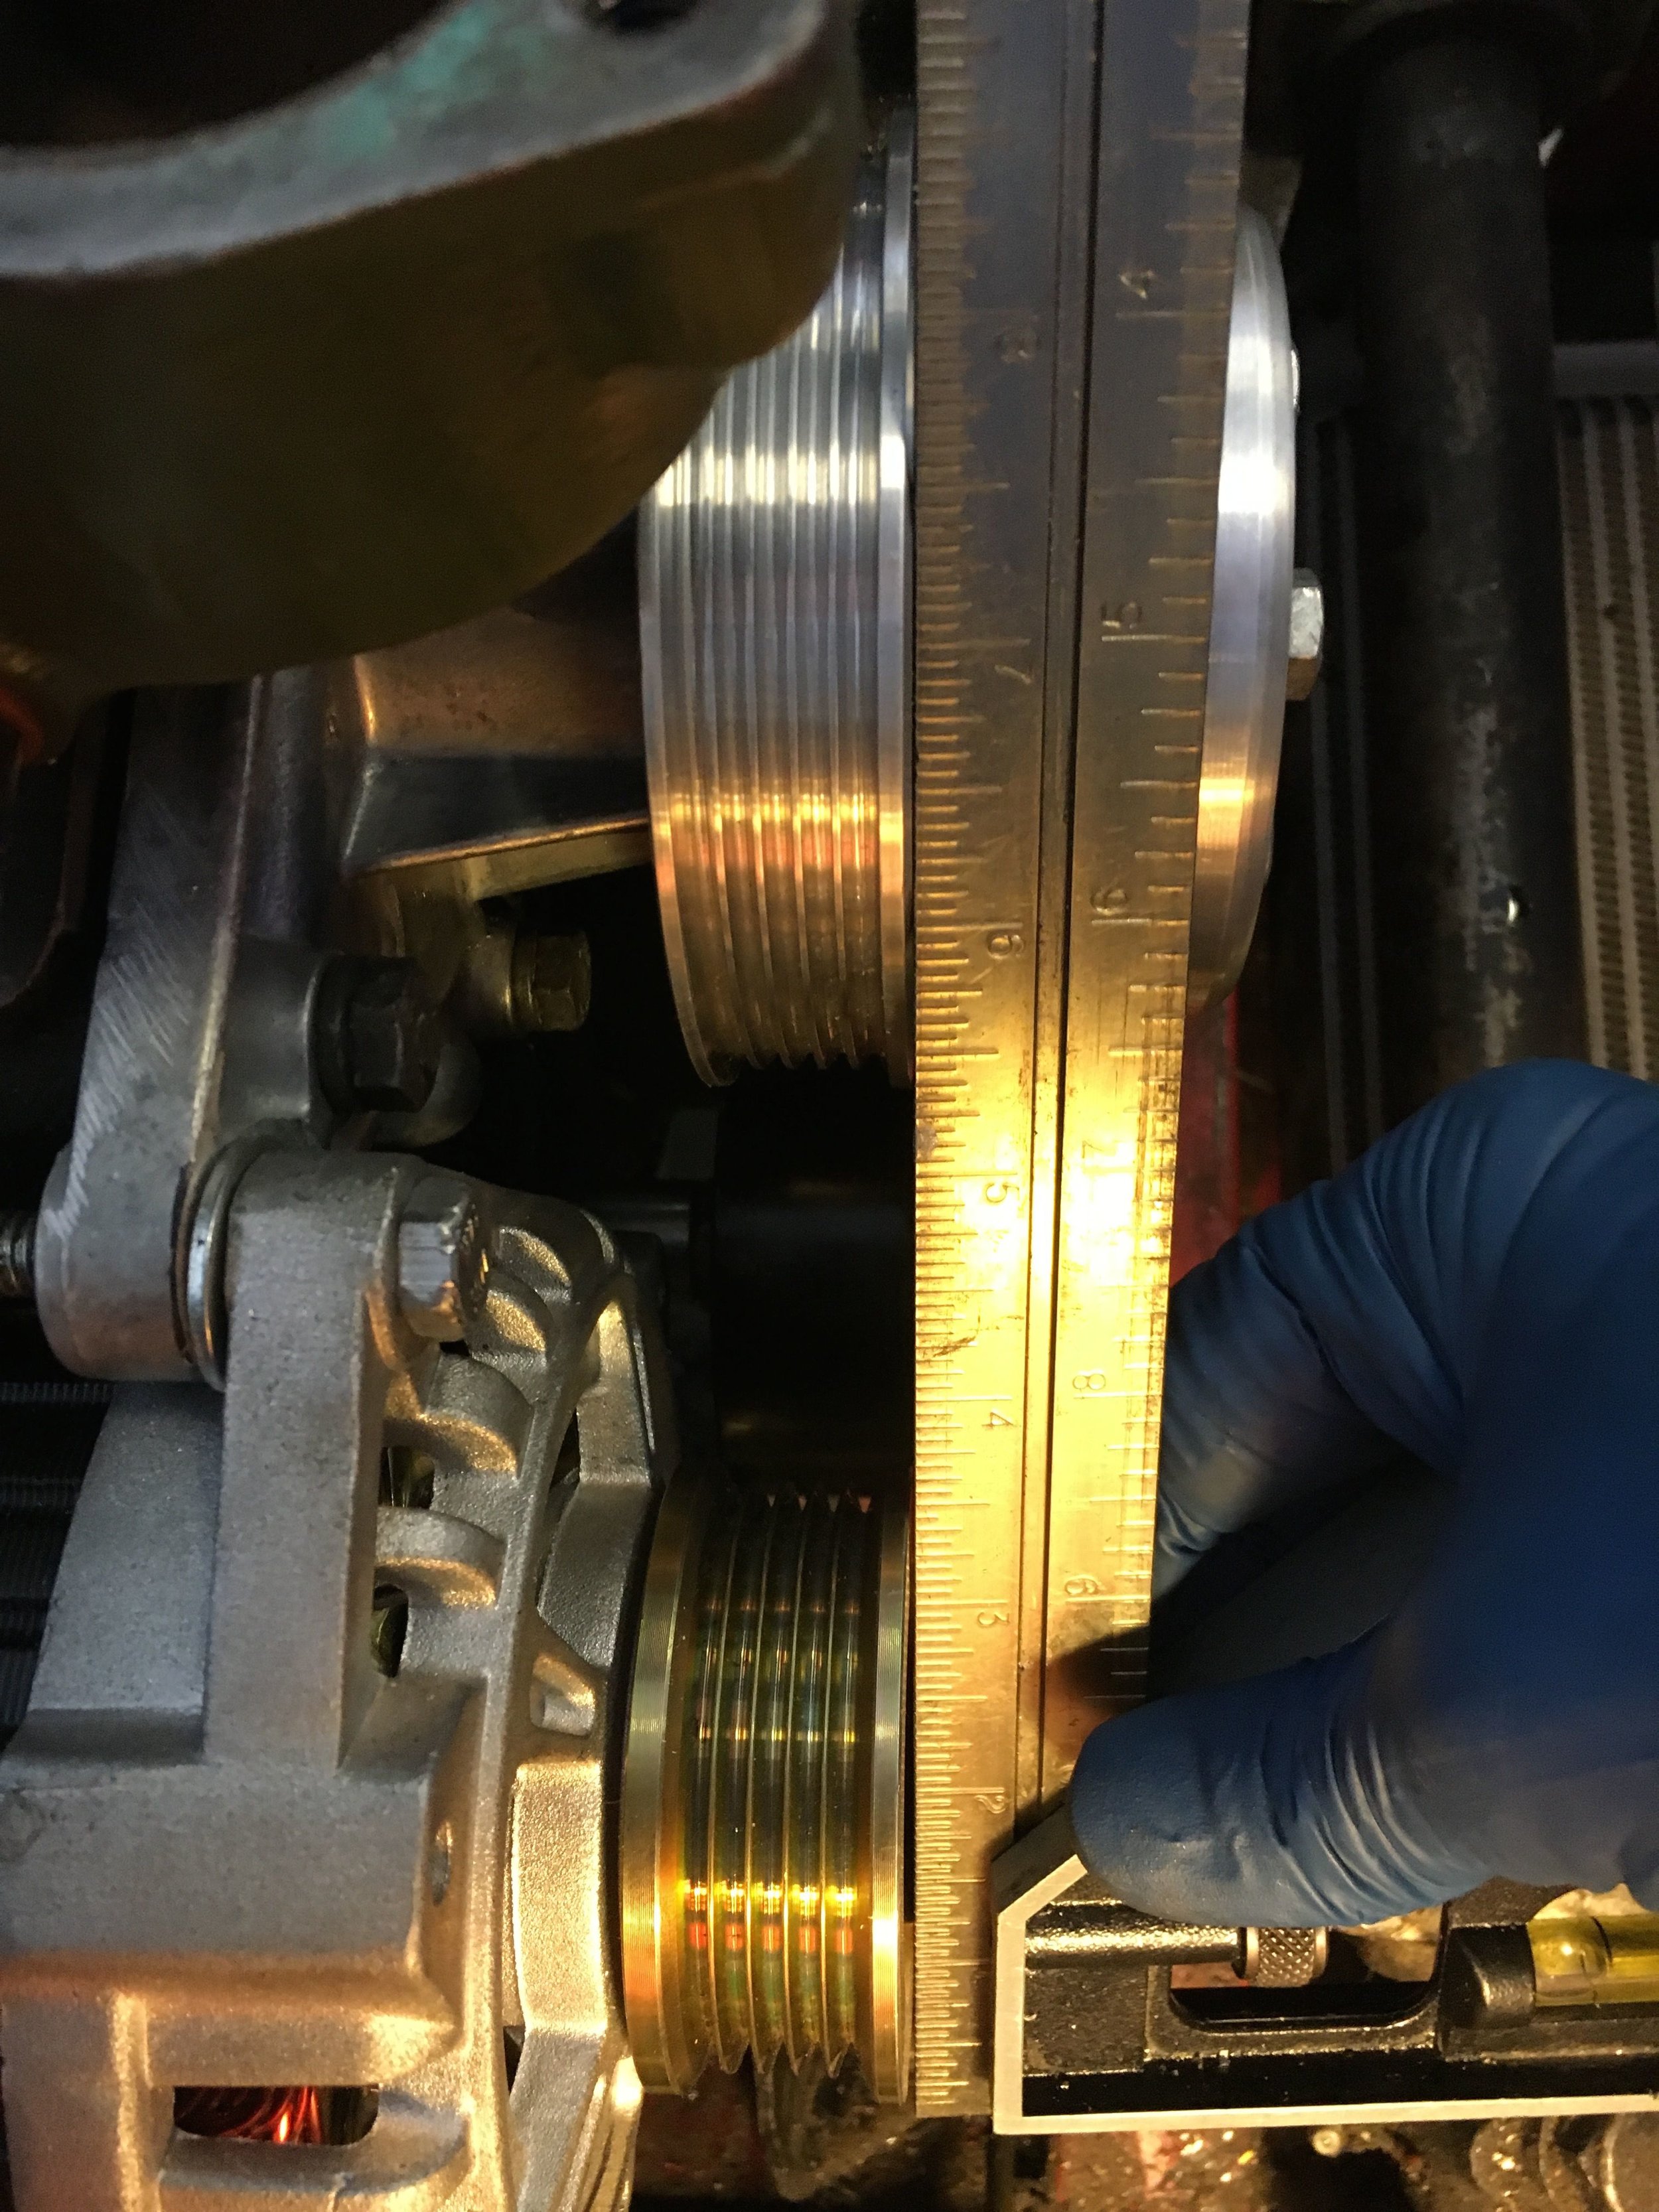
The Creative Spridgets serpentine belt crankshaft pulley should be fitted with a steel Speedi-Sleeve to minimize the possibility of wearing the aluminum. In the event that the sleeve is driven too far on before the lip is removed, here is a photo series showing how to remove the lip.
In any case, driving the sleeve the last fraction of an inch onto the pulley may be achieved as shown in final images in the series:

*Note: the above procedure only applies to pulleys manufactured through March 8, 2022. The next production run will be modified to provide more room to facilitate easy removal of the lip on the Speedi-sleeve. Whenever the current inventory sells out, the above procedure will be unnecessary and the slides removed.
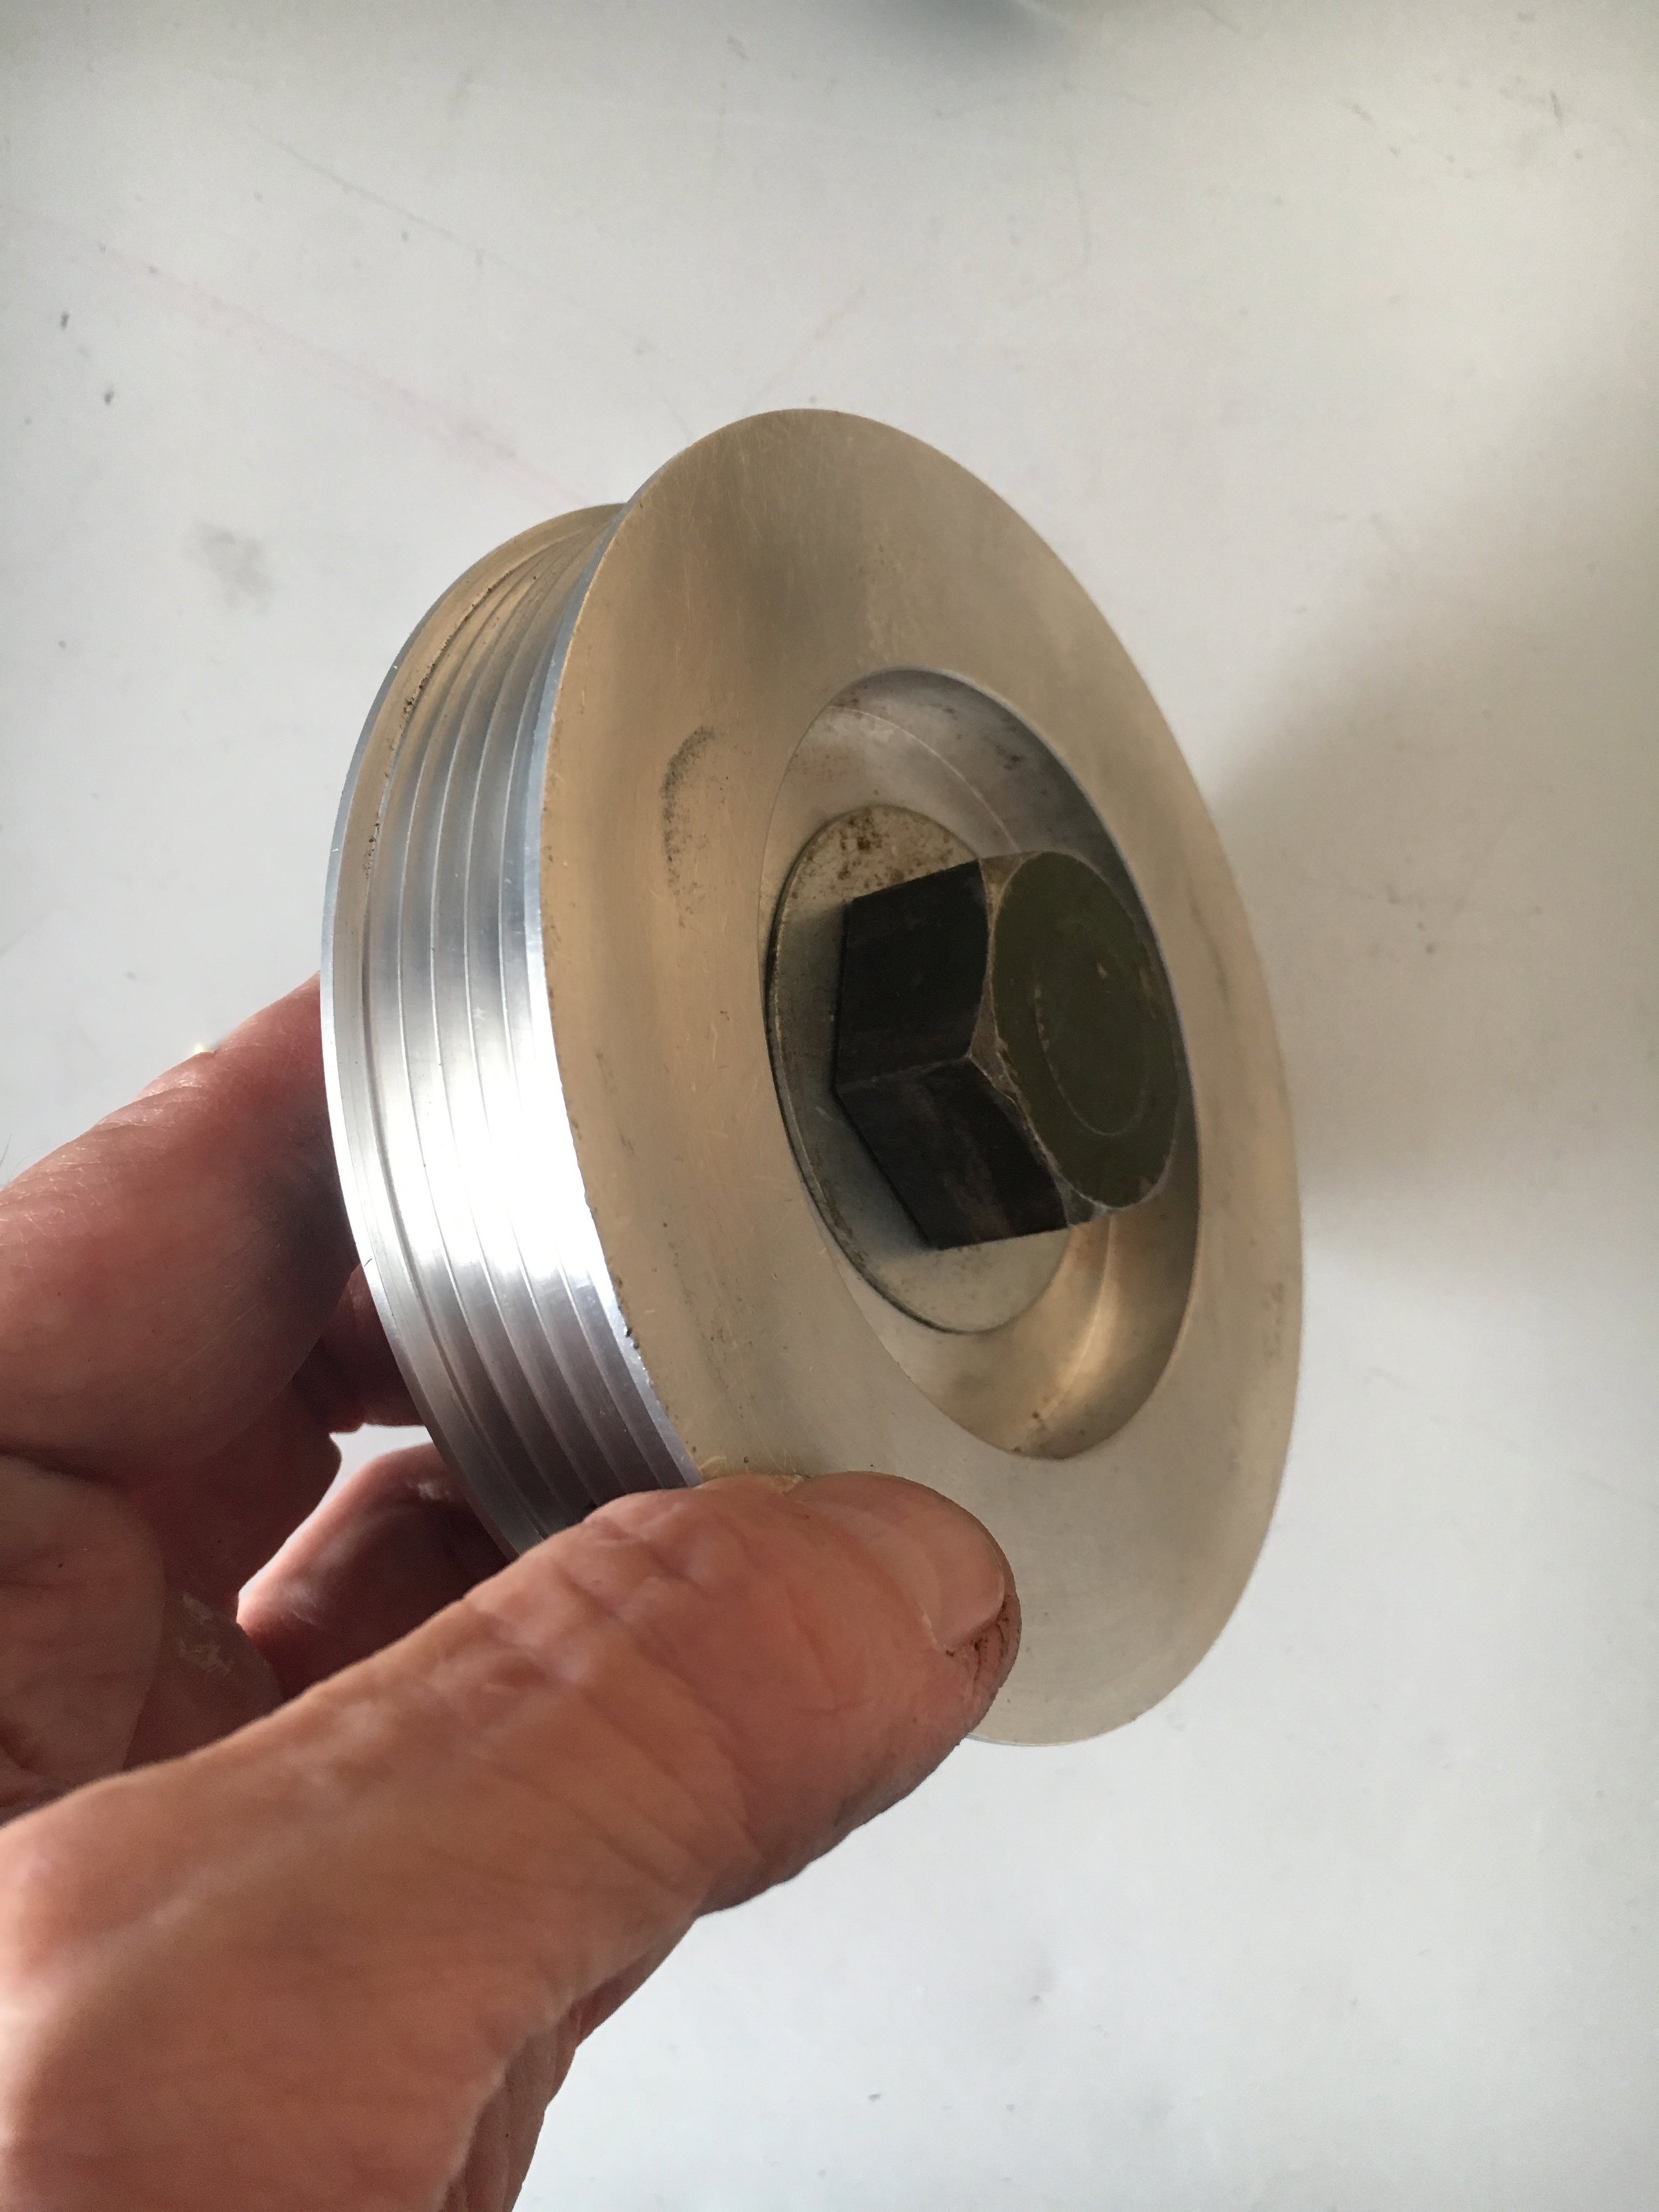
Step 3 - Install pulleys
After fitting it with a Speedi-sleeve, install the serpentine belt crankshaft pulley using an OEM camshaft tab locking washer (Moss Motors part no. 460-550):

The little hooked tab goes into the keyway groove in the pulley and the oblong tab in the washer gets bent up against the bolt to lock it into place.
In the alternative, you may apply blue (light strength) Loctite to 3 or 4 threads and torque the bolt to OEM specs from your workshop manual.
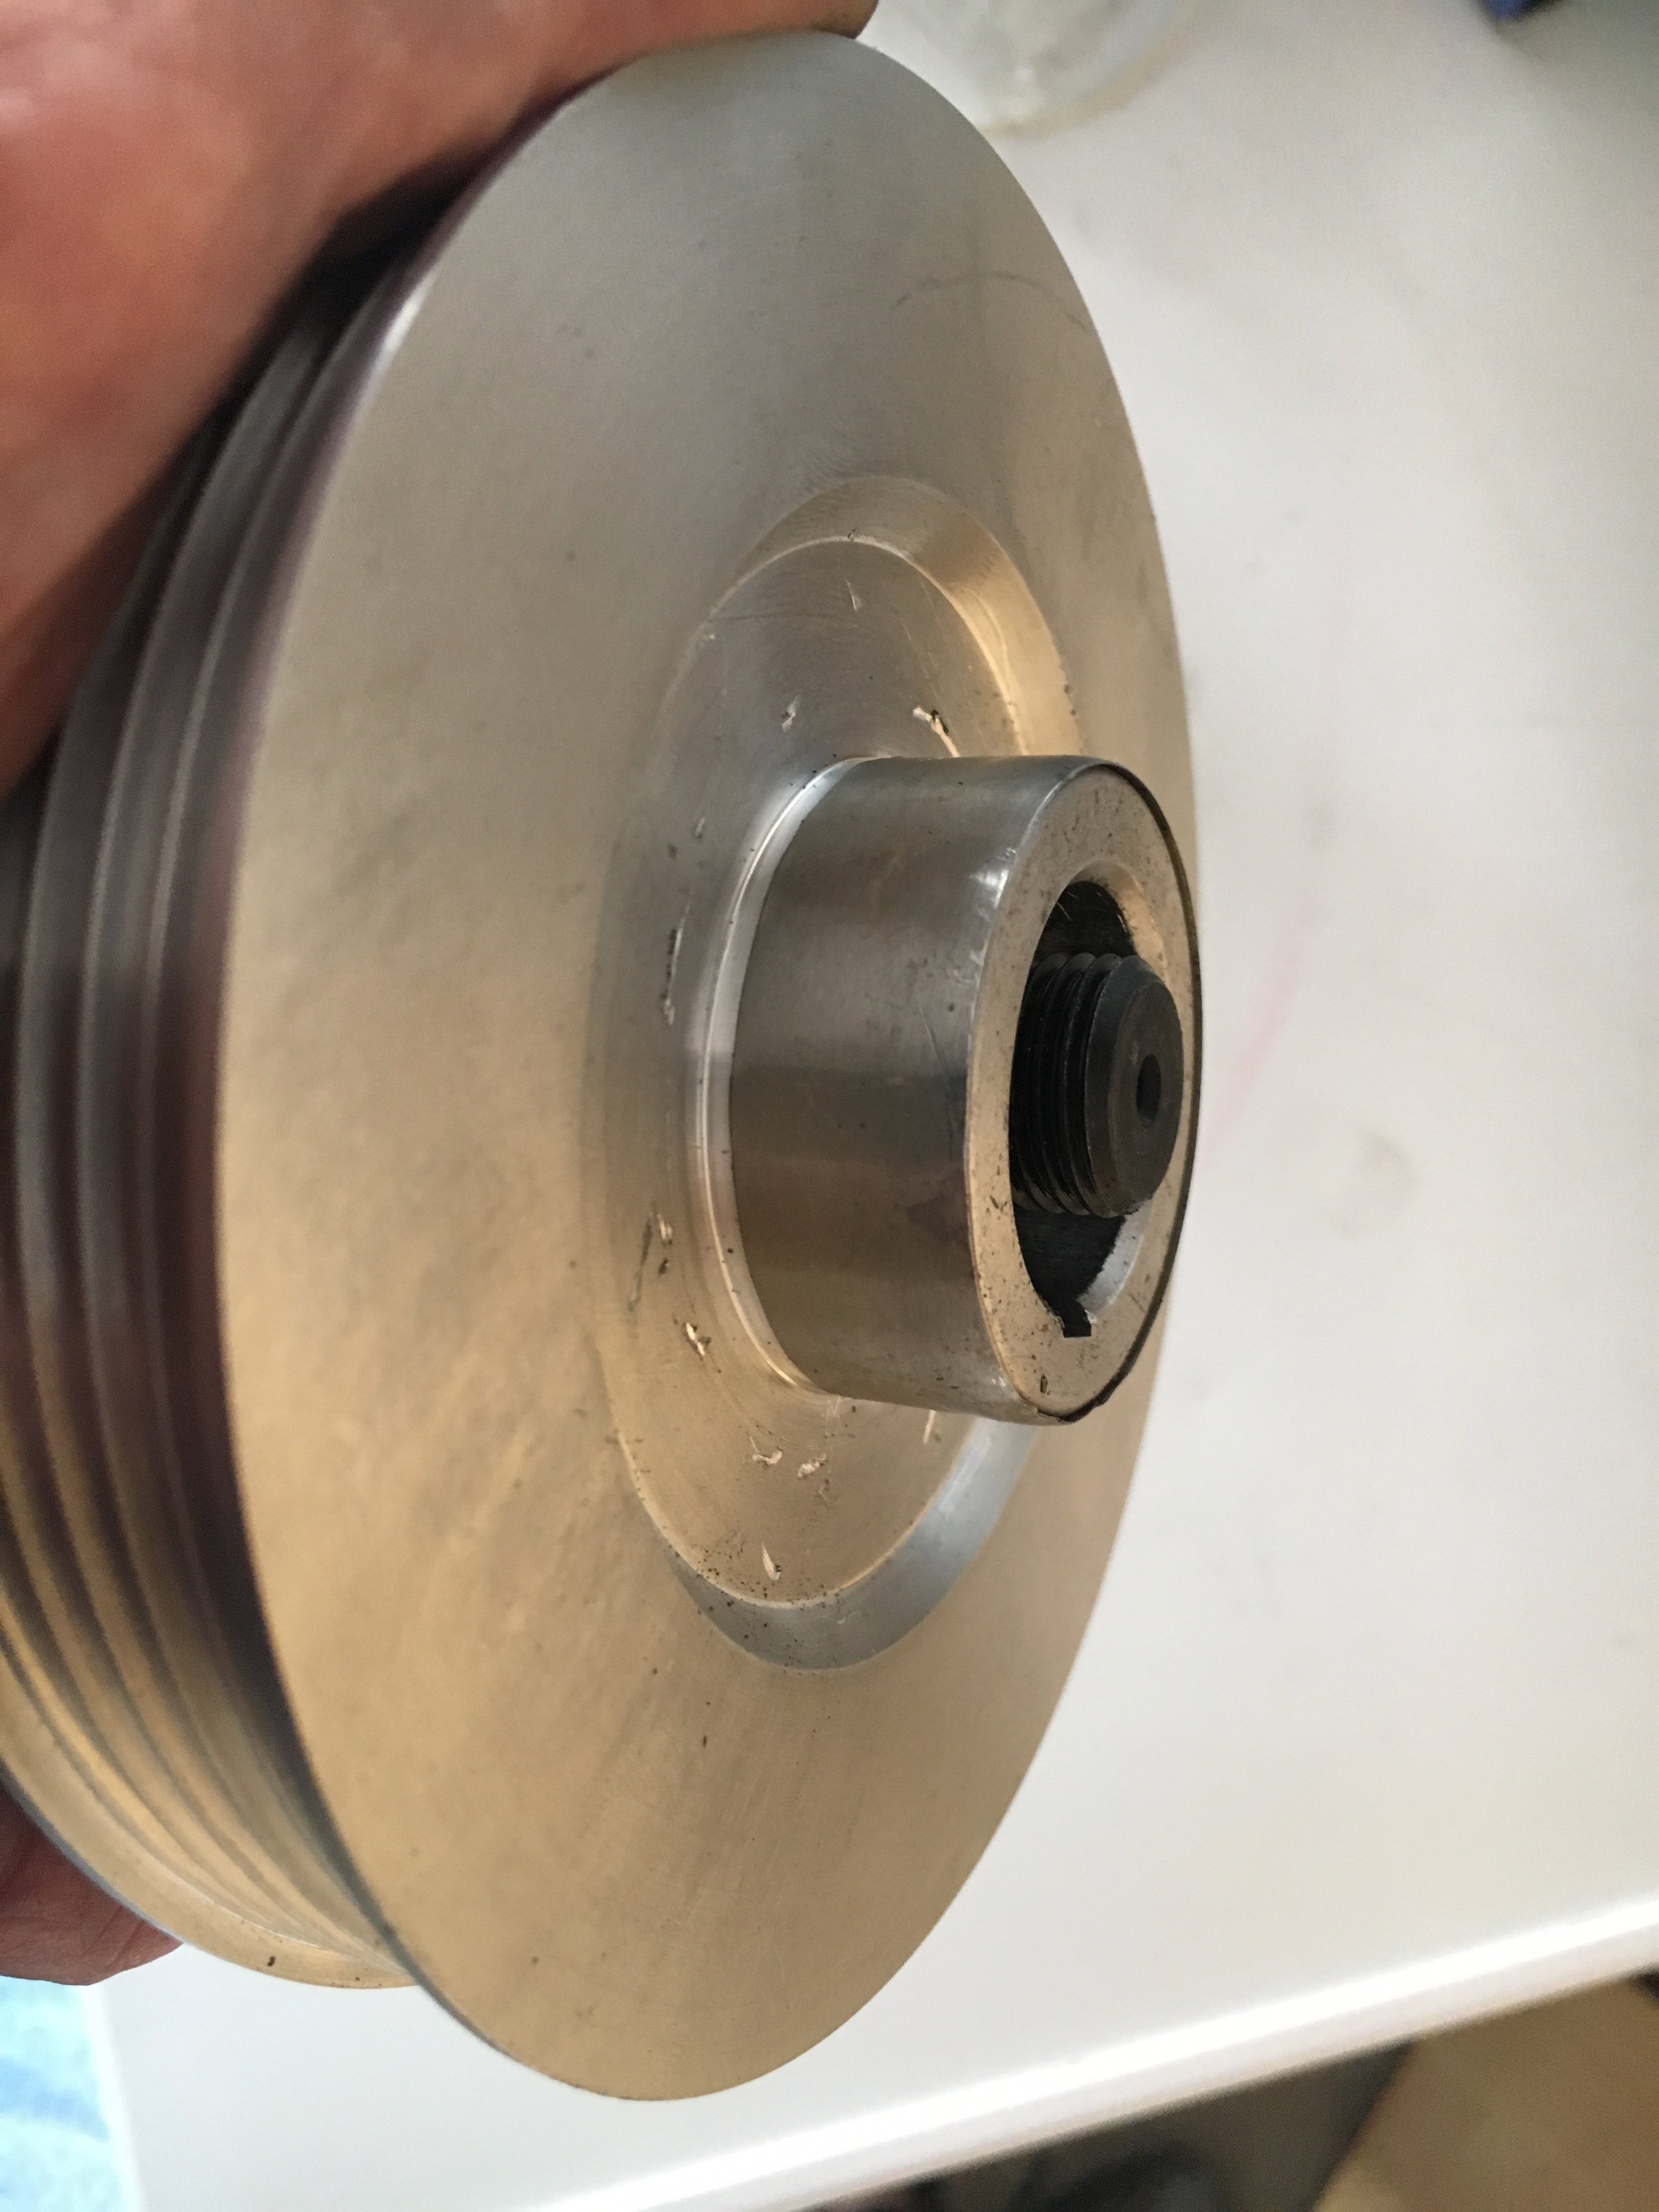
Install the water pump pulley in place of the OEM V-belt pulley.
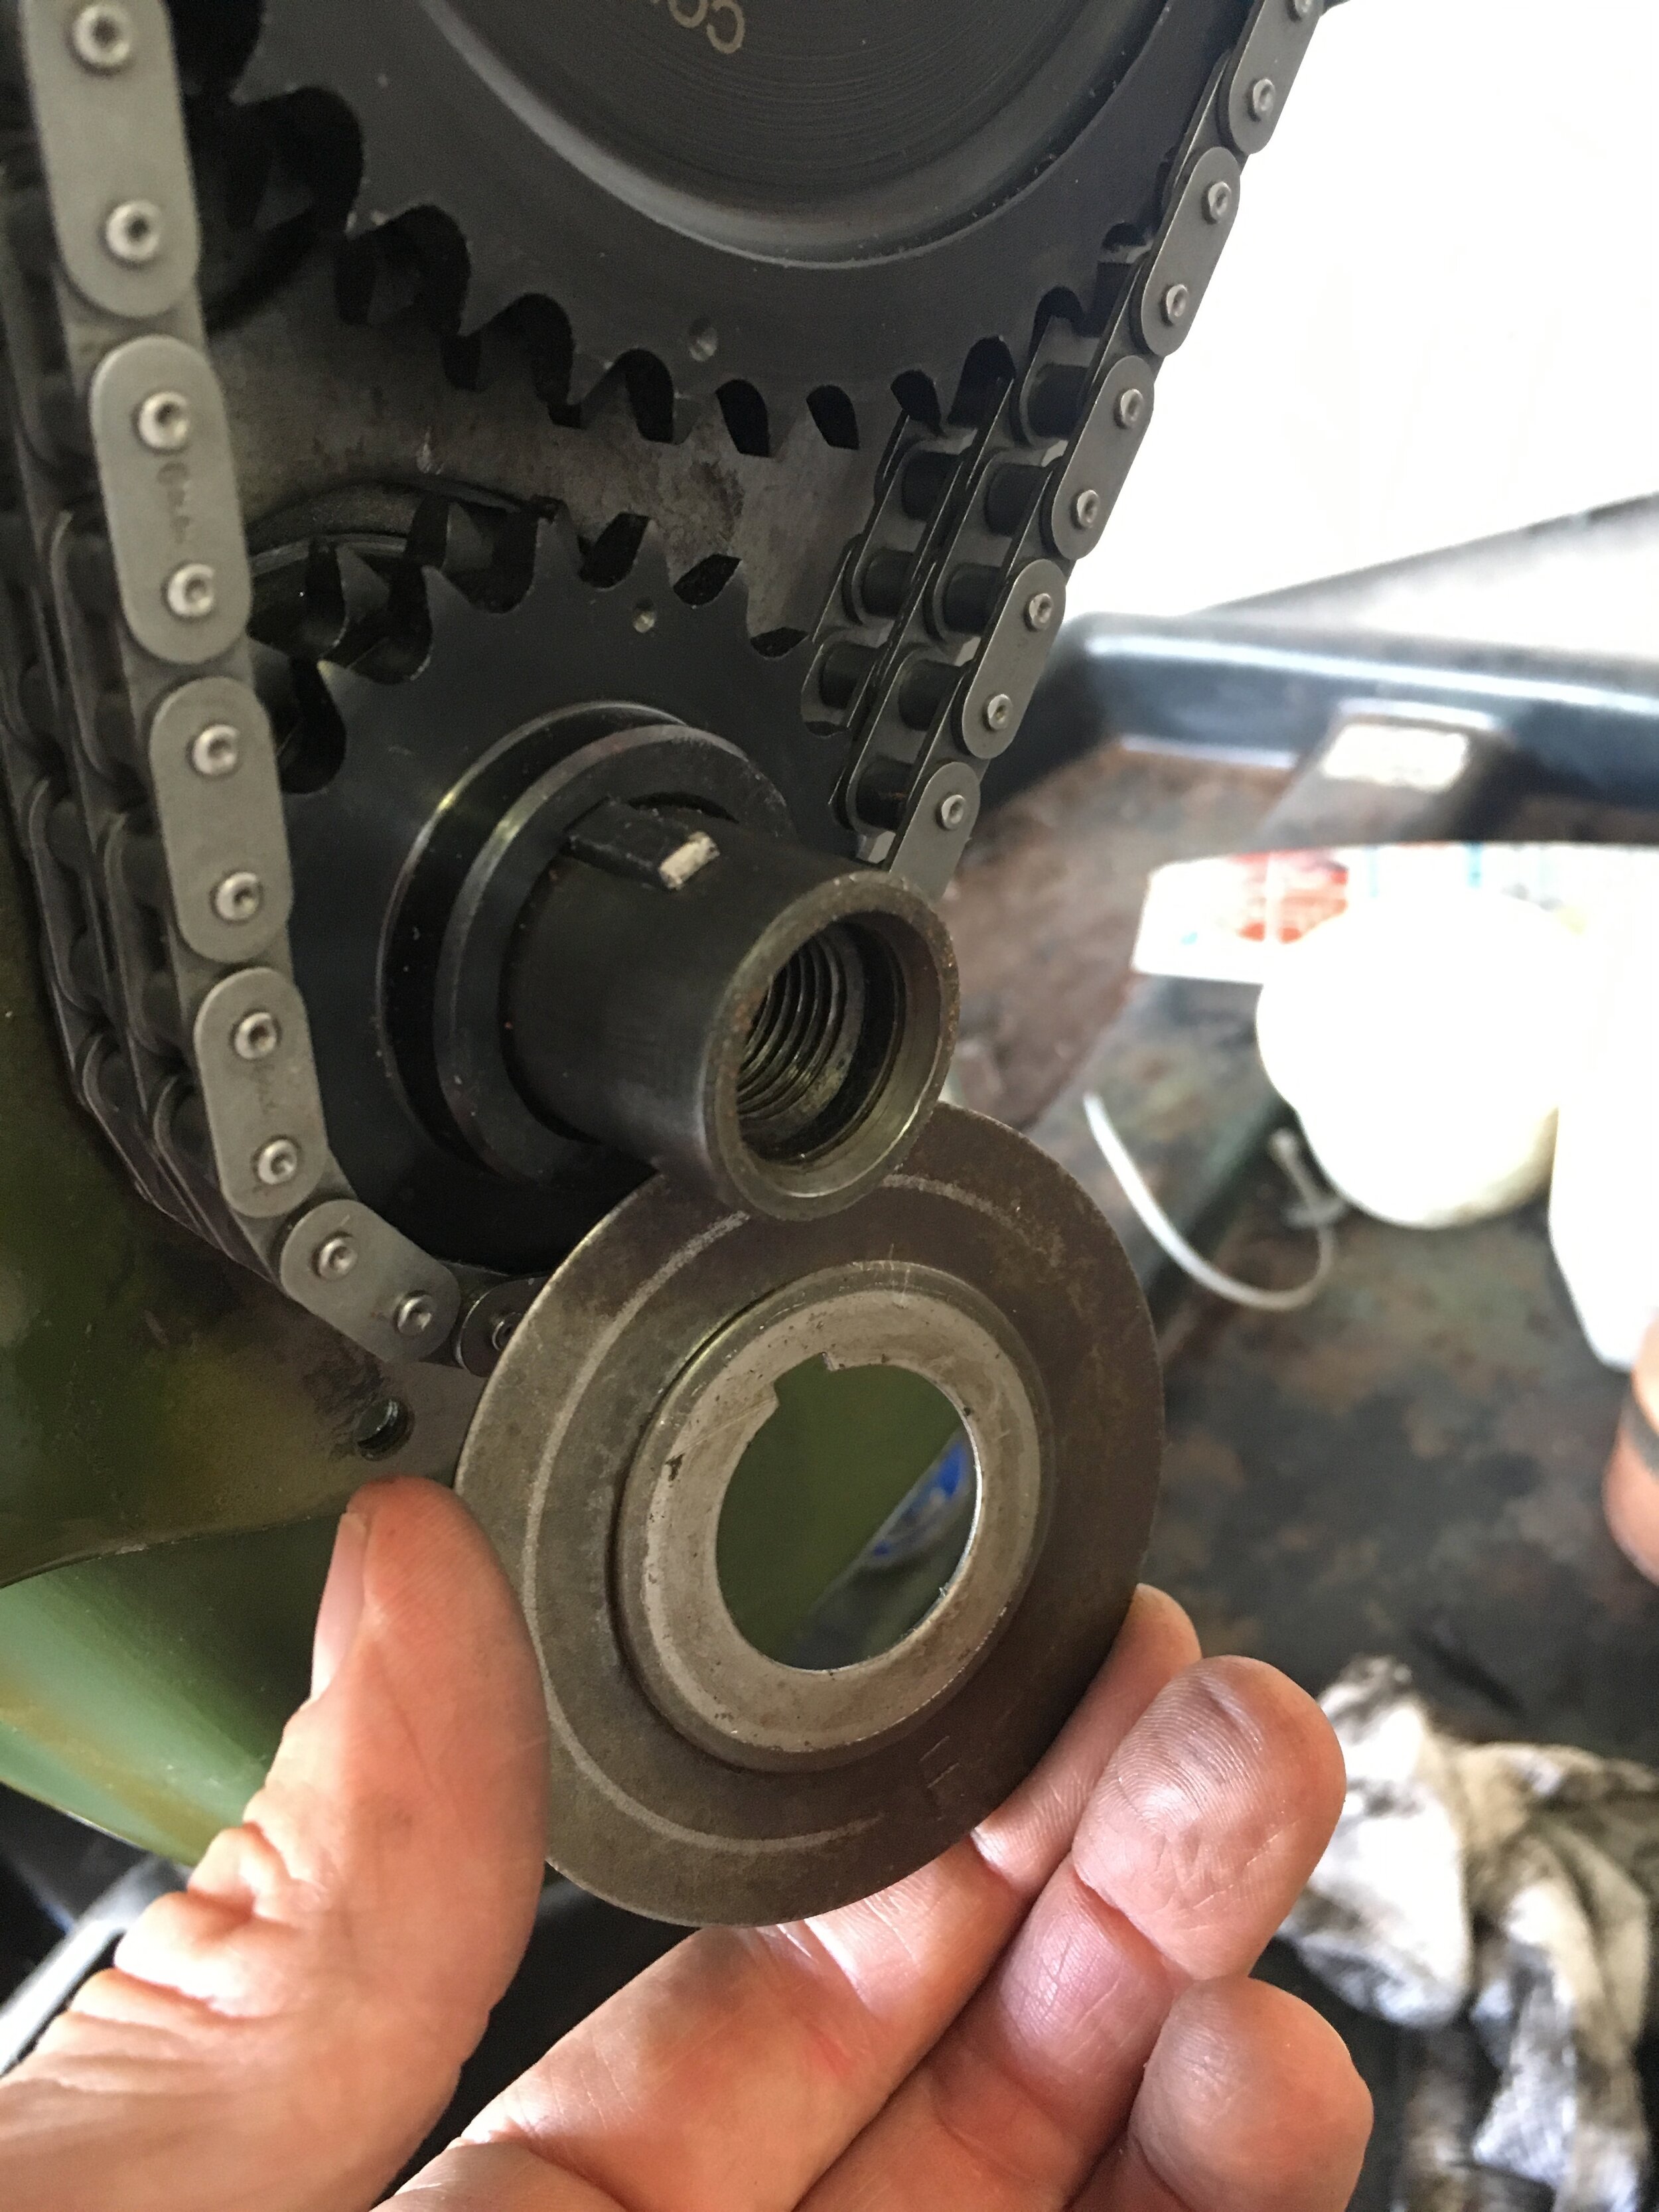
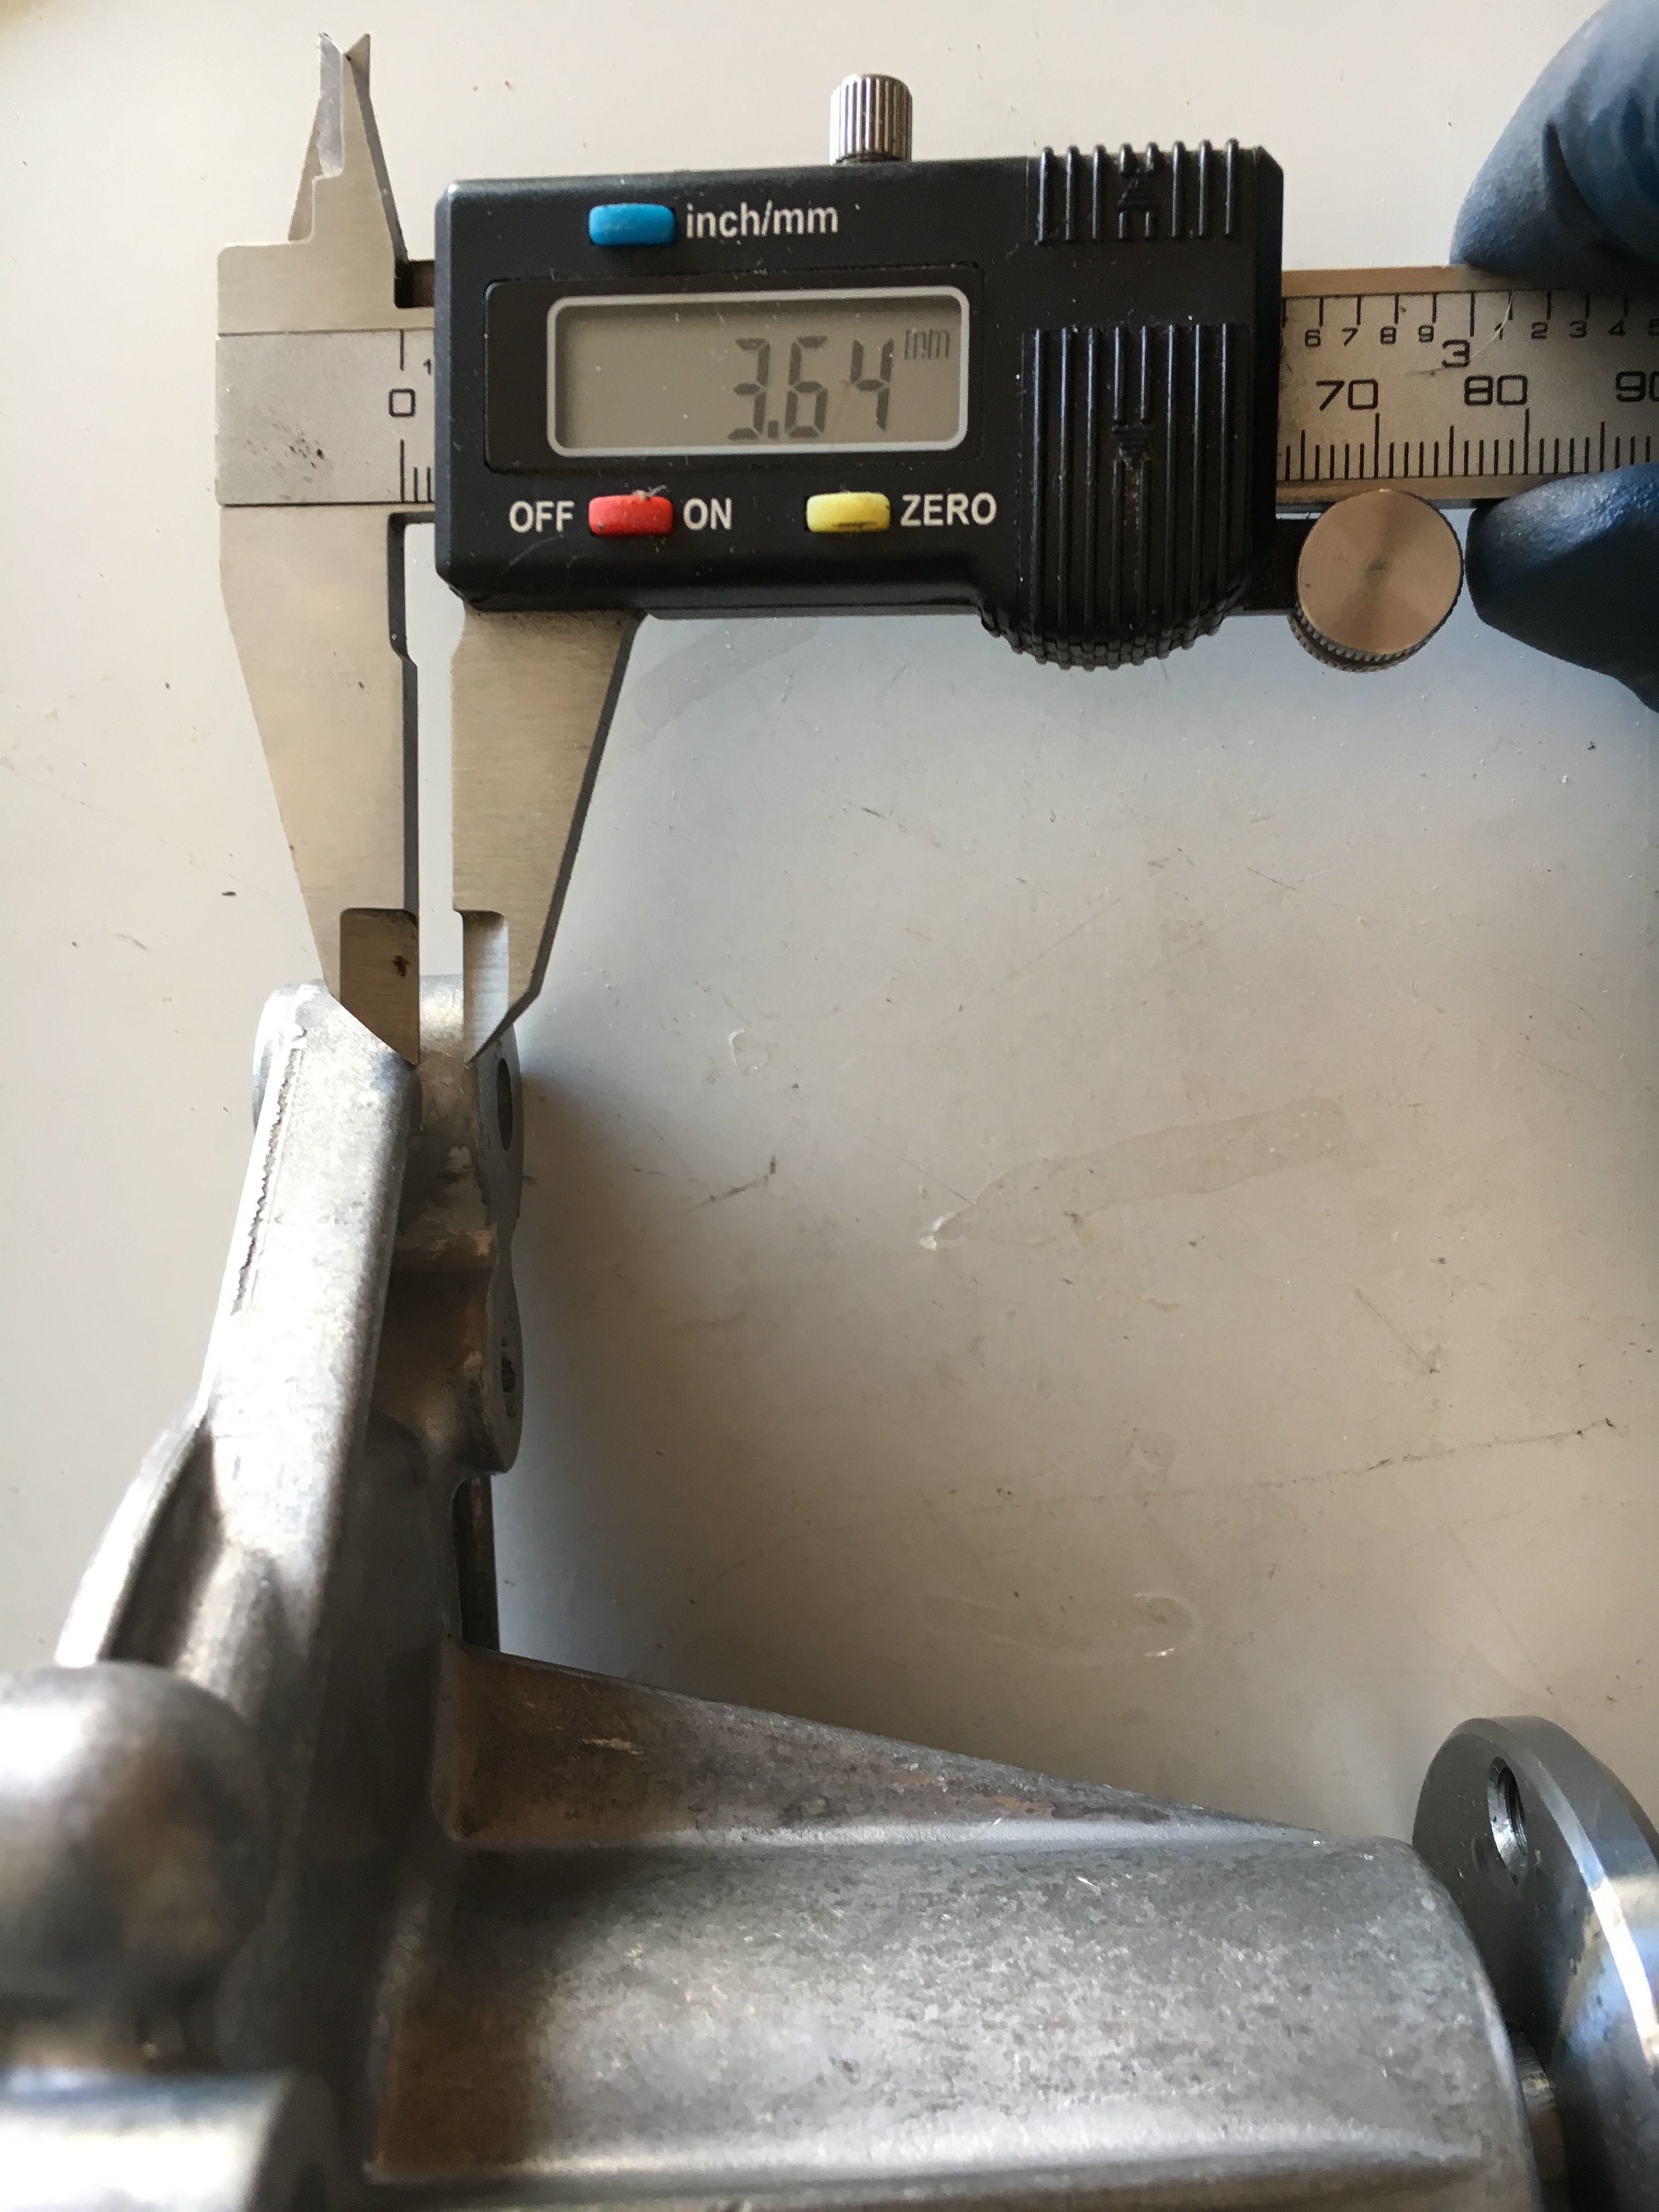
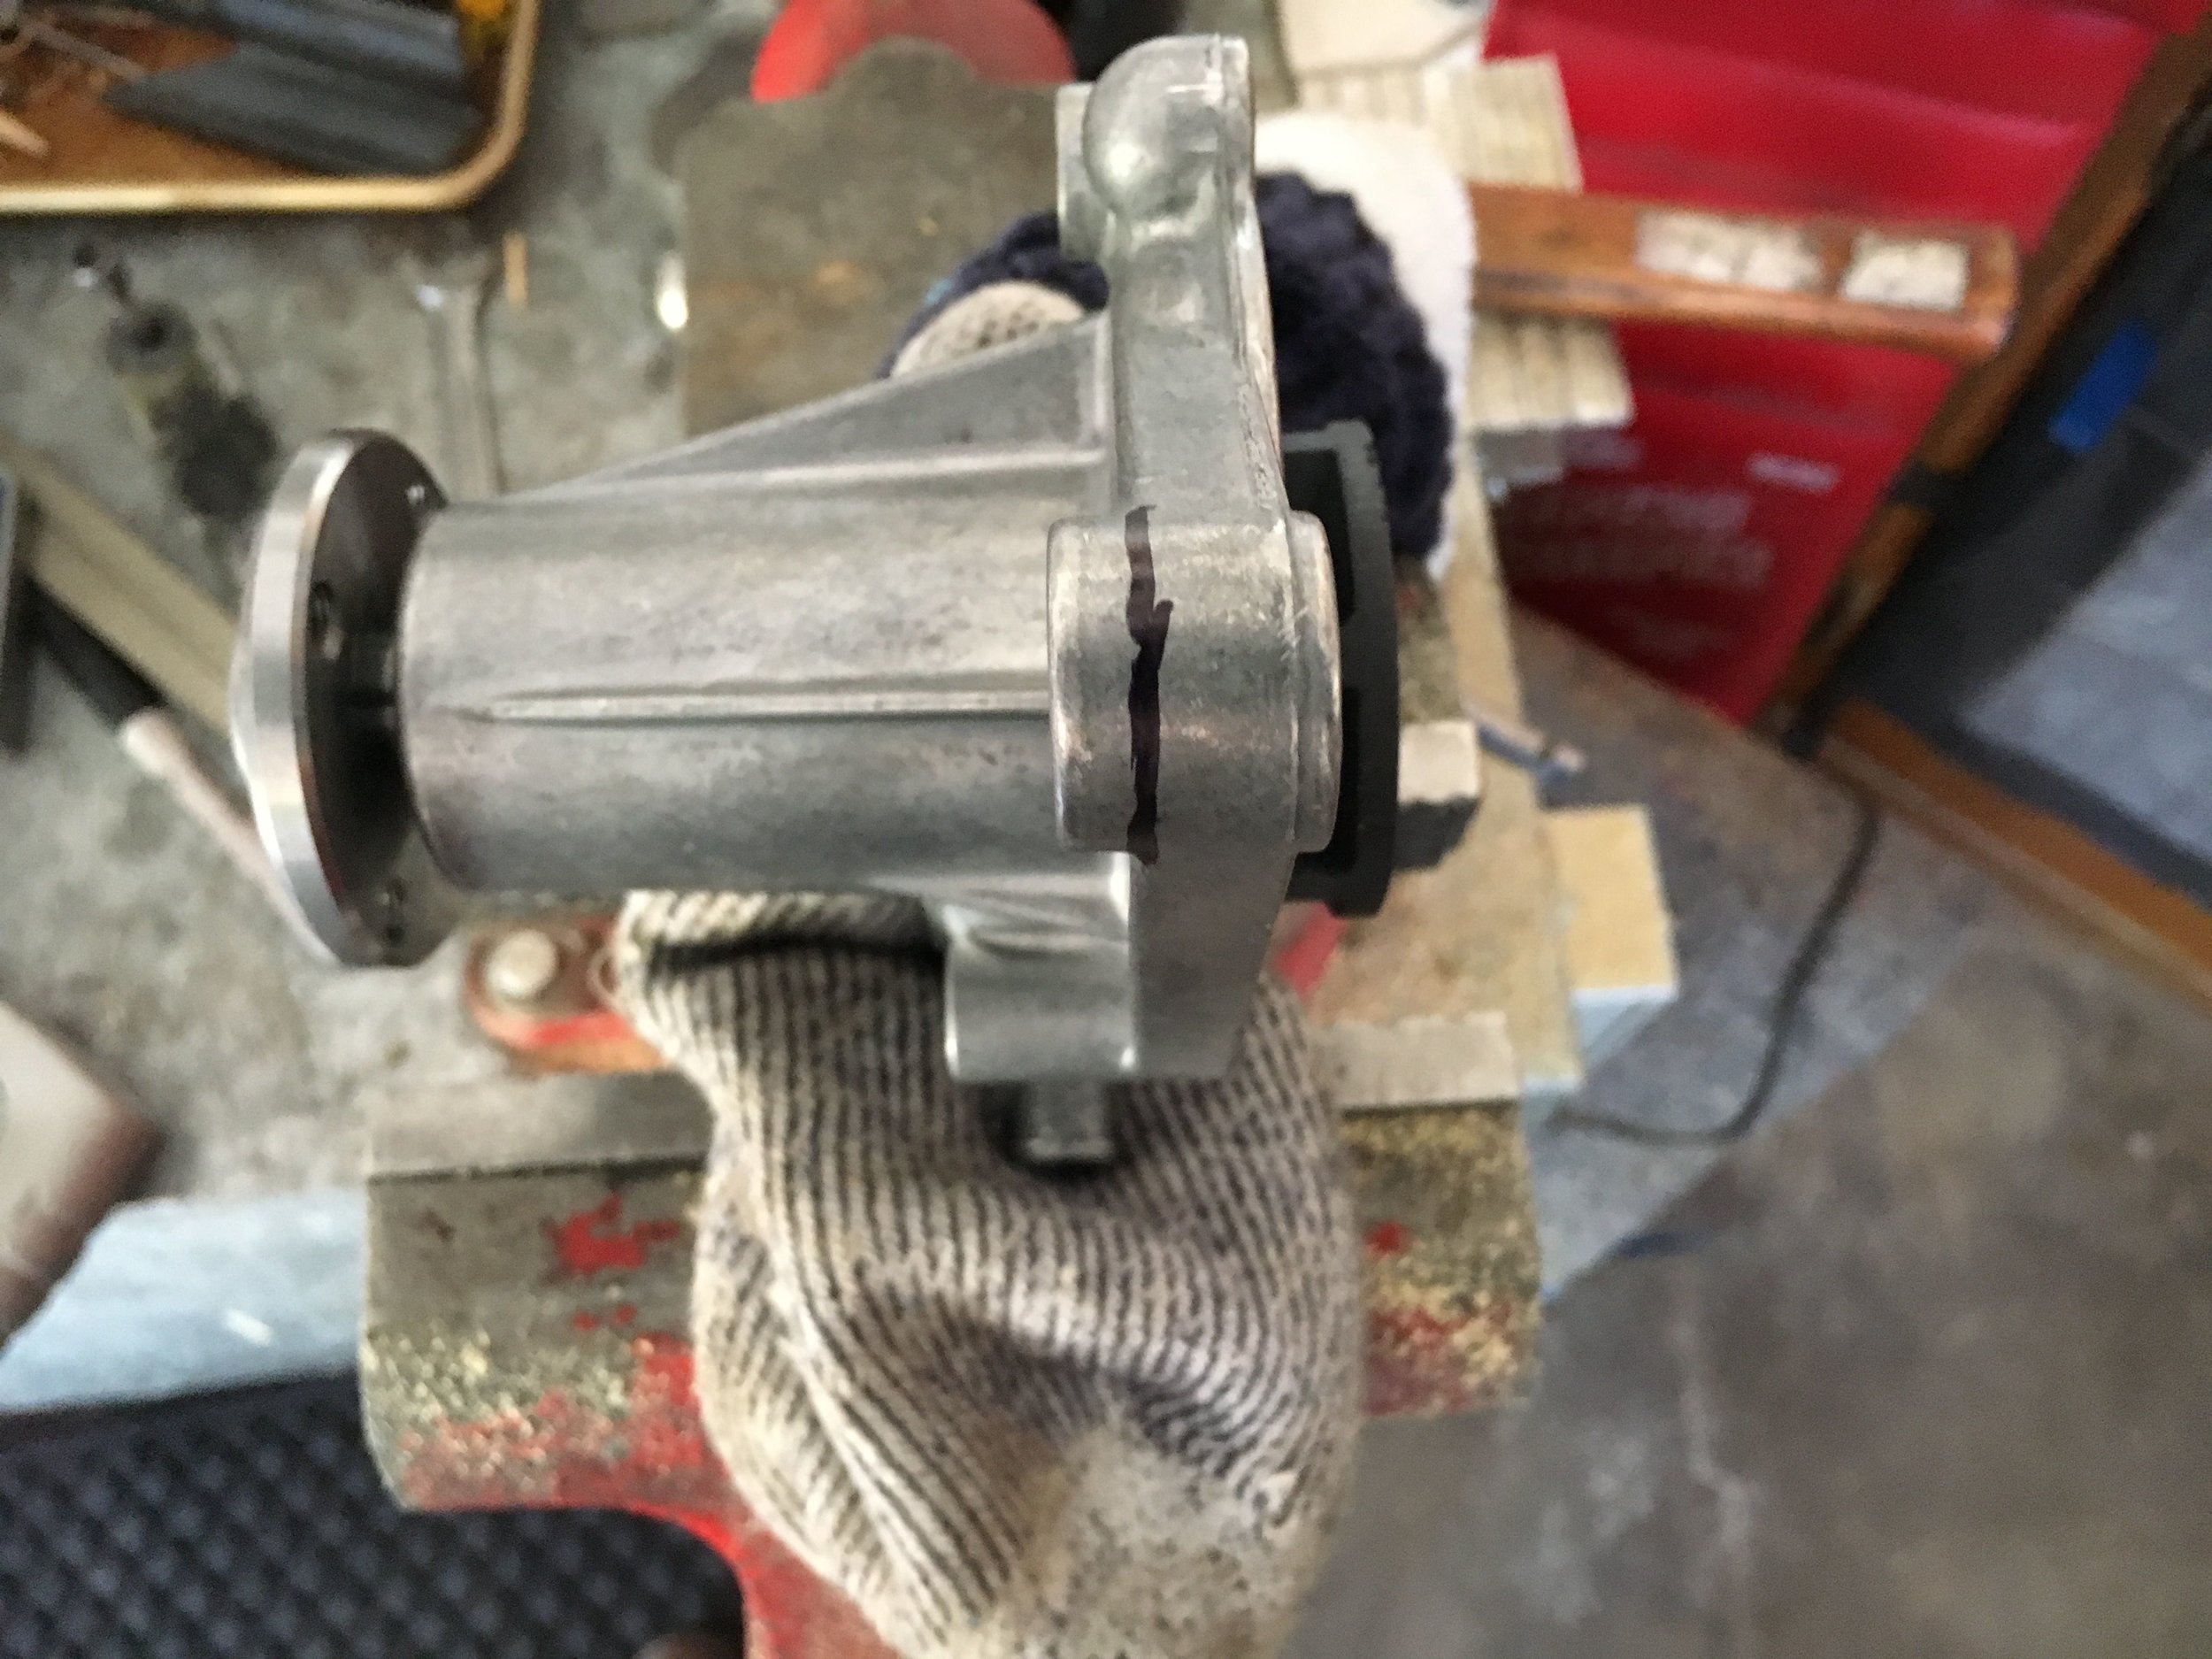
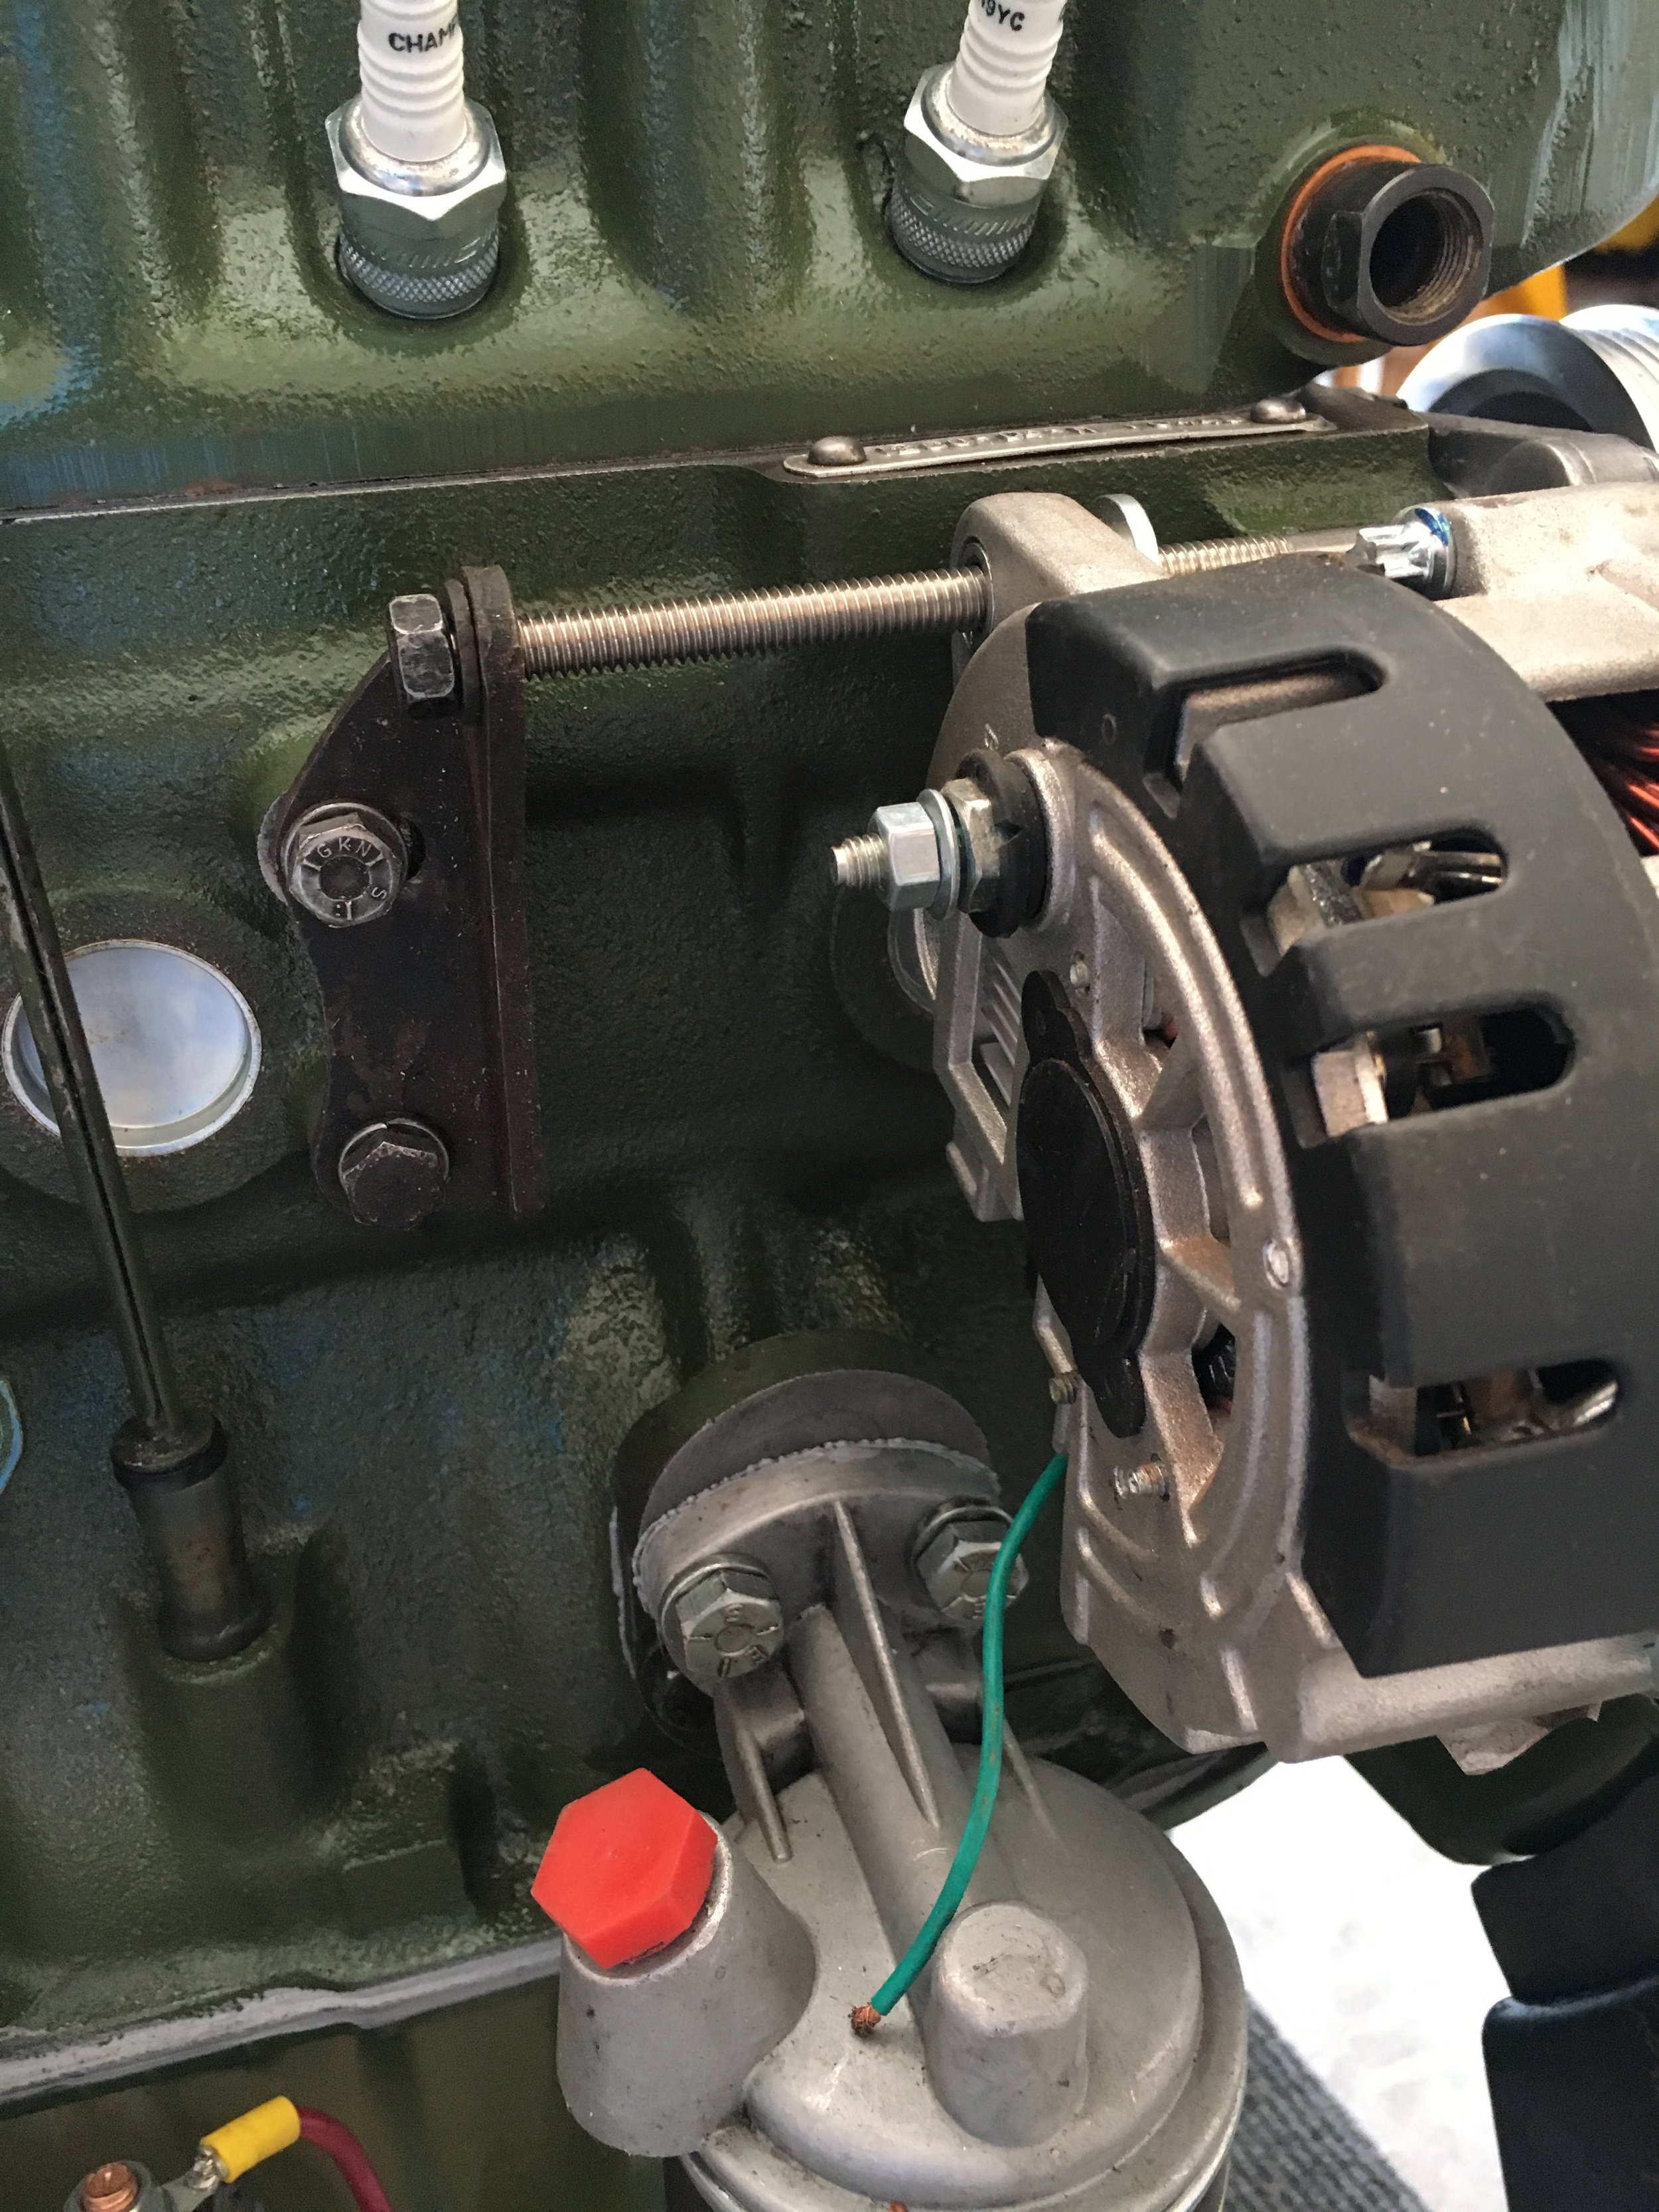
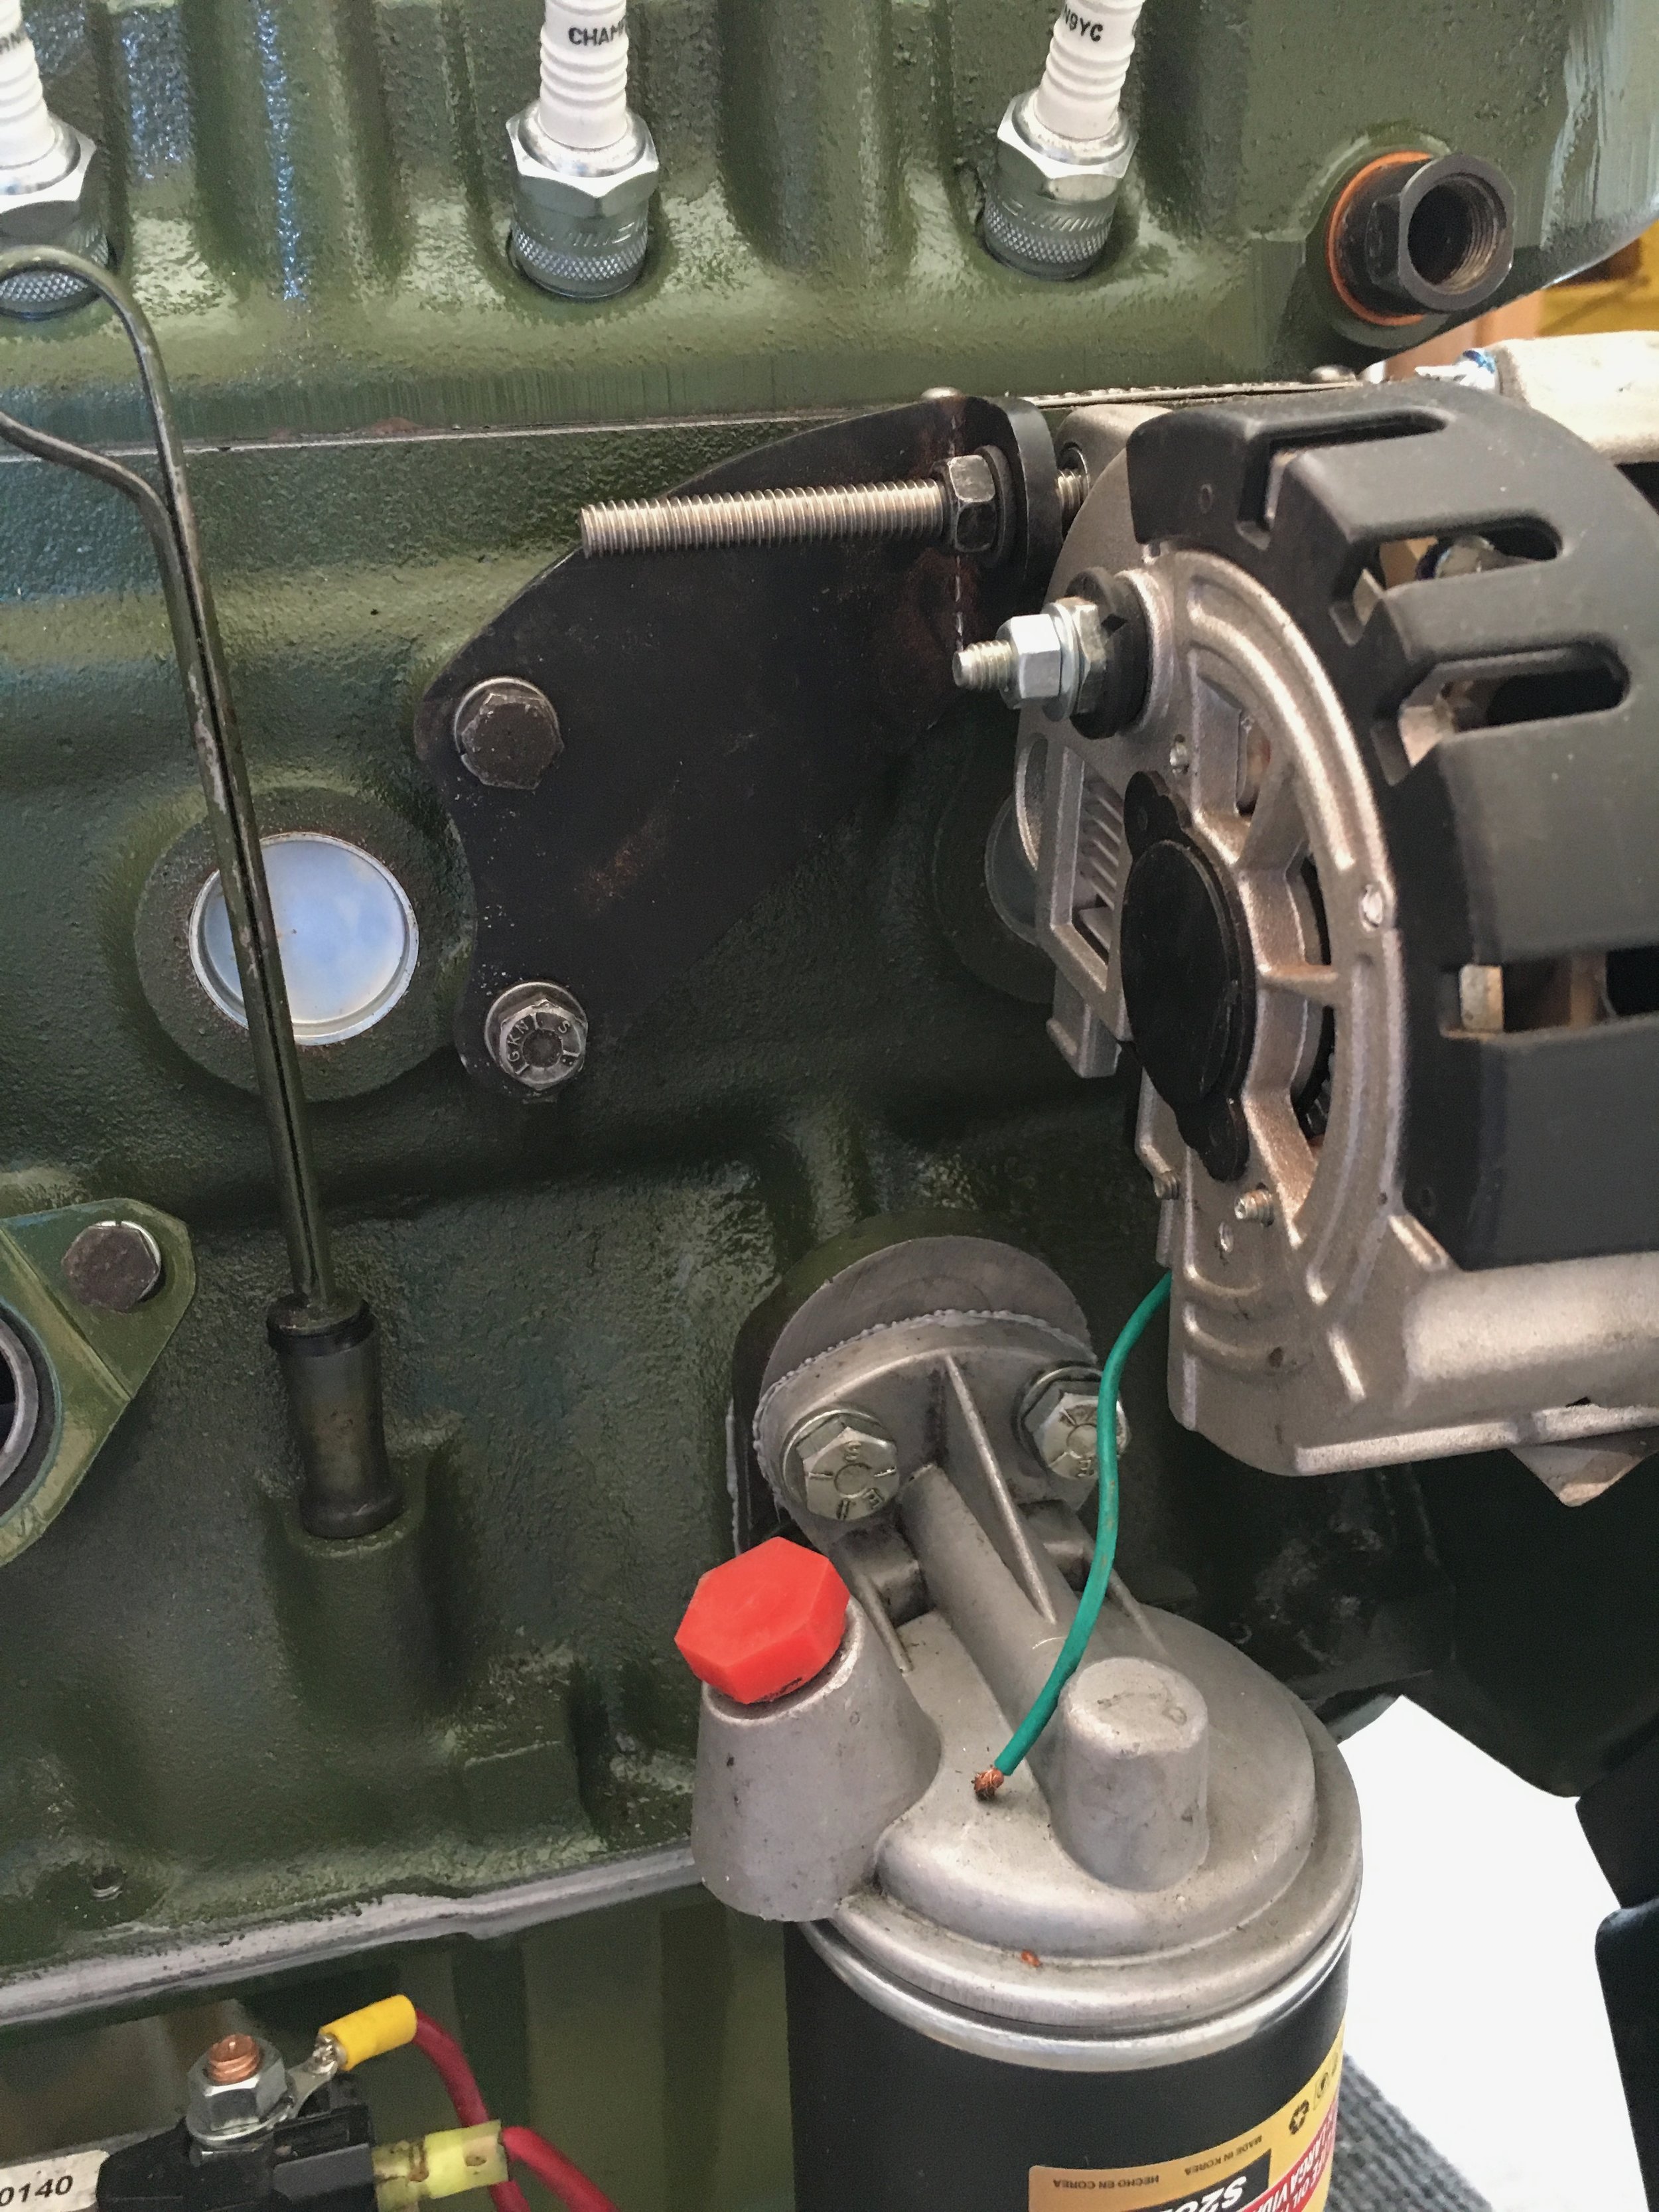
Step 4 - Modify the water pump ear (some alternators).
In order to afford sufficient fore-aft adjustment to align the alternator pulley with the new crankshaft and water pump pulleys, you may need to shave a small amount off of the water pump’s mounting ear. These photos show you how:

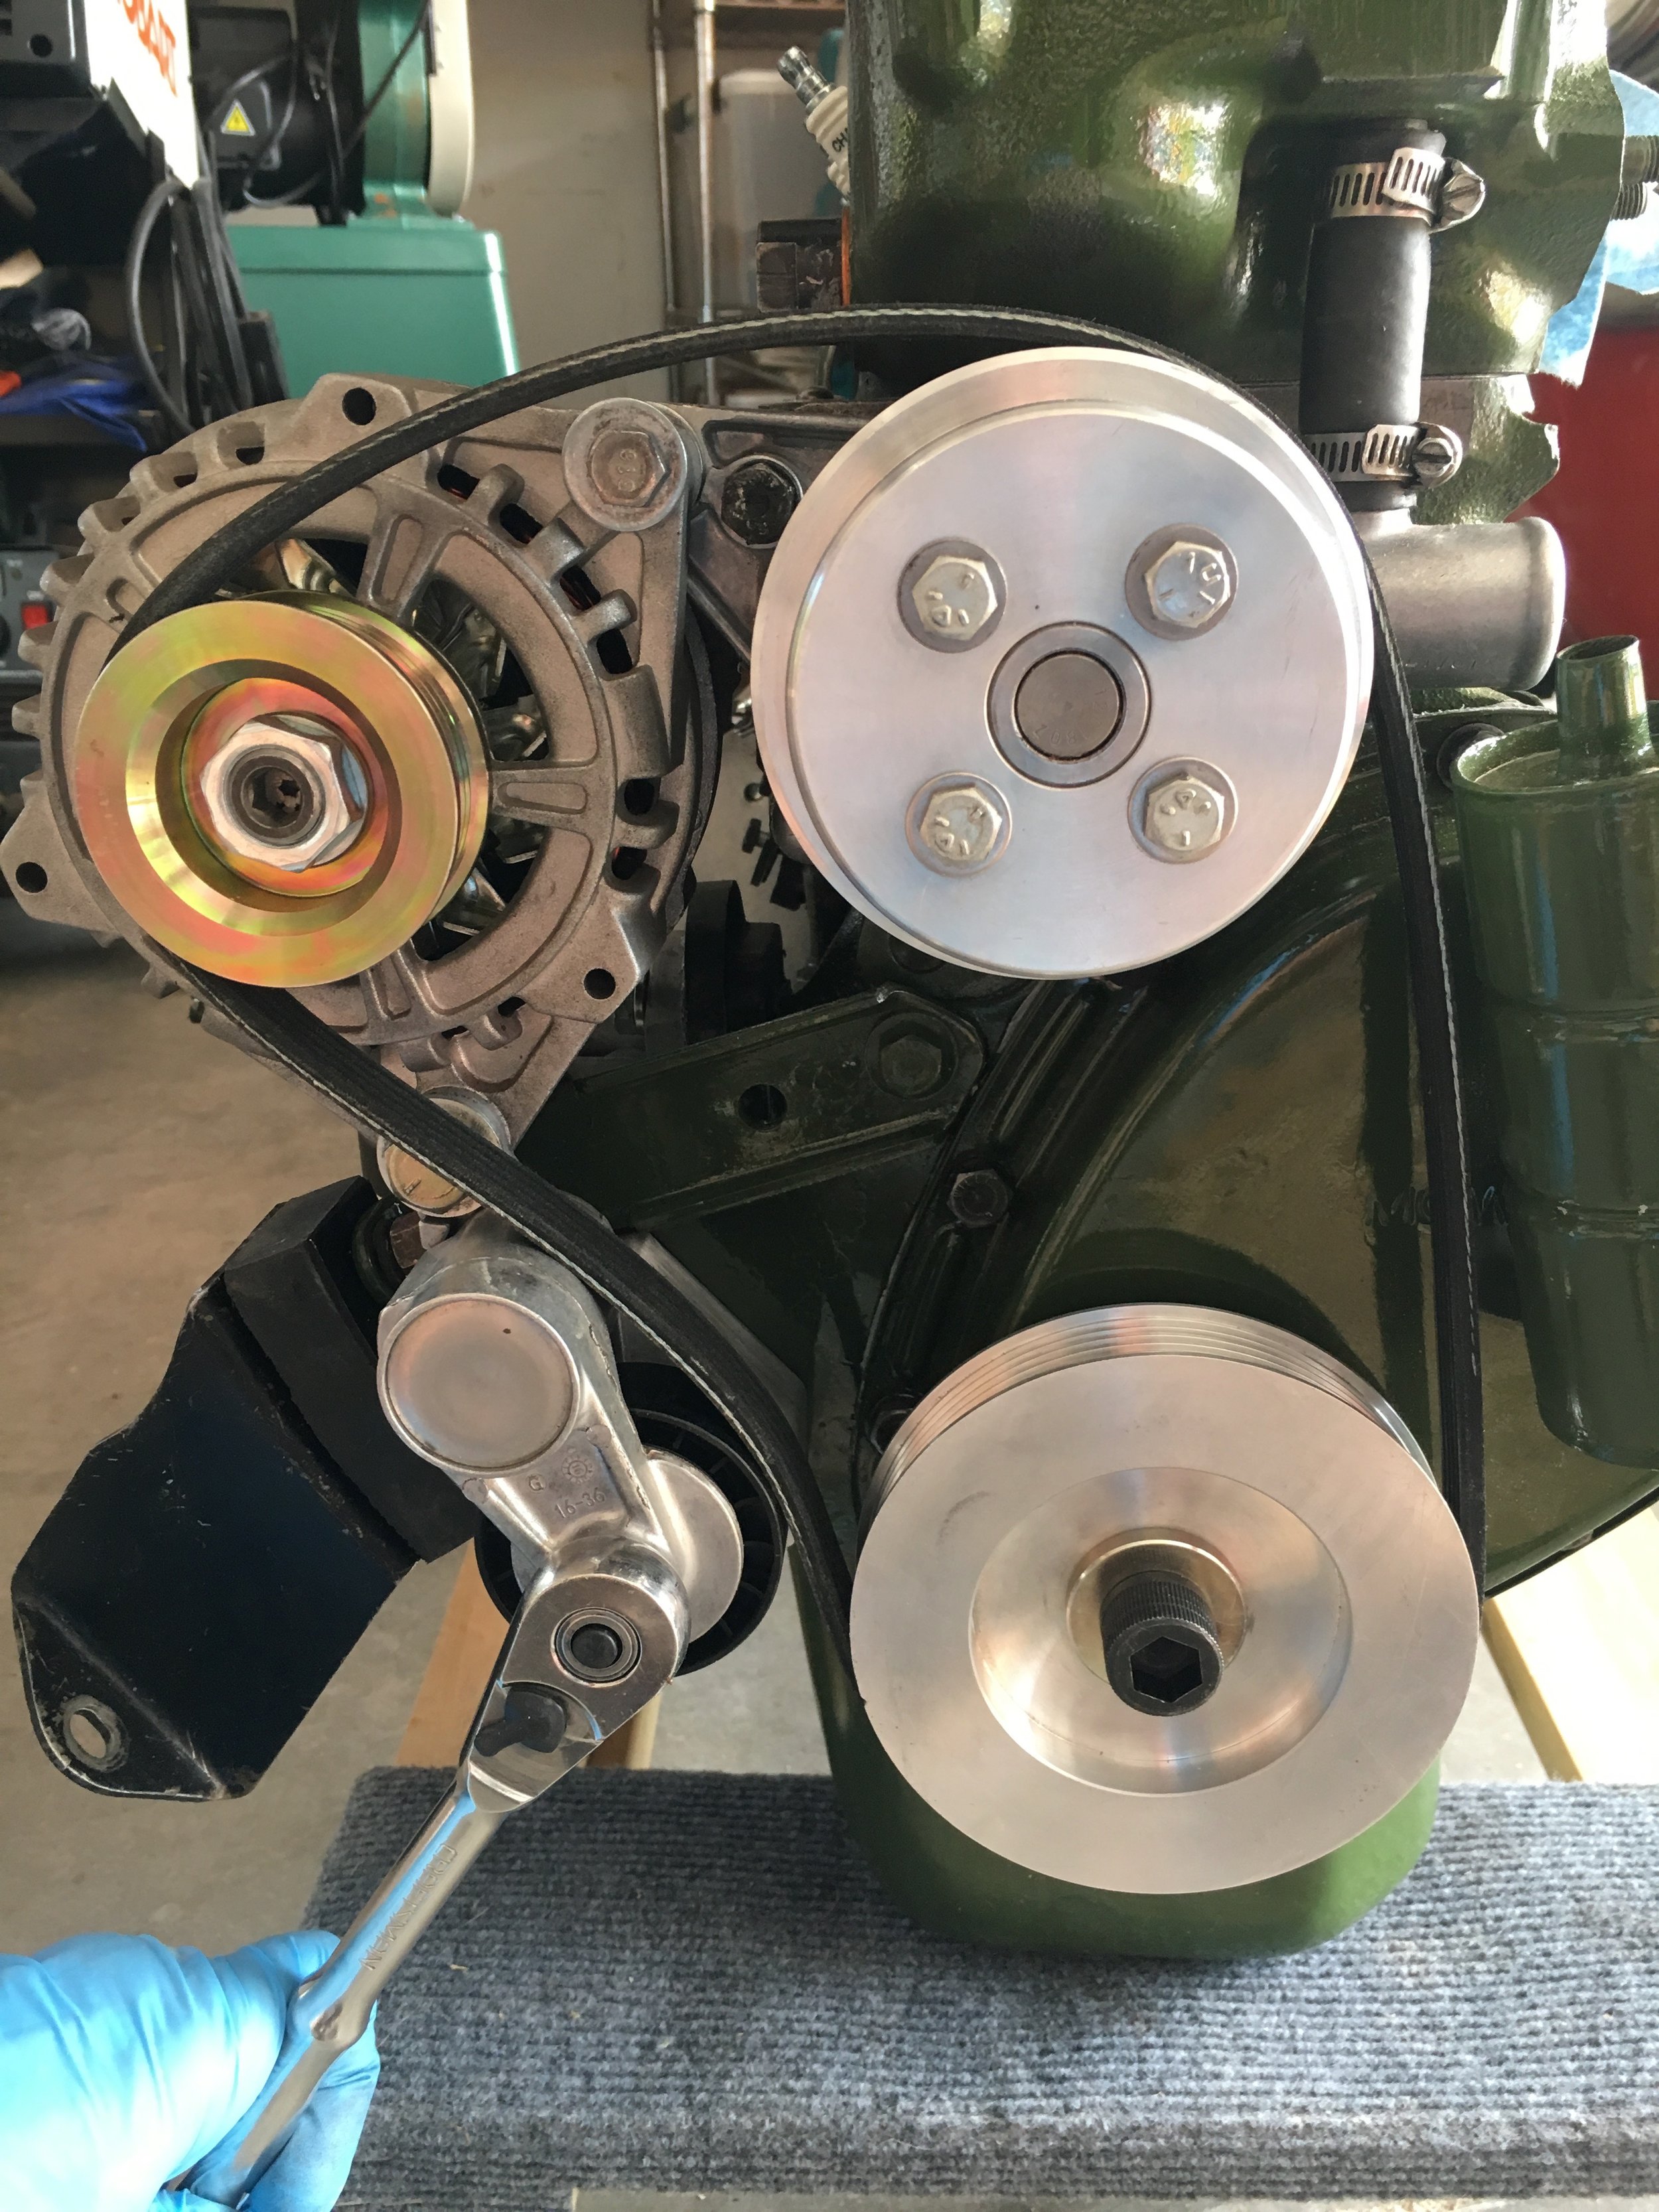
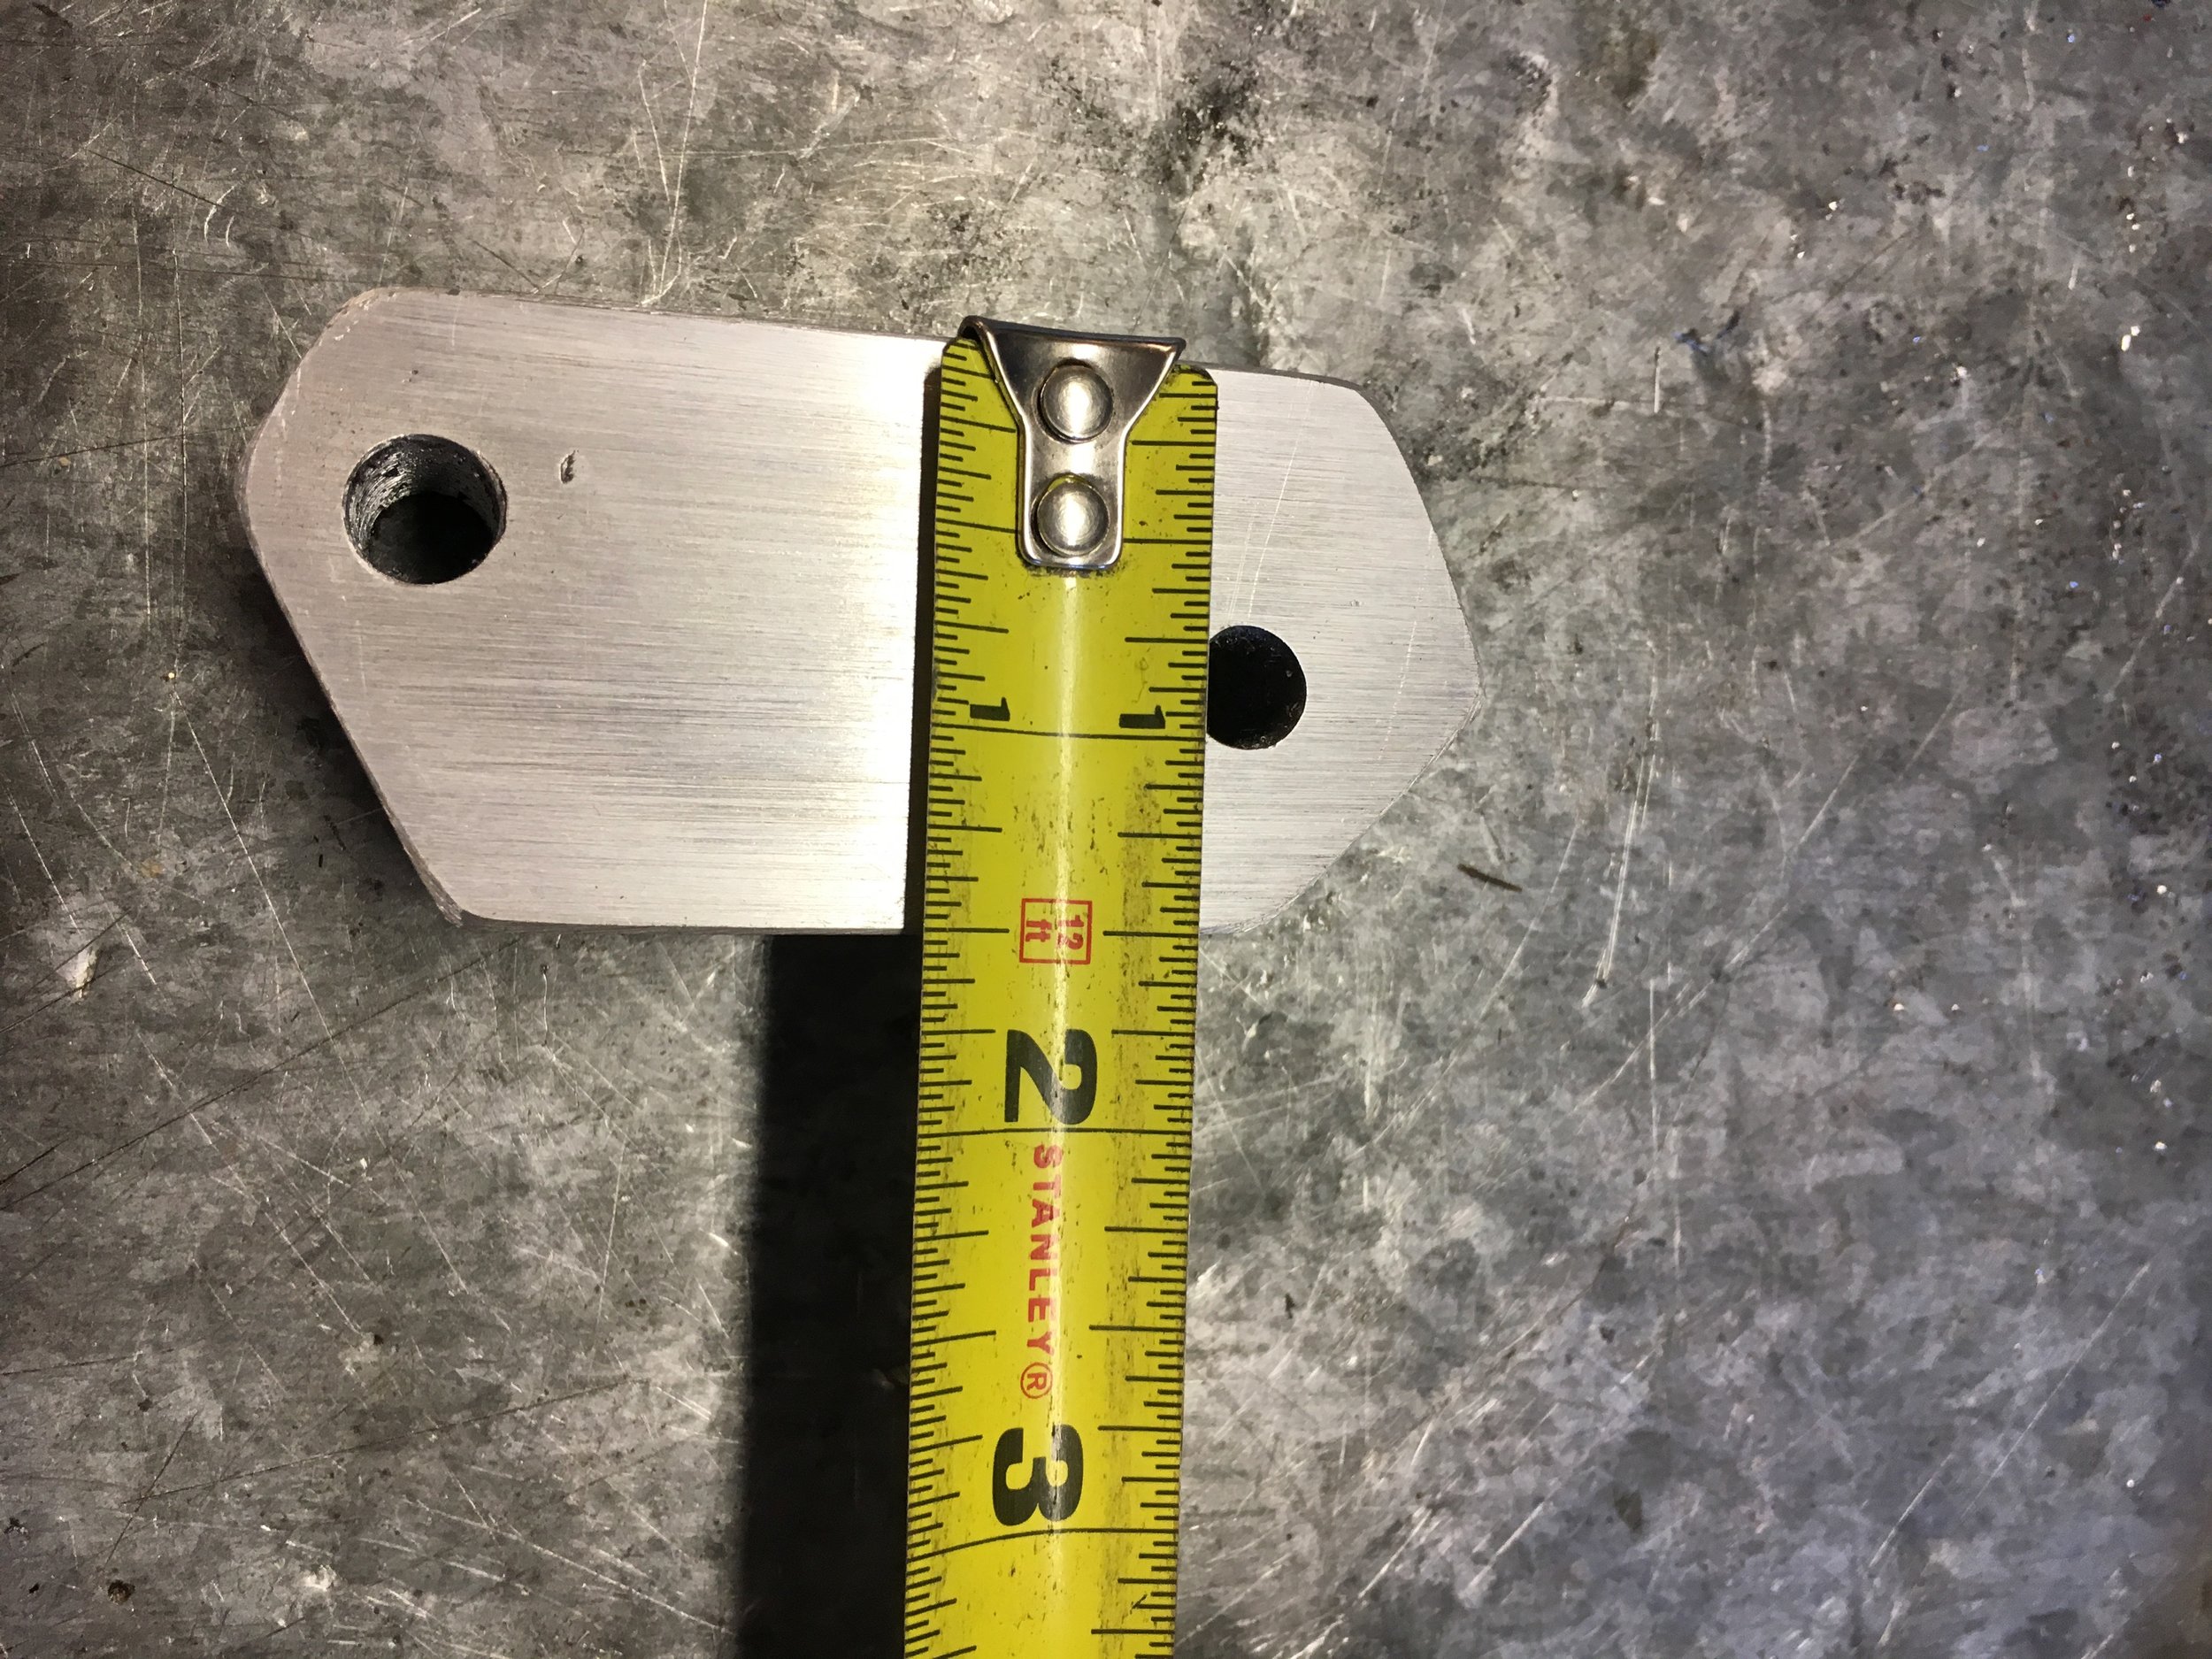
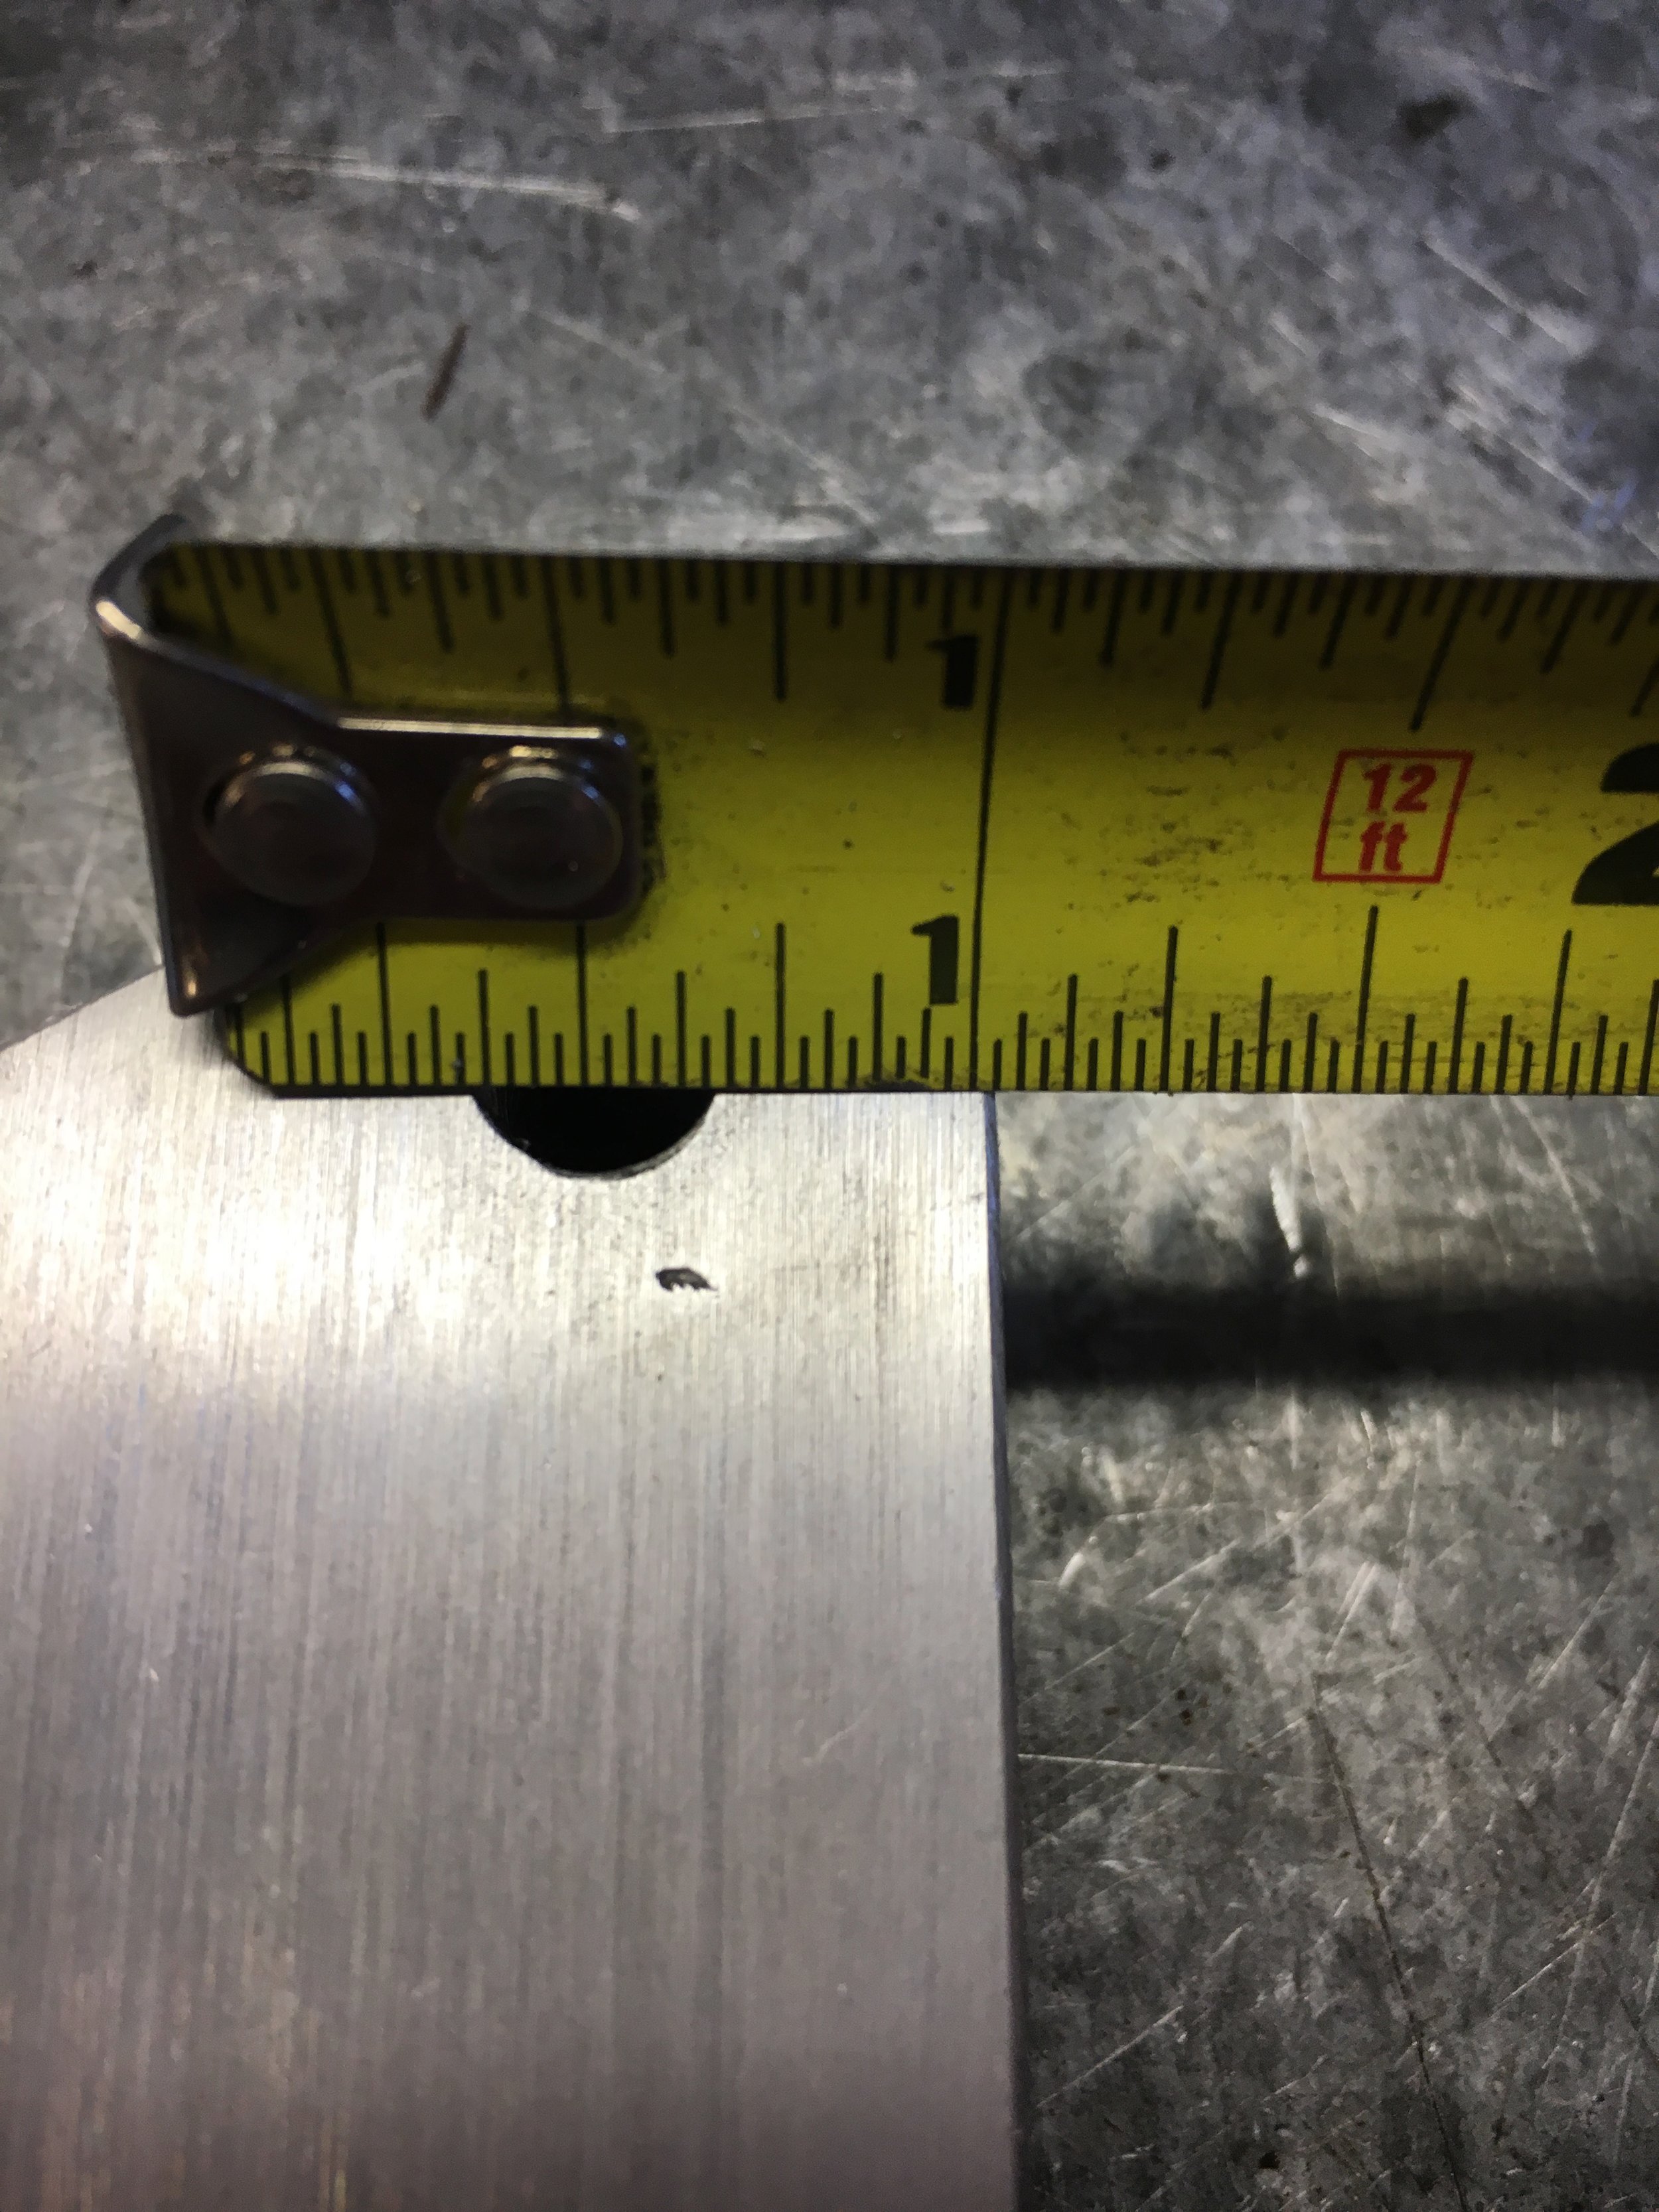
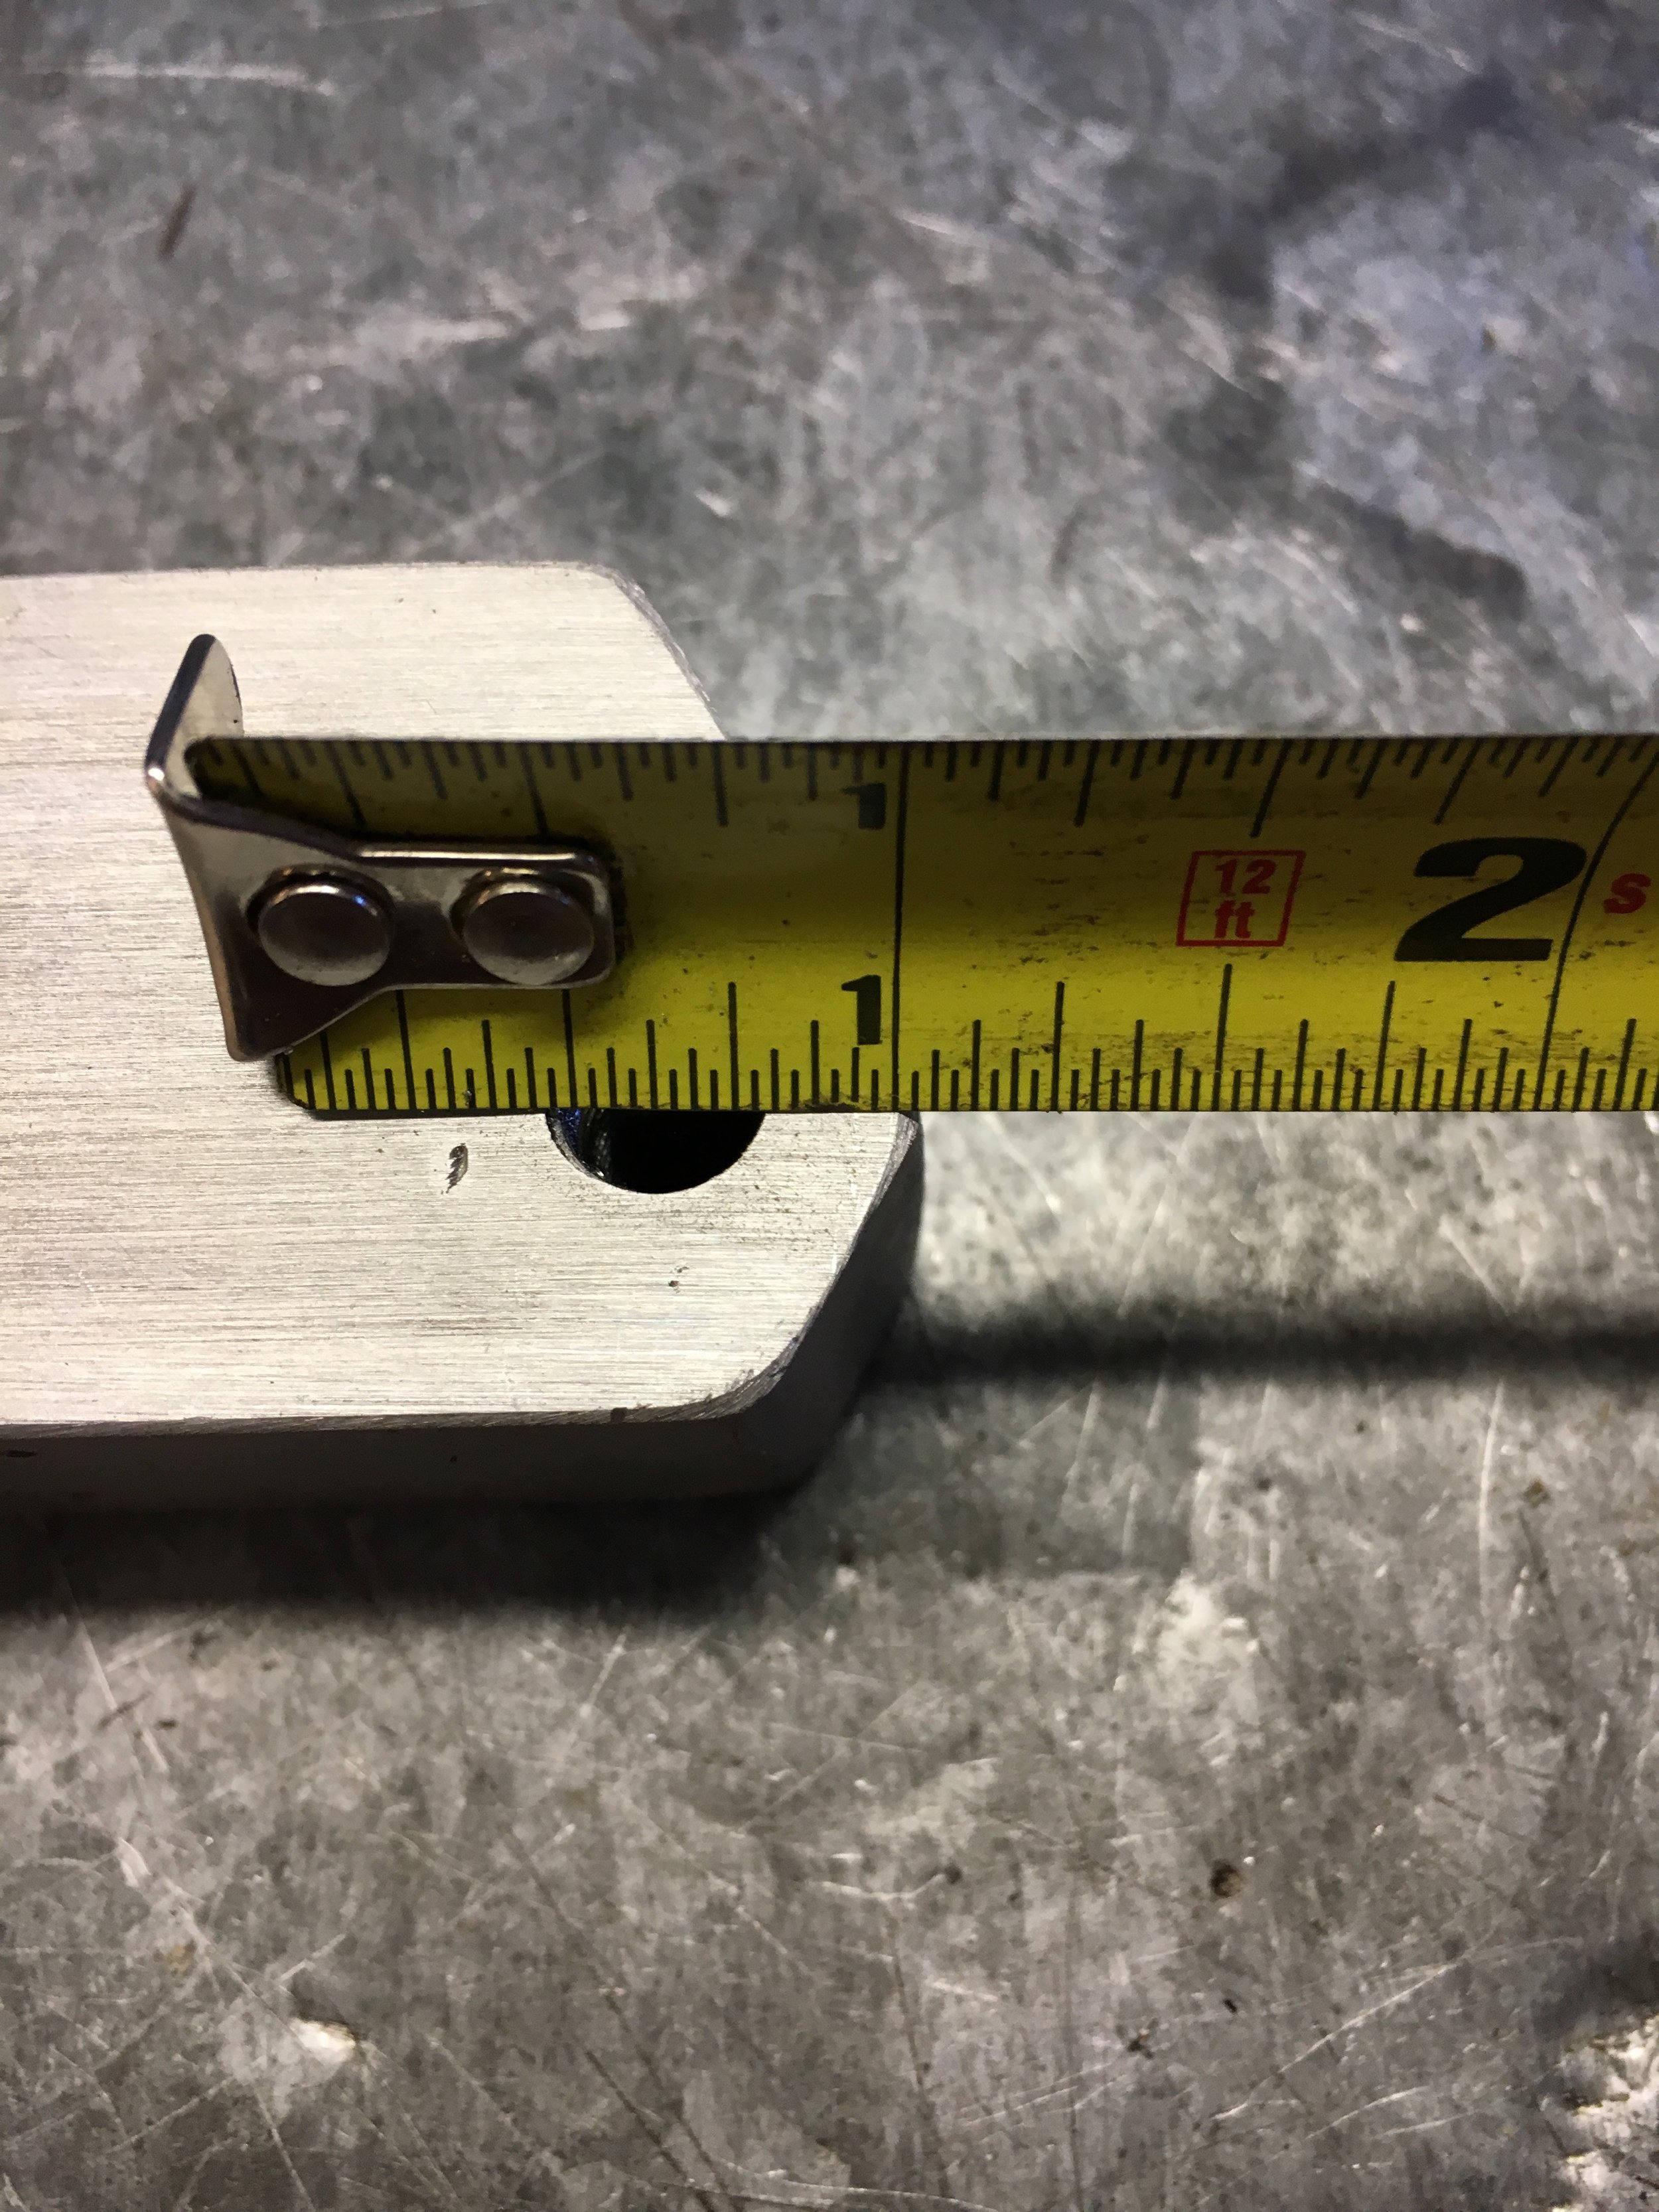
Step 5 - Fabricate & install tensioner mounting block.
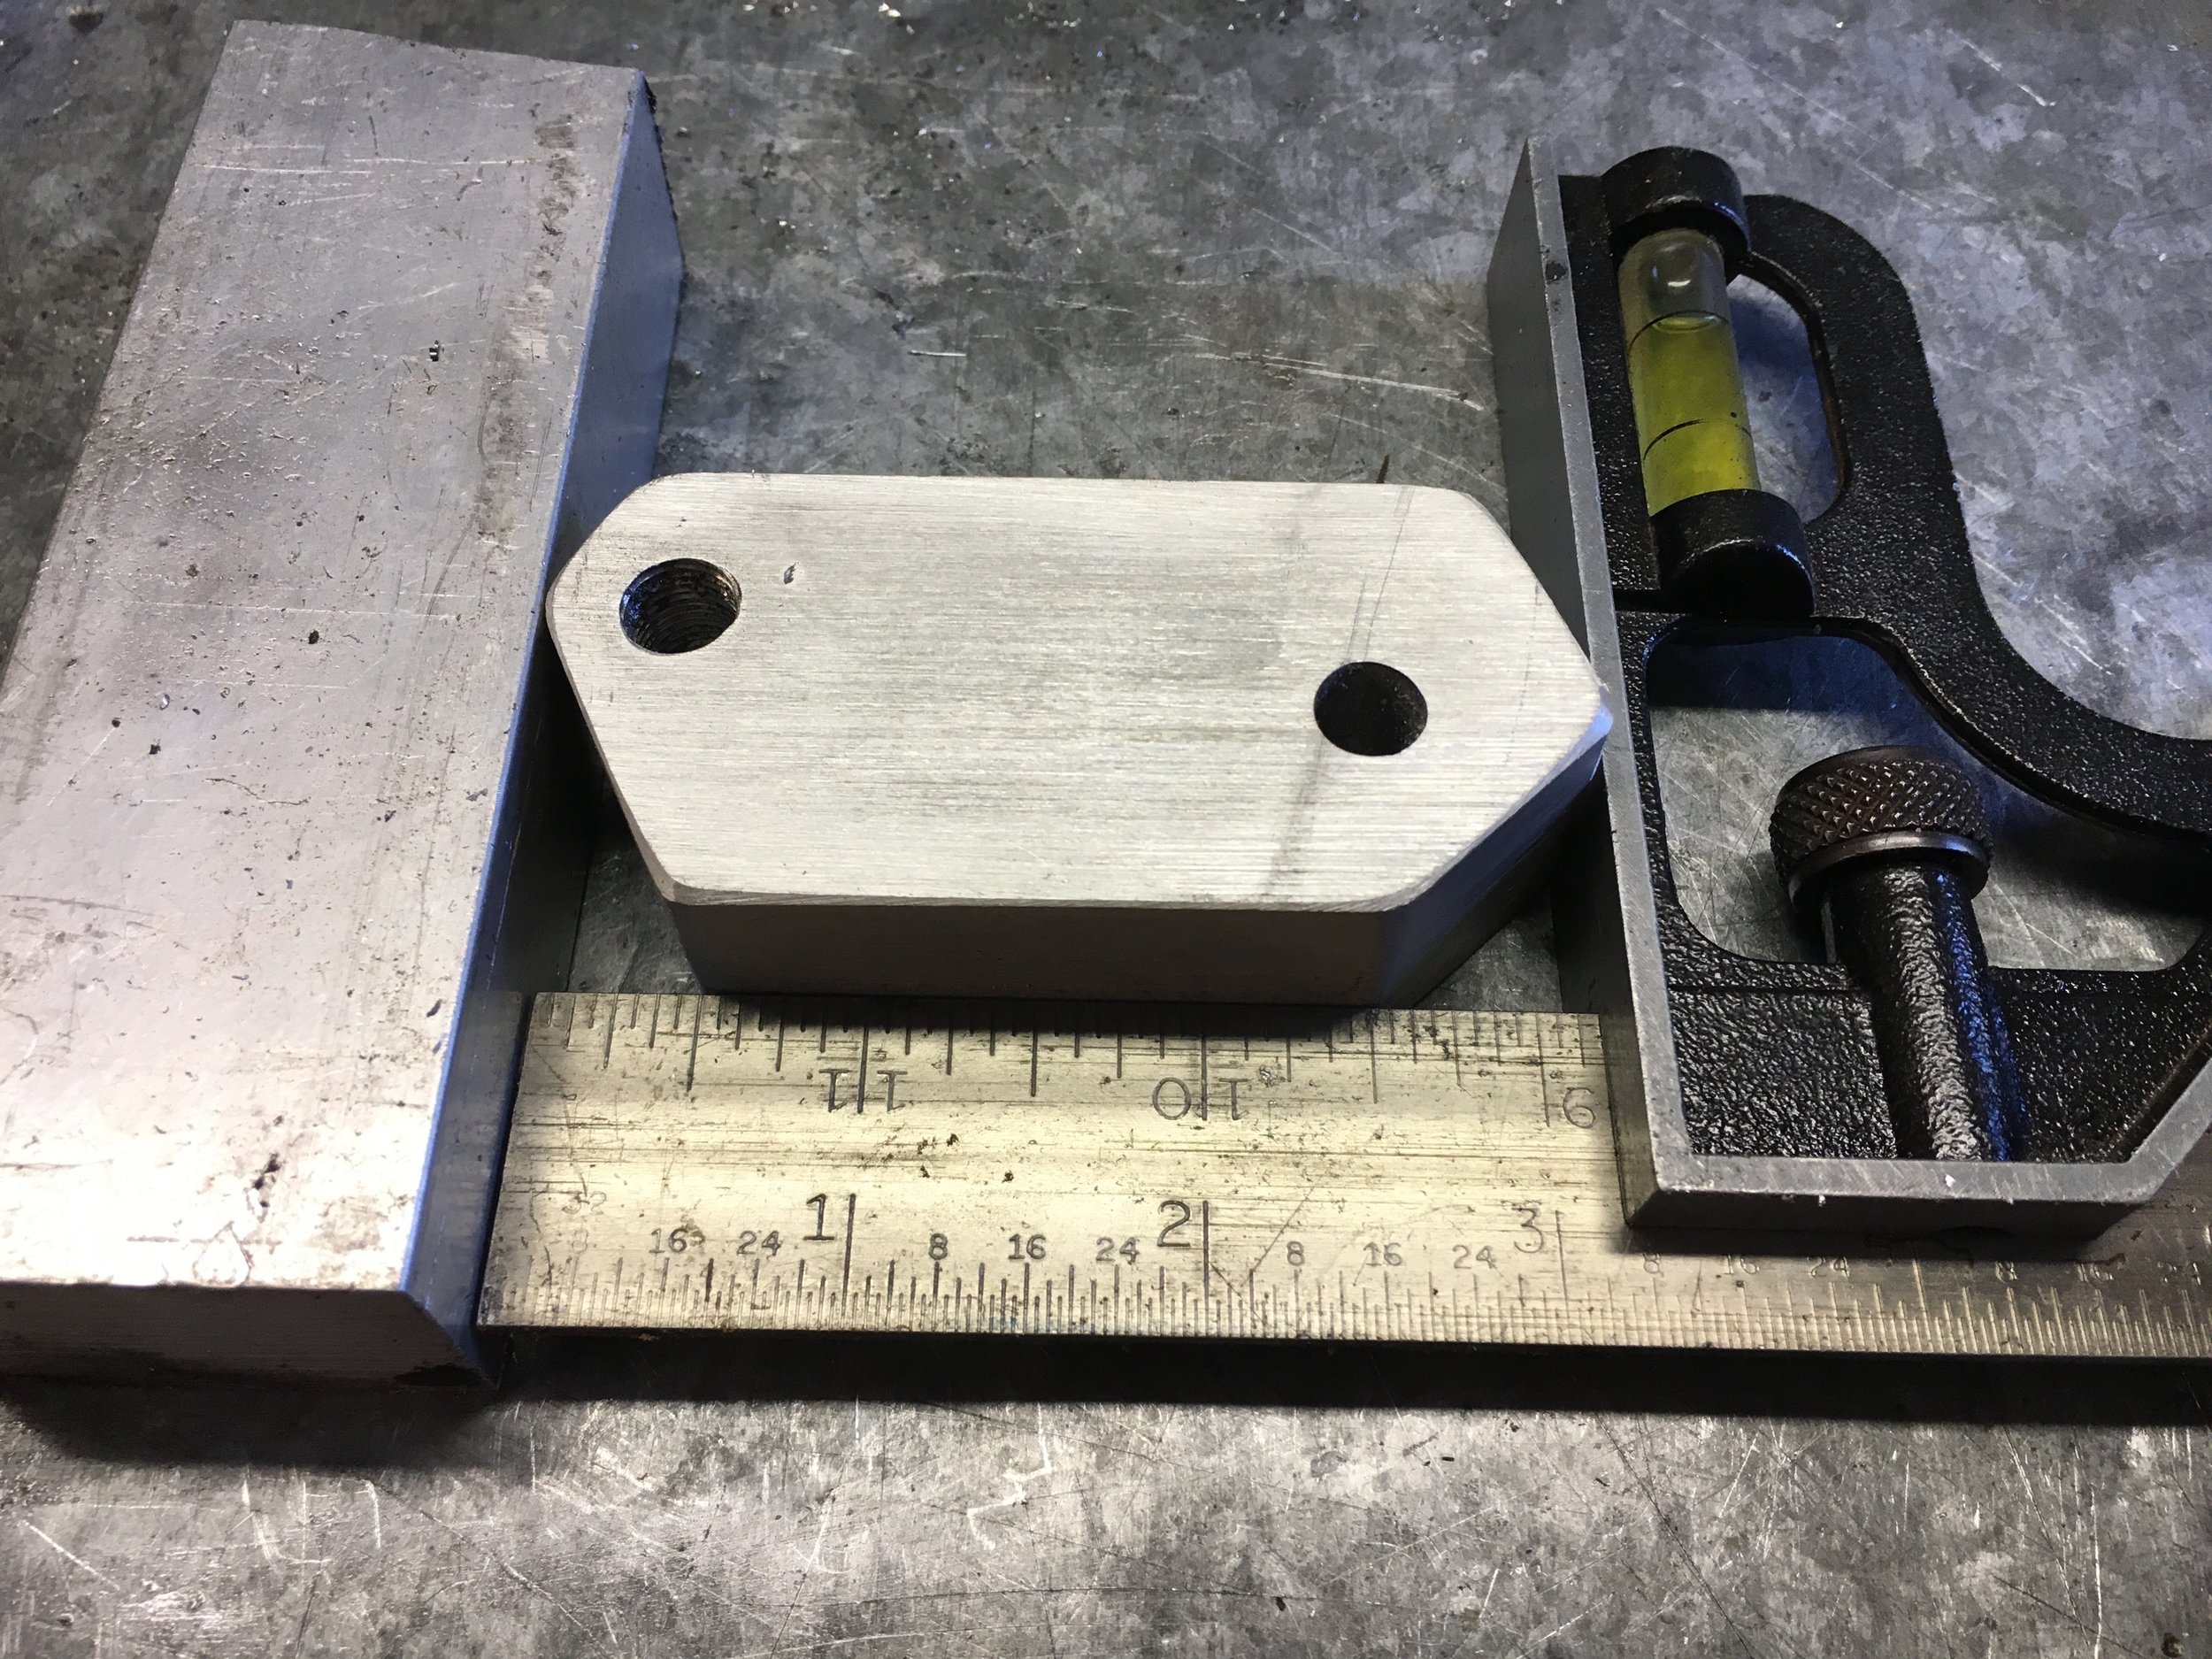
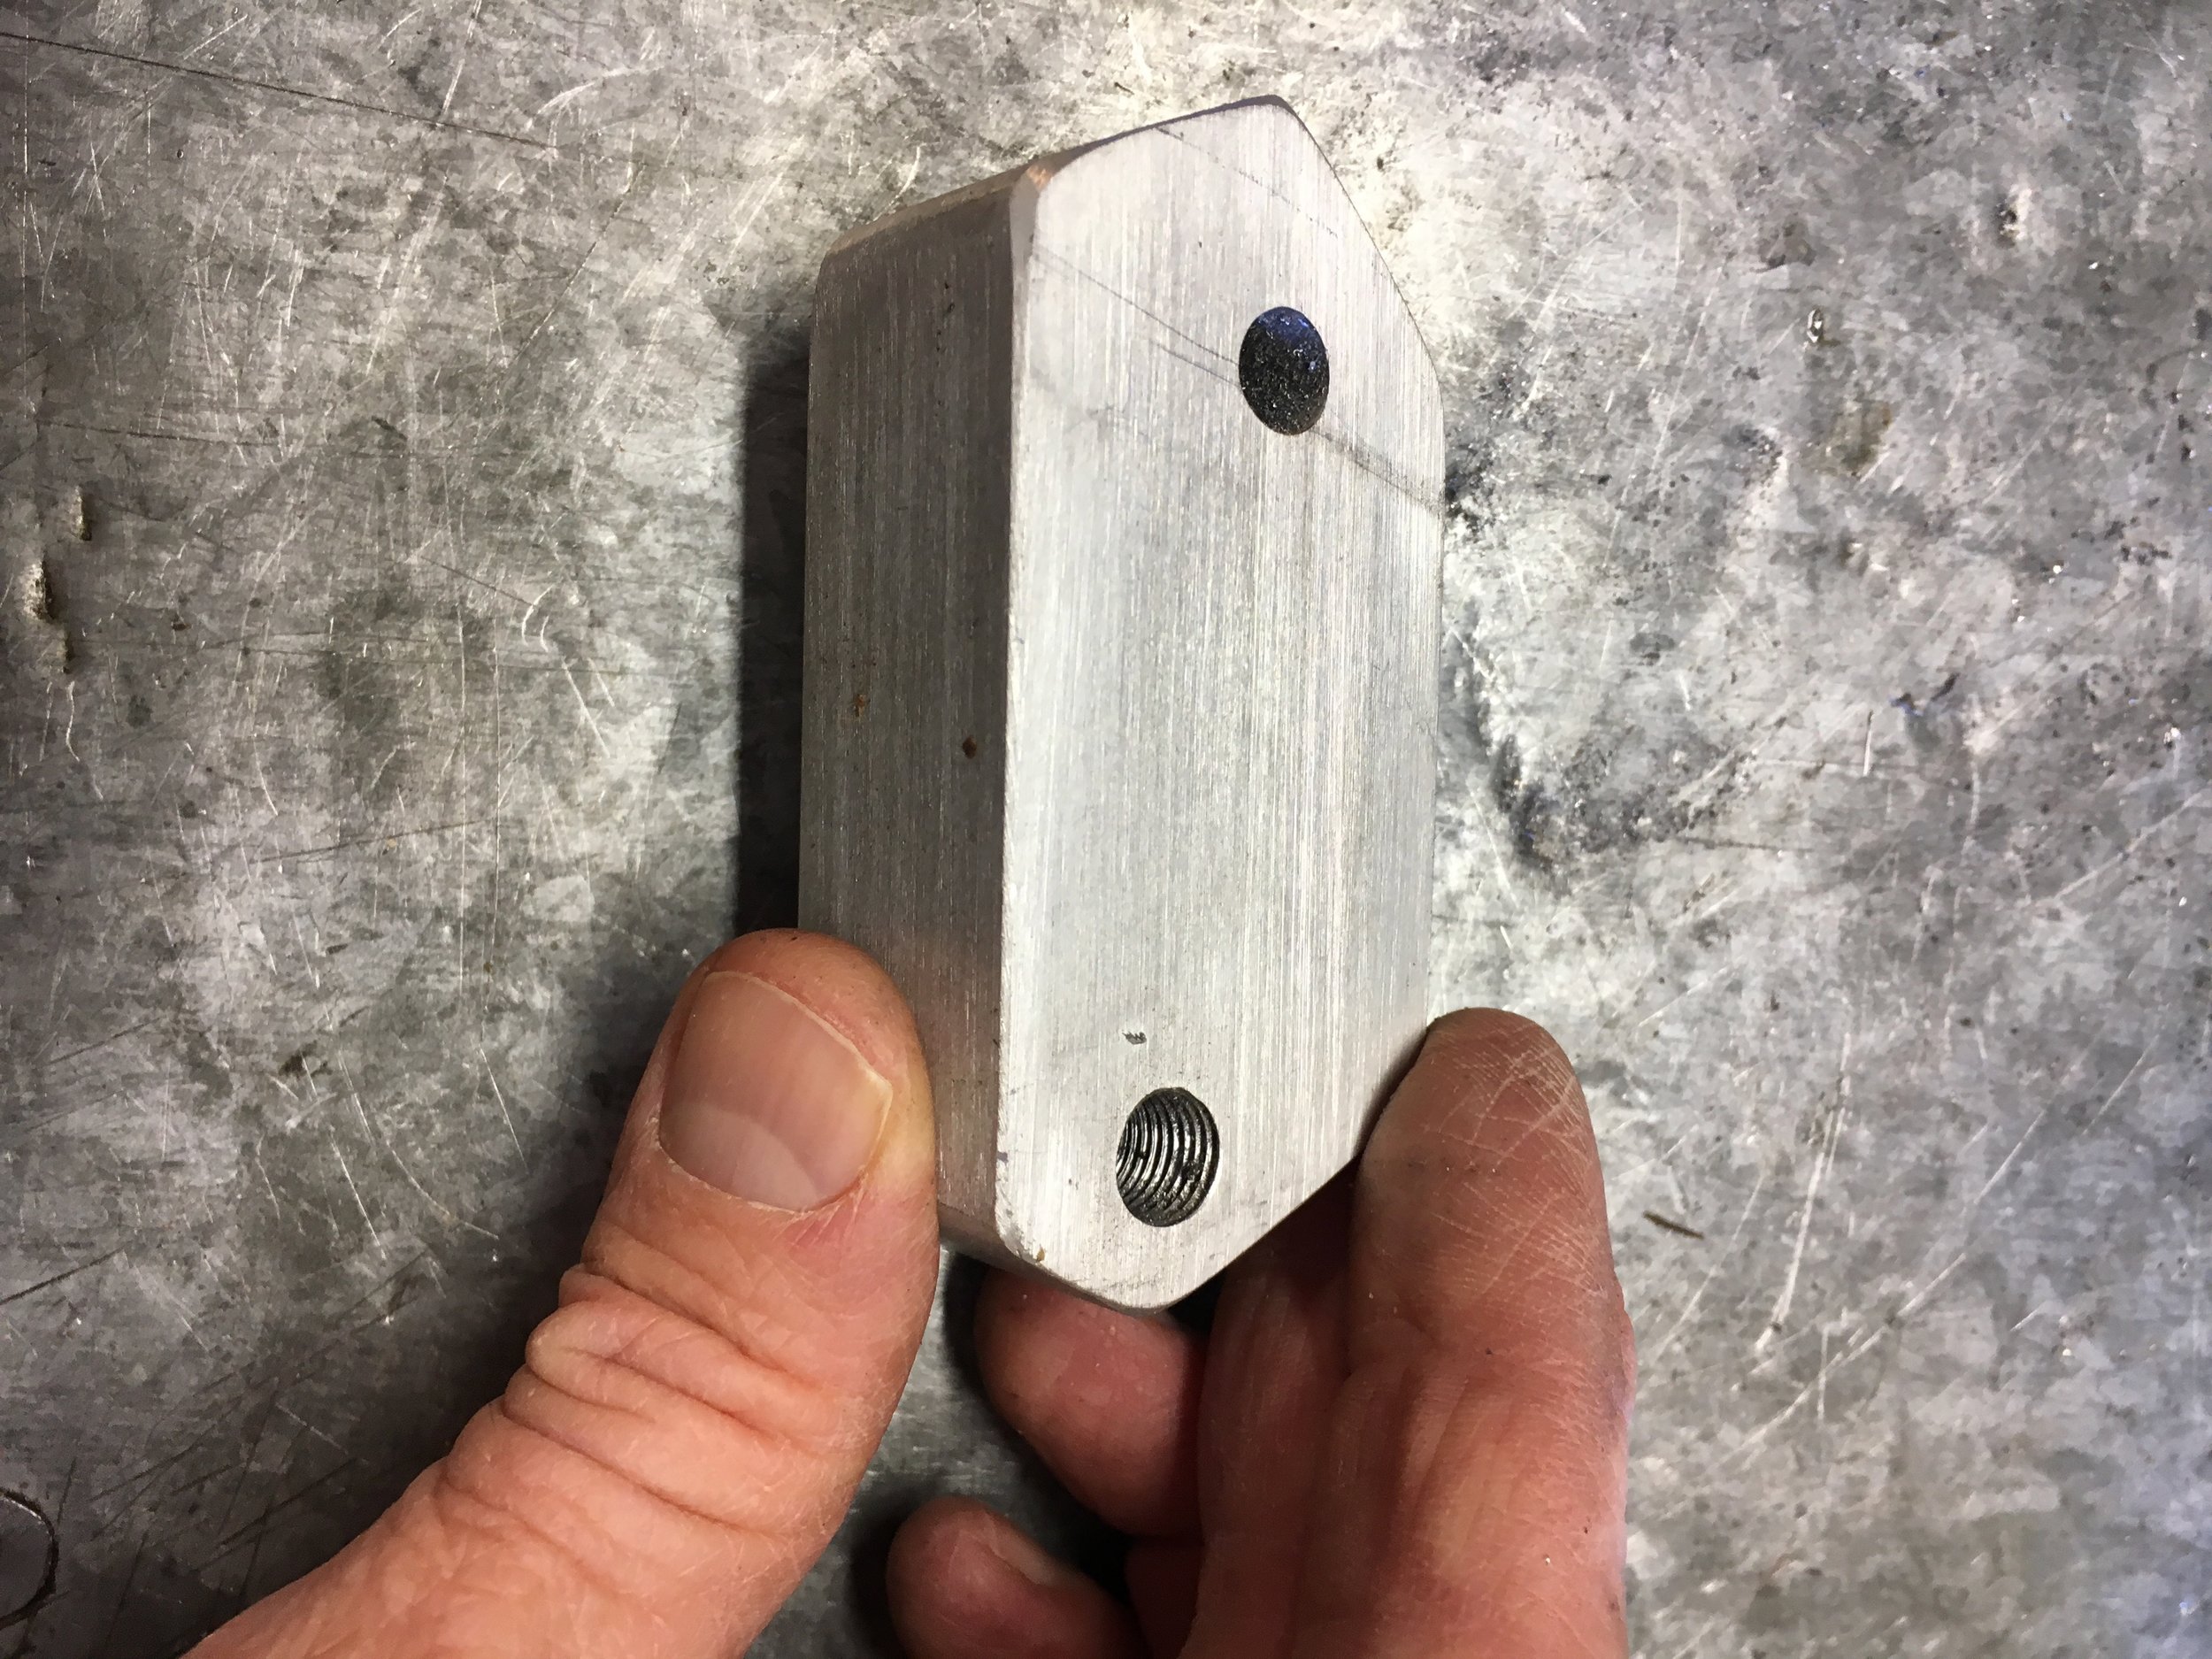
The tensioner mounting block is a simple parallelogram fashioned from 1”x1-1/2” aluminum bar:

You may download the above CAD drawing free of charge by visiting the ‘purchase’ page or by clicking here.
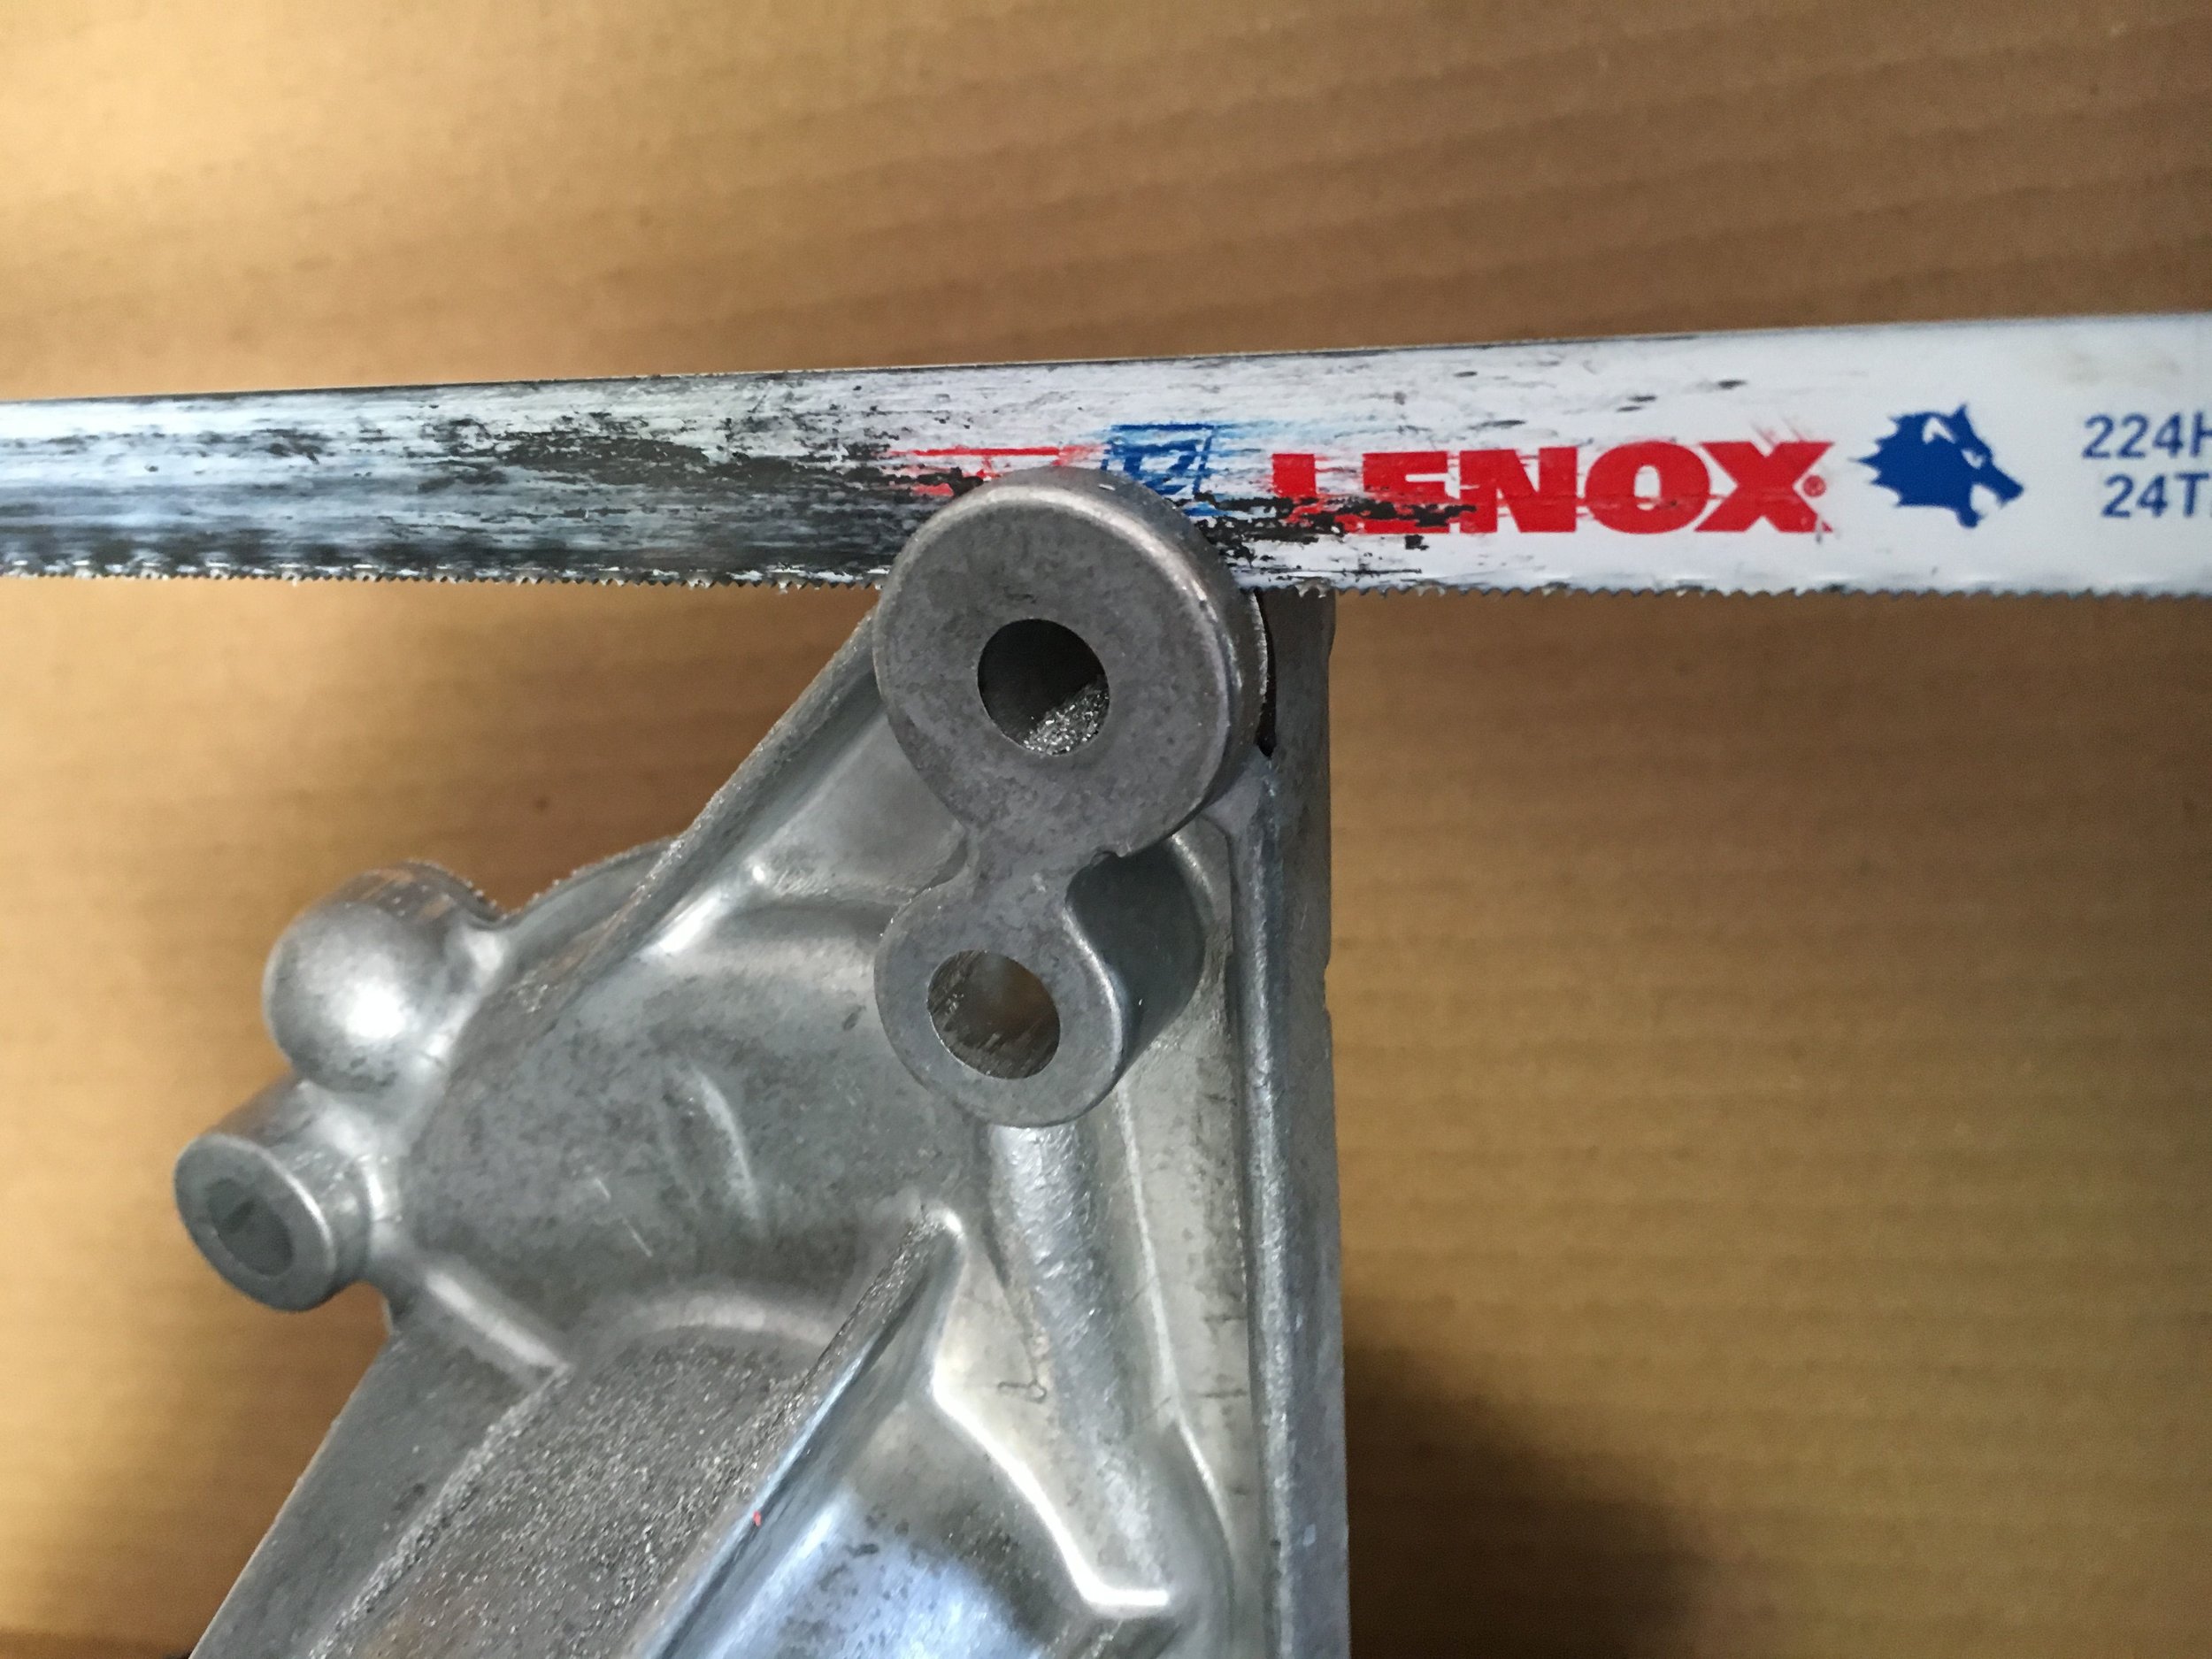
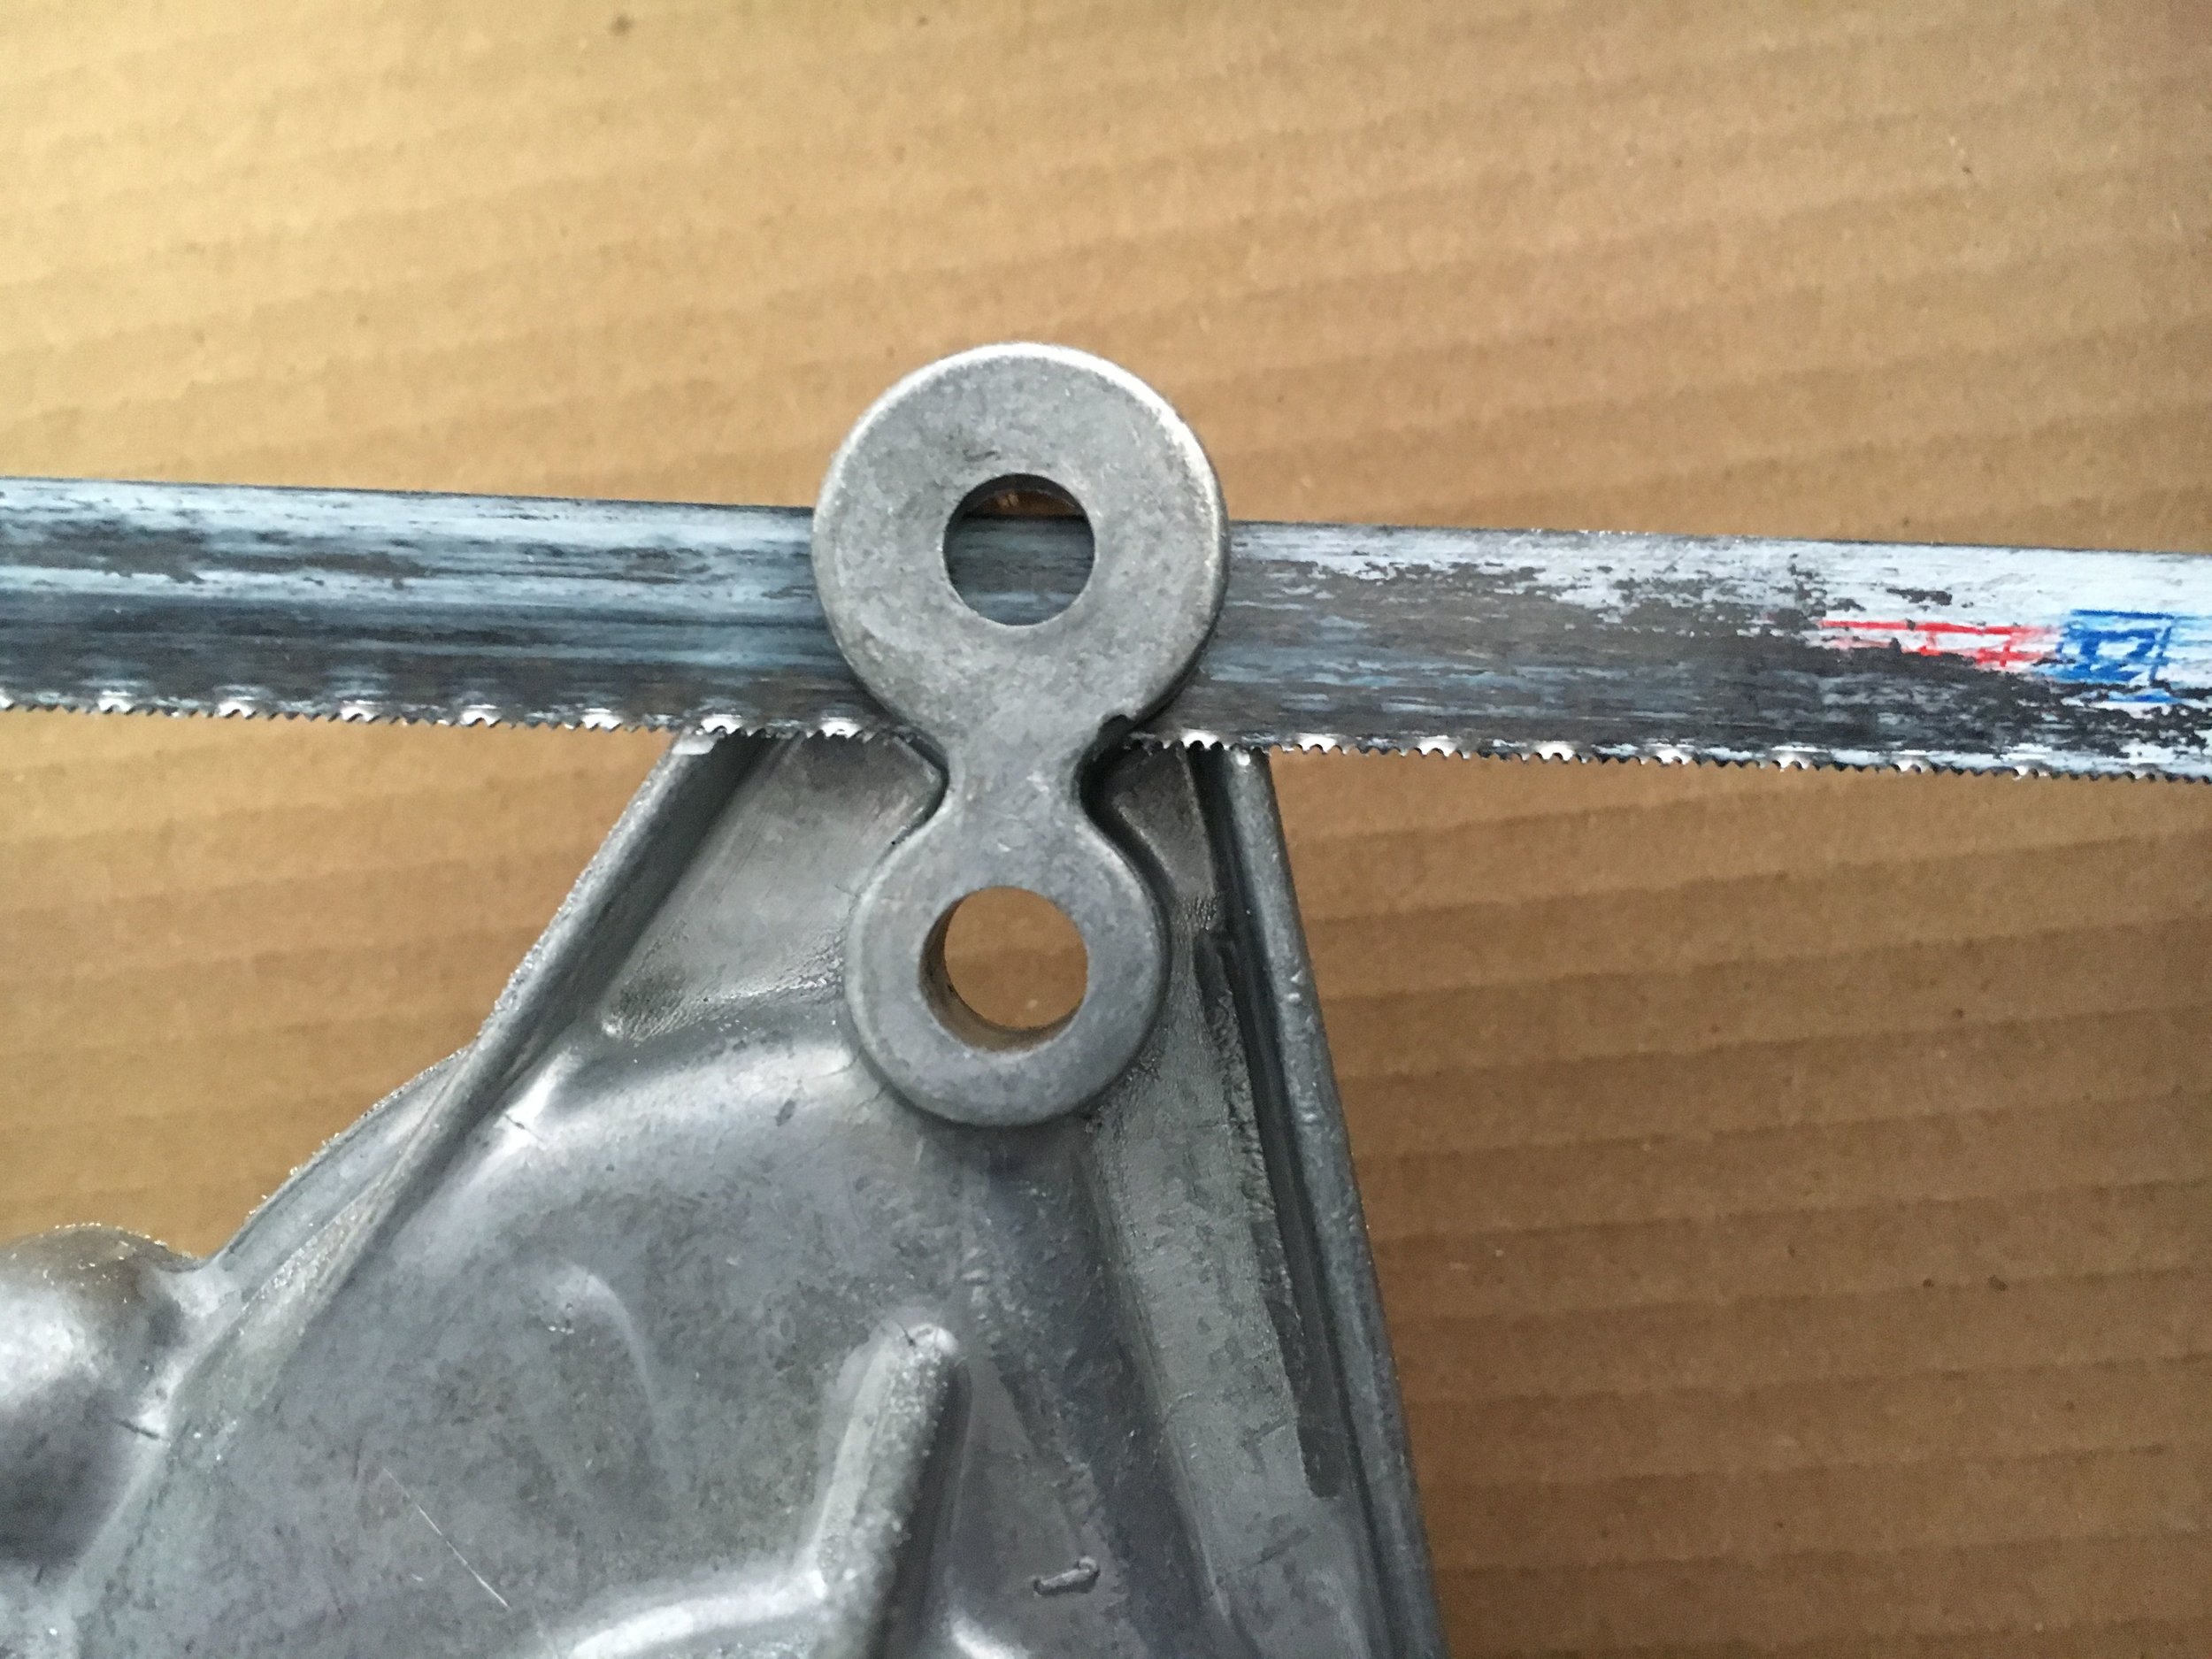
The mount employs a 5/16-24 bolt passing through an unthreaded hole into where a shorter bolt originally held the front engine plate to the block. This is the lower bolt in this photo:
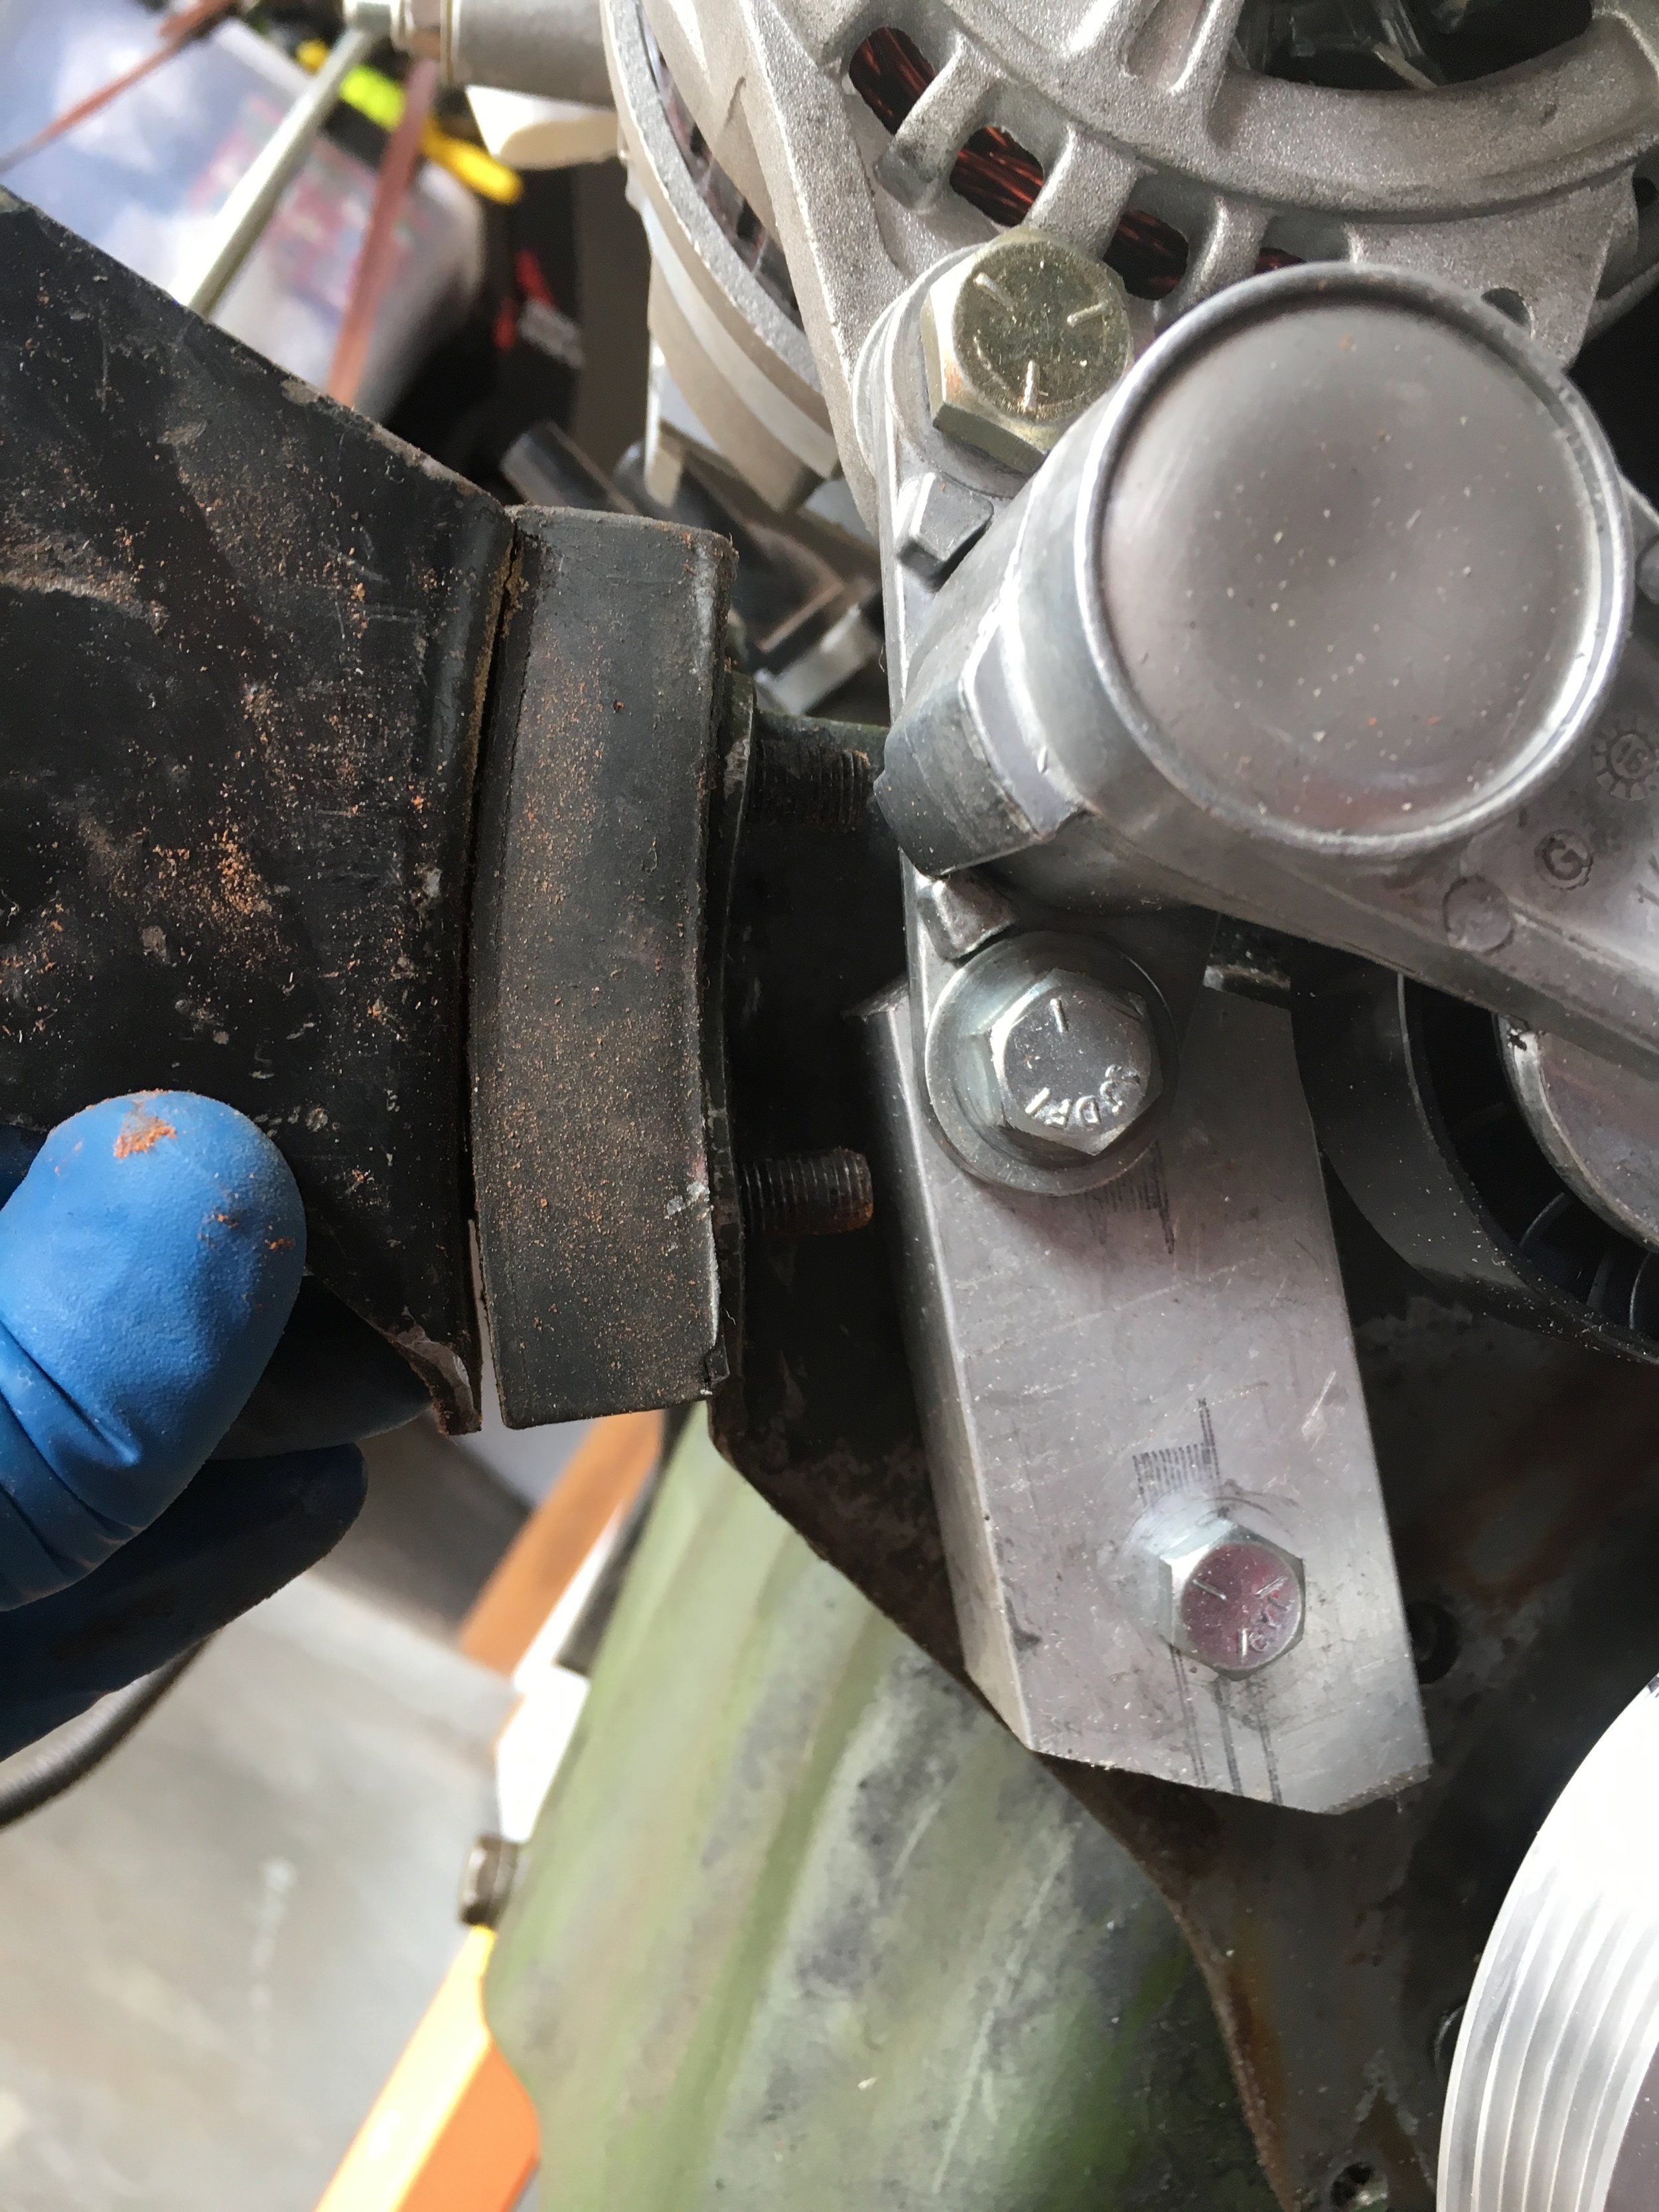
The upper hole gets drilled and tapped for a 3/8-24 x 1” bolt to affix the tensioner’s lower mounting ear. The drill size to tap for a 3/8-24 bolt is 22/64”.
You can round the edges or modify the shape for appearance as you wish. A file and belt-sander make quick work of this.
This series shows the dimensions of the mounting block, including the location of the holes from the sides and ends. But apart from the distance between the hole centers—roughly 1-1/2” or 38.1mm—the dimensions are not critical:
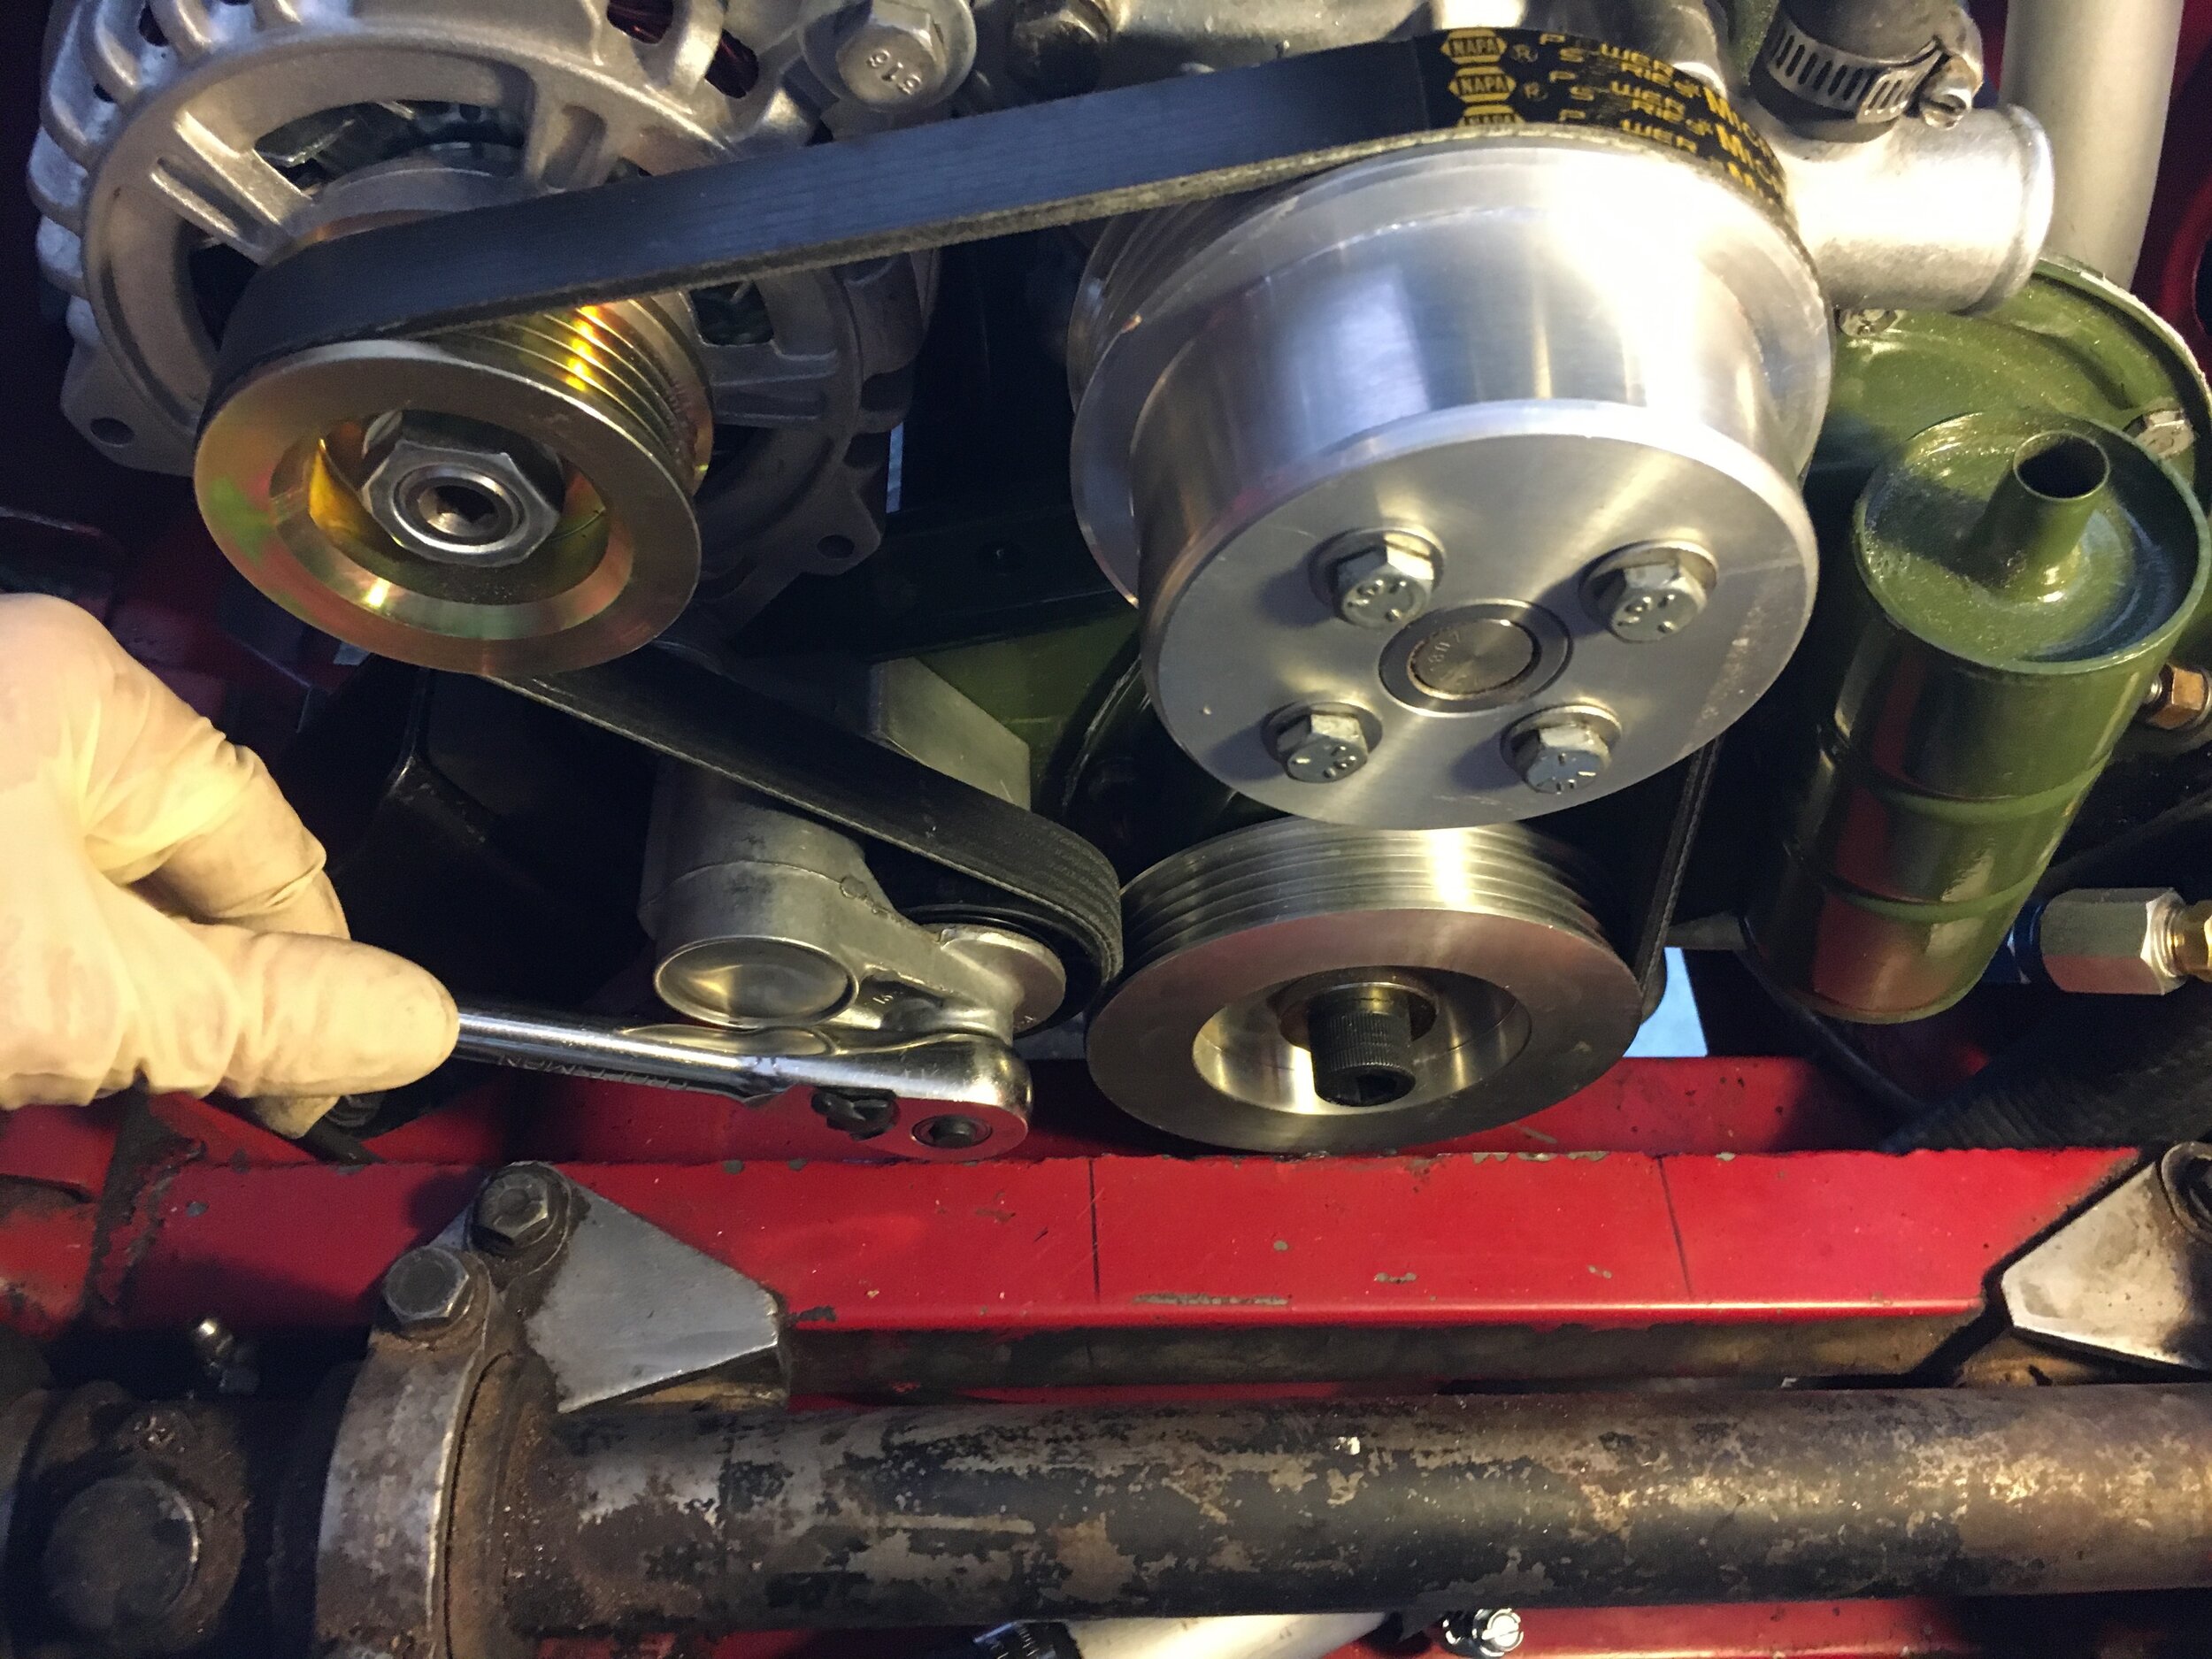
Use washers as needed at the alternator and mounting block to place the belt tensioner mount’s pulley parallel to the crankshaft pulley. With the CS121D, none were needed between the belt tensioner and its mounting block, and one washer was needed between the alternator’s ear and the belt tensioner.
As you can see, the clearance to the lower motor mount bolt is slight. If necessary, either file or cut a relief into the edge of the belt tensioner mounting block, or simply cut off any unused/excess threads from the motor mount bolt:
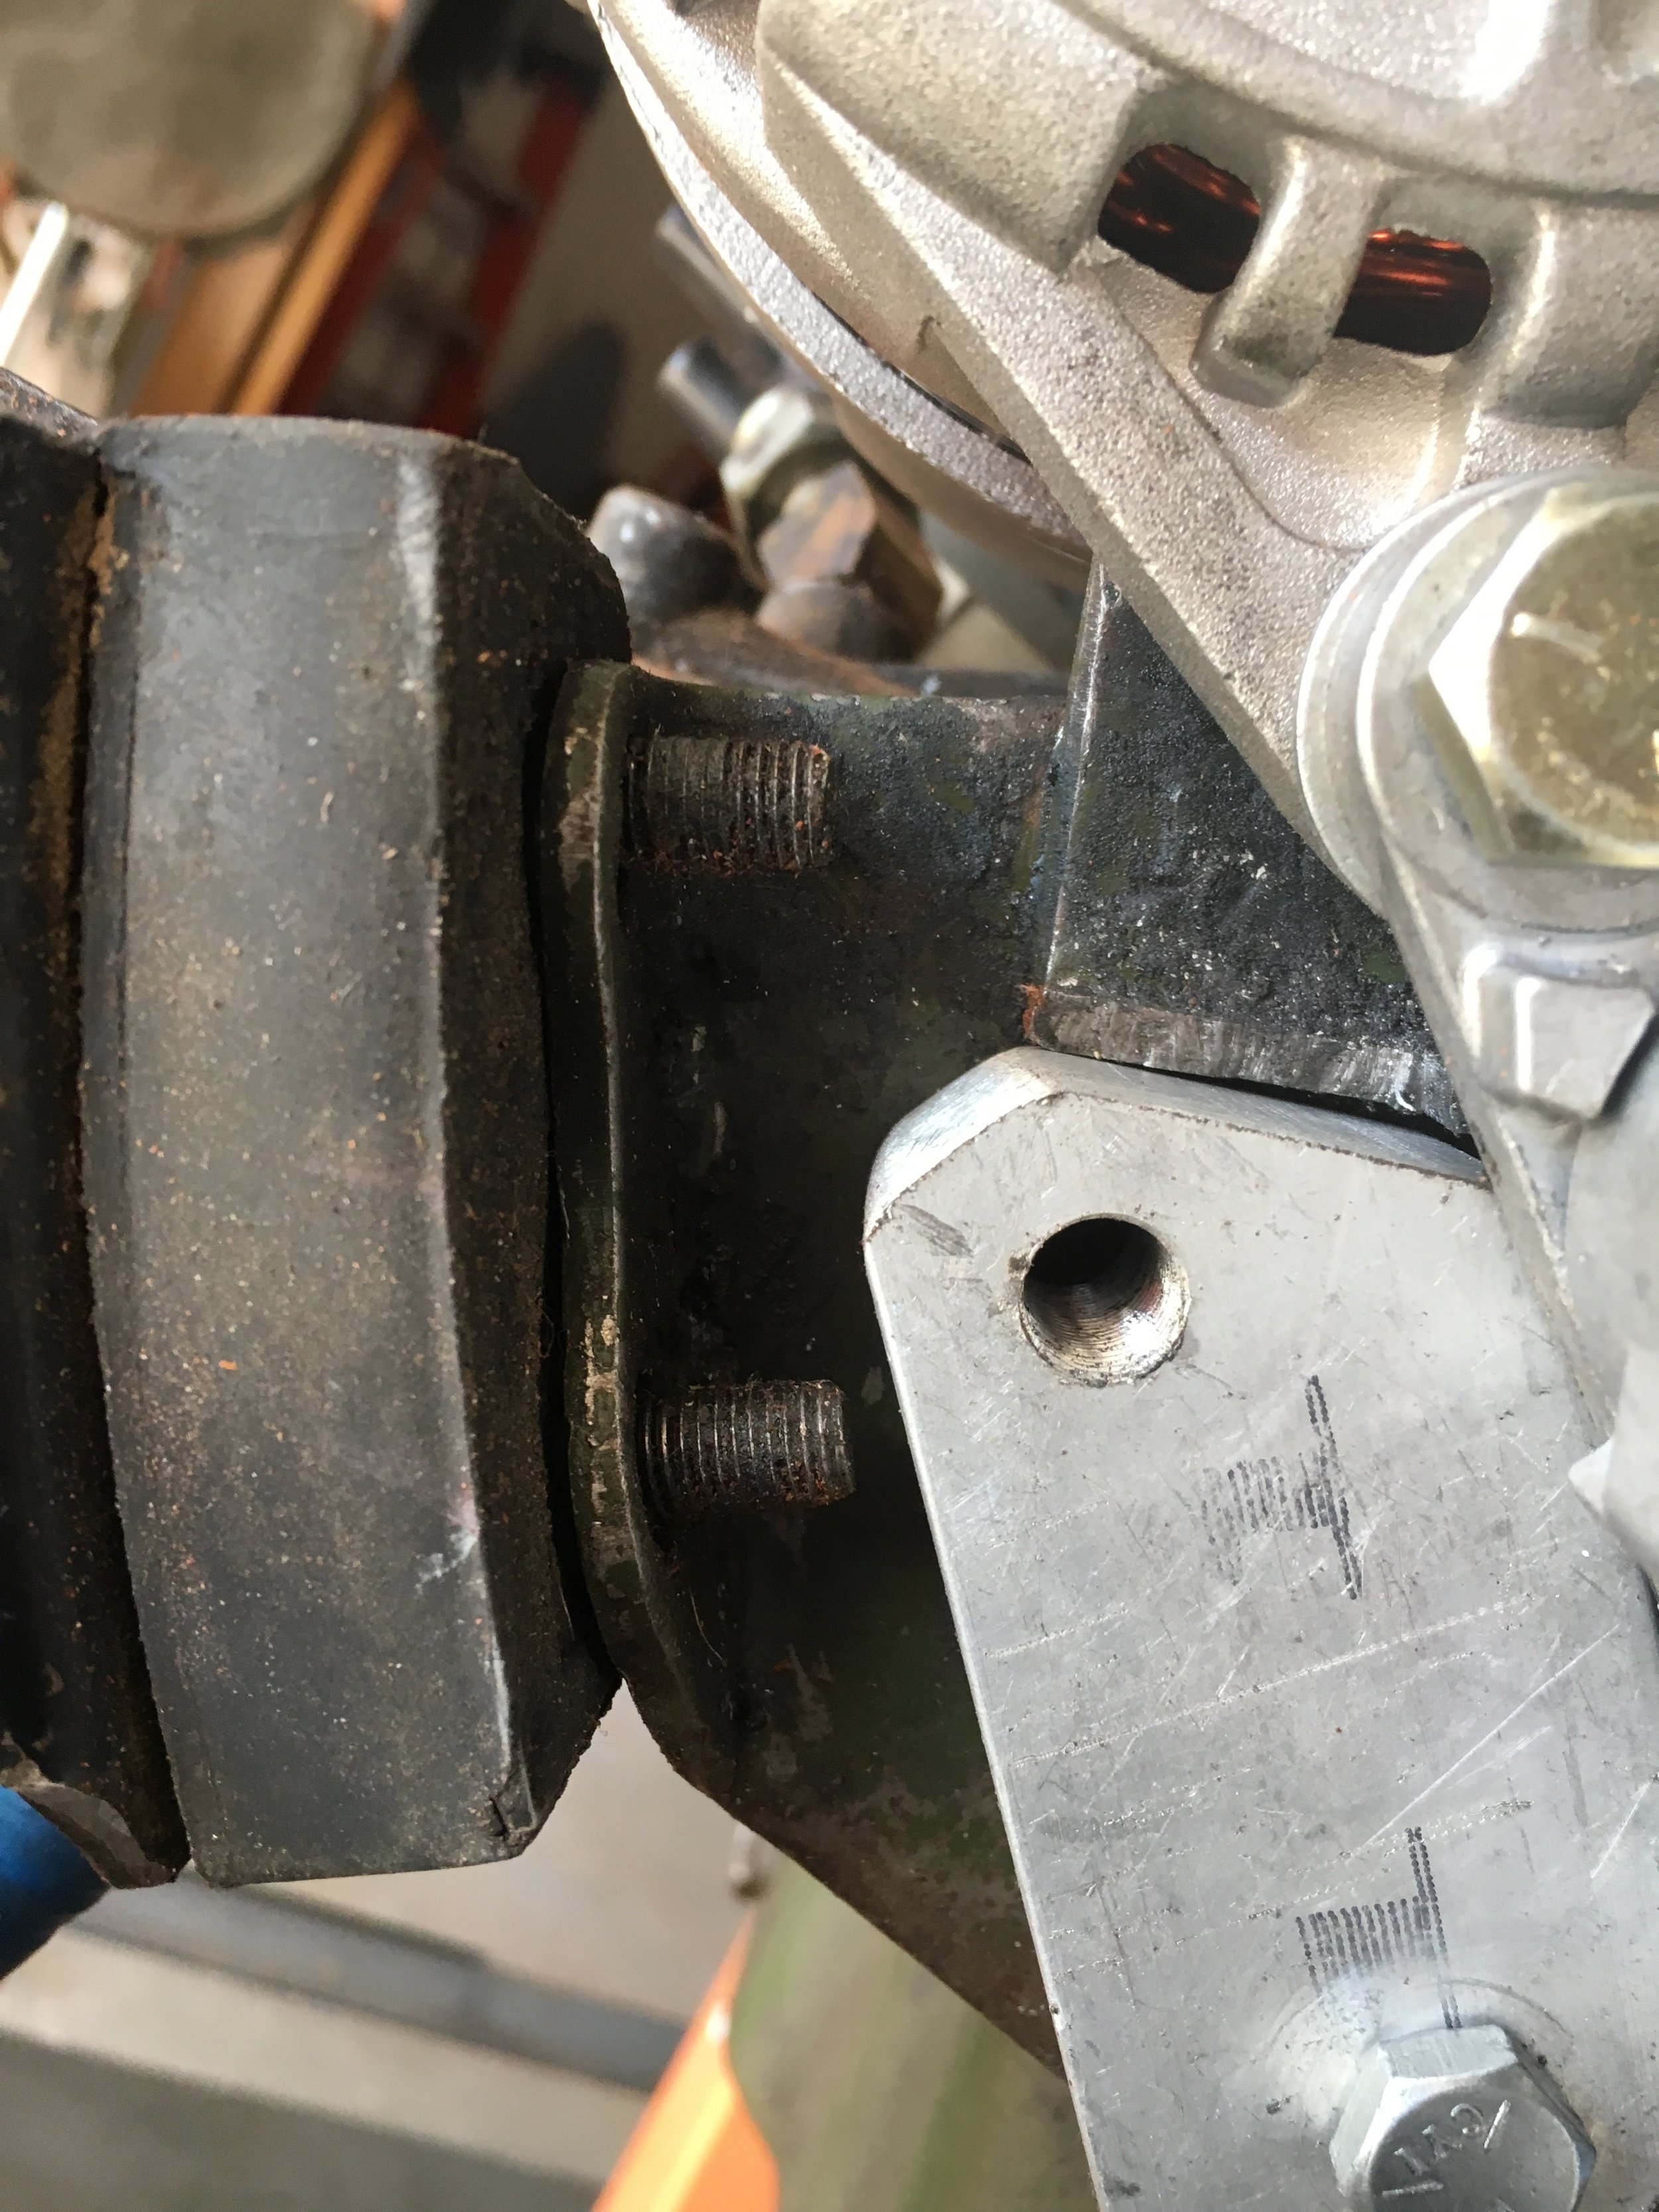
Remove the belt tensioner mounting block to allow you to start the nuts and lock washers onto the motor mount. Then replace the block.
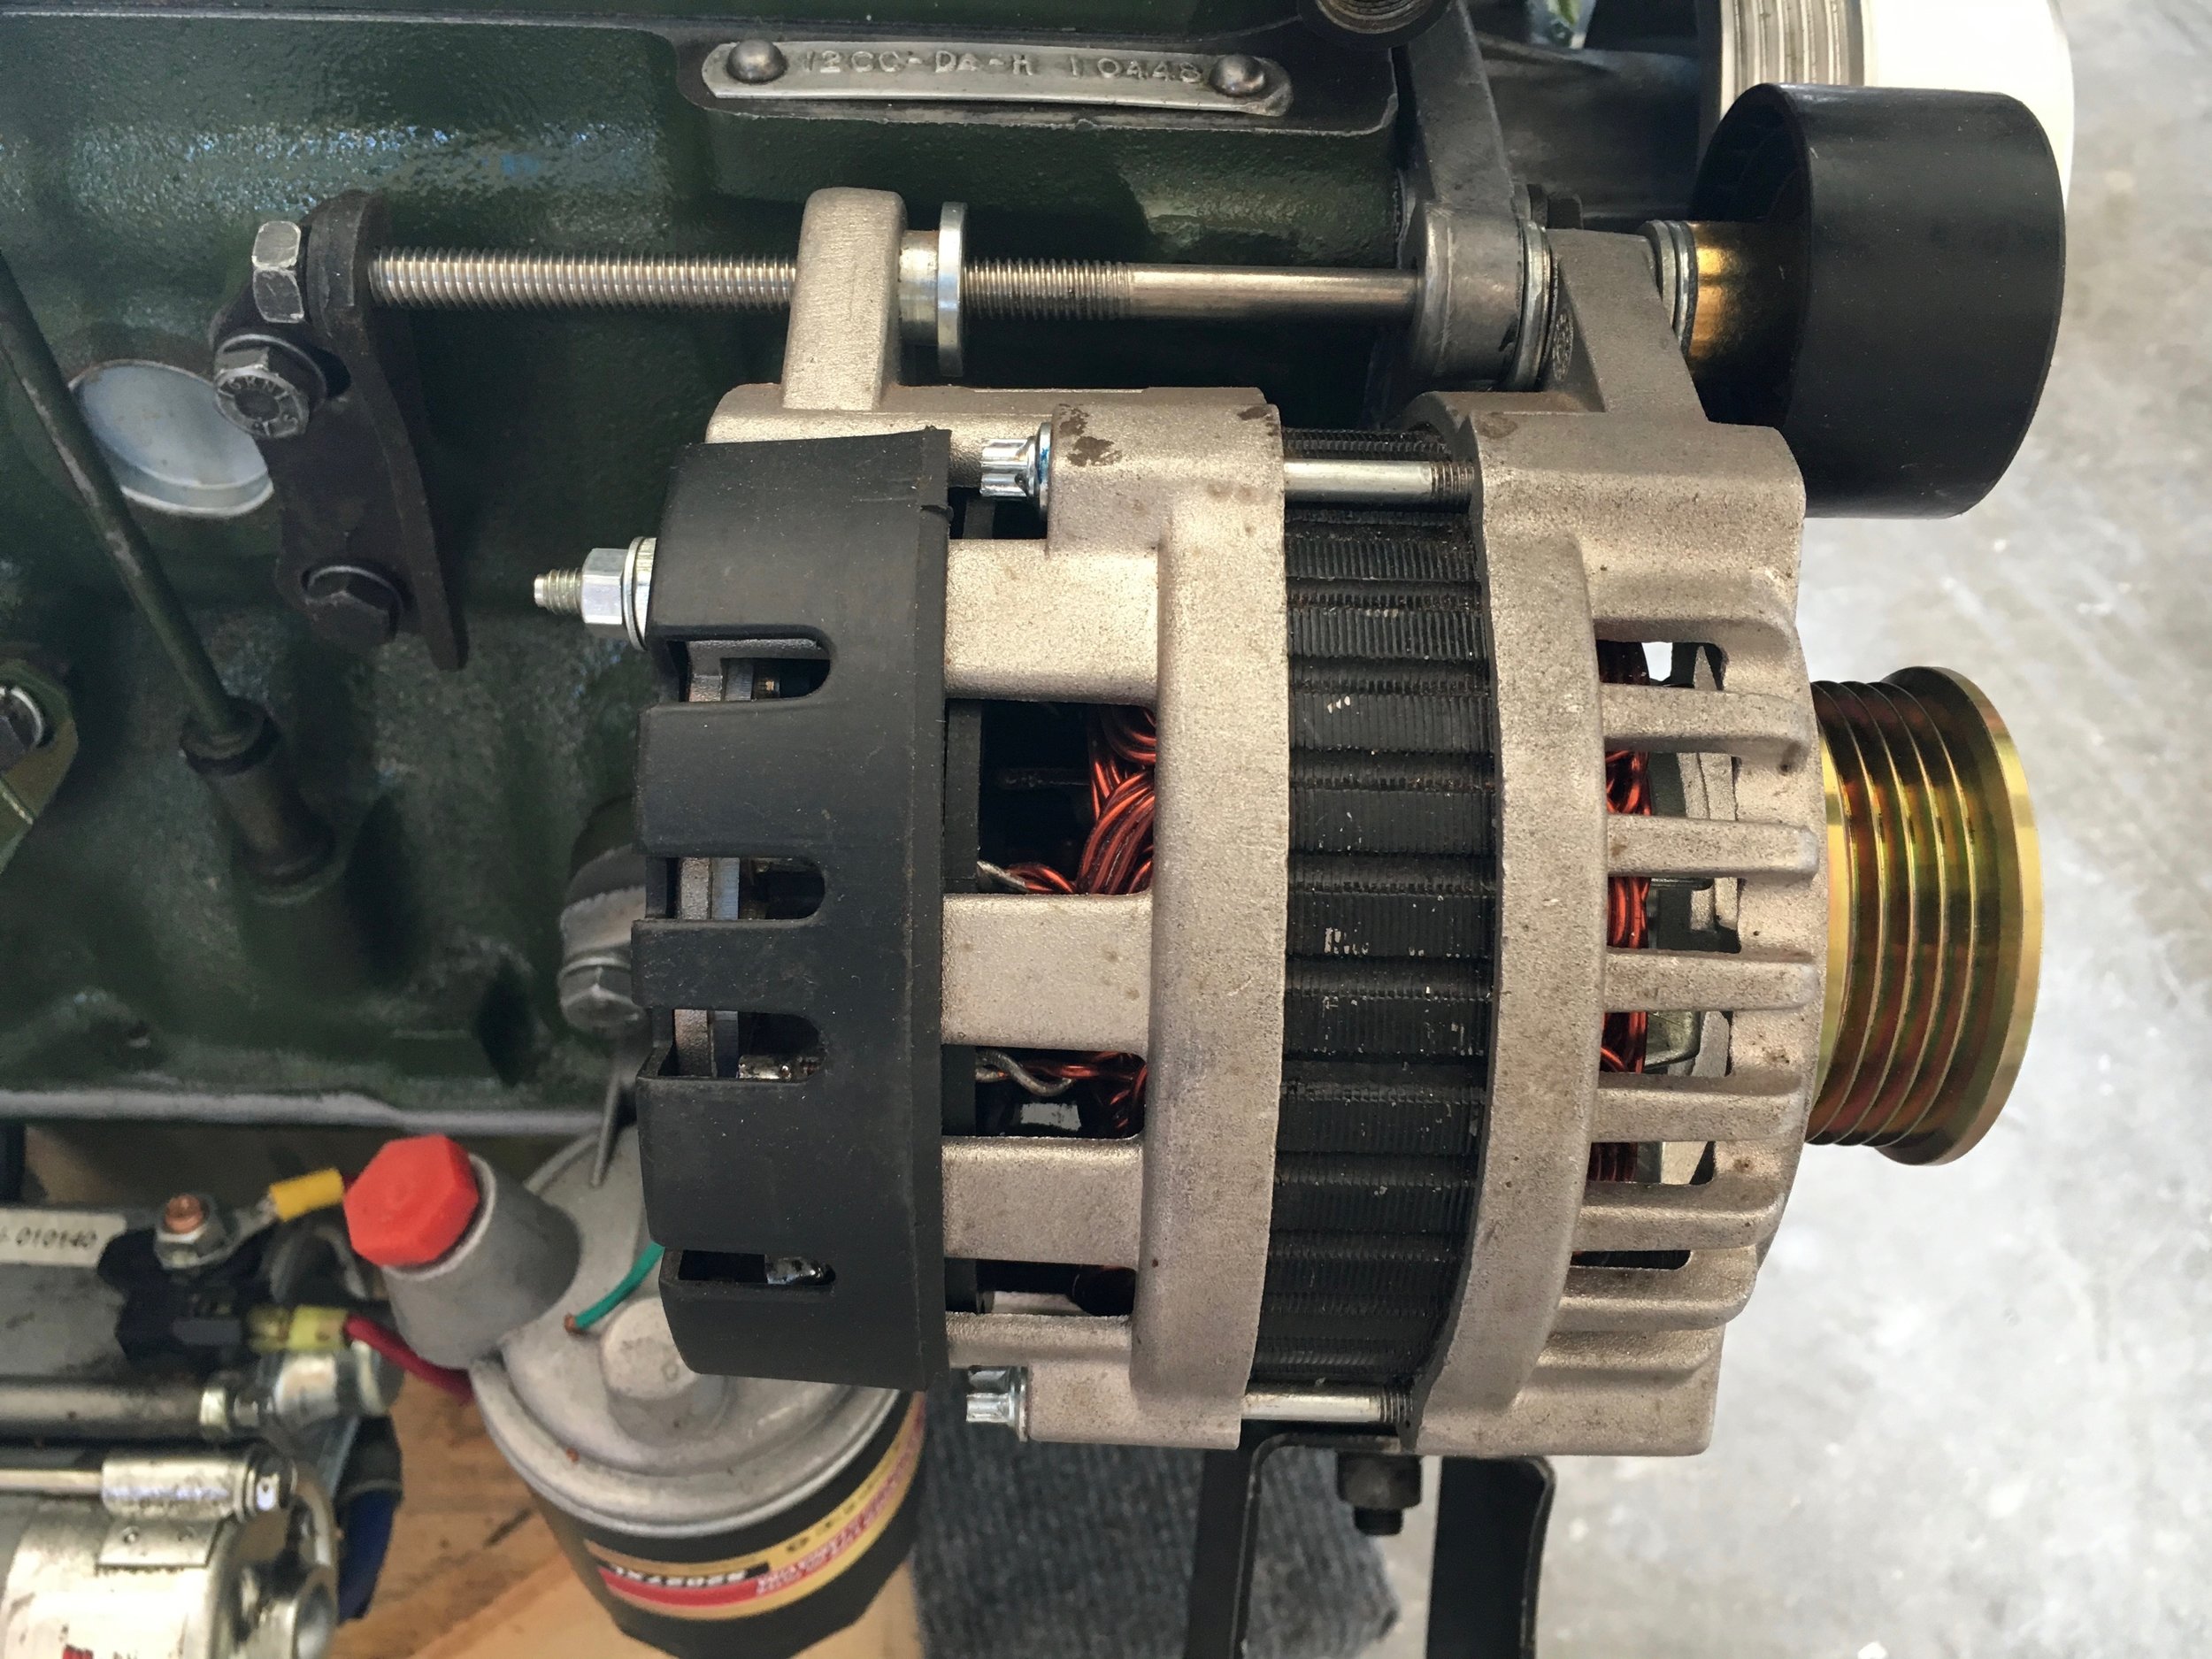
Step 6 - Install & align alternator.
Use an appropriate number and thickness of washers between the modified water pump mounting ear and the alternator to align the alternator’s pulley with the water pump pulley, as shown here:
You may use either the OEM rear generator mount or the OEM alternator mount with this conversion. Shown below is a single 8-1/2” long 5/16-18 pivot bolt in place of the finicky separate bolts that are most often used:
The reason for the extra length is that the same bolt will later mount the Dayco idler pulley used for the DIY supercharger conversion:
Step 7 - Install tensioner & belt.
Use an appropriate bolt to initially attach the alternator’s threaded adjustment ear to the belt tensioner’s upper ear (many alternators come with a bolt). You may need a longer than stock bolt to accommodate the tensioner’s thickness. Lightly snug the bolt but do not tighten securely yet.
Lift the alternator slightly to let you thread the 3/8-24 bolt through the tensioner’s lower ear and into the belt tensioner block.
Tighten all bolts securely—but be mindful that with both the belt tensioner block and alternator, you are threading steel bolts into aluminum. Tighten sufficiently to flatten out and engage the lock washers, but take care not to strip the aluminum (though in both cases, there are measures you can take to salvage either the alternator or tensioner block—drilling and tapping for larger fasteners).
Using a 3/8” ratchet driver, flex the tensioner’s spring, install the belt taking care to ensure that its micro-Vs are seated in each pulley’s grooves, and then release the tension. We found it easiest to start by slipping the belt onto the crank pulley, then moving to the water pump pulley, and finishing with the alternator pulley.
Lower the engine into place onto the motor mounts and tighten their screws and nuts securely. Do the same with the transmission mount bolts.
Reconnect everything you disconnected, refill the coolant, and double-check the fuel feed line.
Wire the new CS121D alternator if not using an existing unit. The alternator should come with a plug, and its connections are straightforward.
On 1275s like the 1967 MG Midget test mule, connect the thick brown-and-yellow charging wire to the large output bolt on the back of the alternator using a crimped hoop connector. Then, solder the green-and-red field wire to the green wire coming out of the supplied plug, as shown here:

Check the charging or have your local auto parts store do that for you.
Enjoy your new serpentine belt drive!