
Frequently Asked Questions
Please contact us with your questions, and we will post answers here.
Scroll down to read FAQs for the project of your choice, or click on these hyperlinks:
diy intercooled supercharger
diy rear disc brakes
DIY Intercooled Supercharger for 948, 1098 and 1275 A-Series Engines
Do you sell a complete kit?
What is the benefit of a ‘blow-through’ conversion like this one?
will this conversion work on 948cc and 1098cc engines?
what about high-compression pistons?
How difficult is the conversion?
what do i have to buy?
How much weight does the conversion add?
can i still access the distributor and spark plugs?
Will this conversion work with a belt camshaft drive?
does this conversion retain the heater?
can I retain the front bumper?
will this conversion fit a right-hand drive car?
is this conversion reversible?
Do you sell a complete kit?
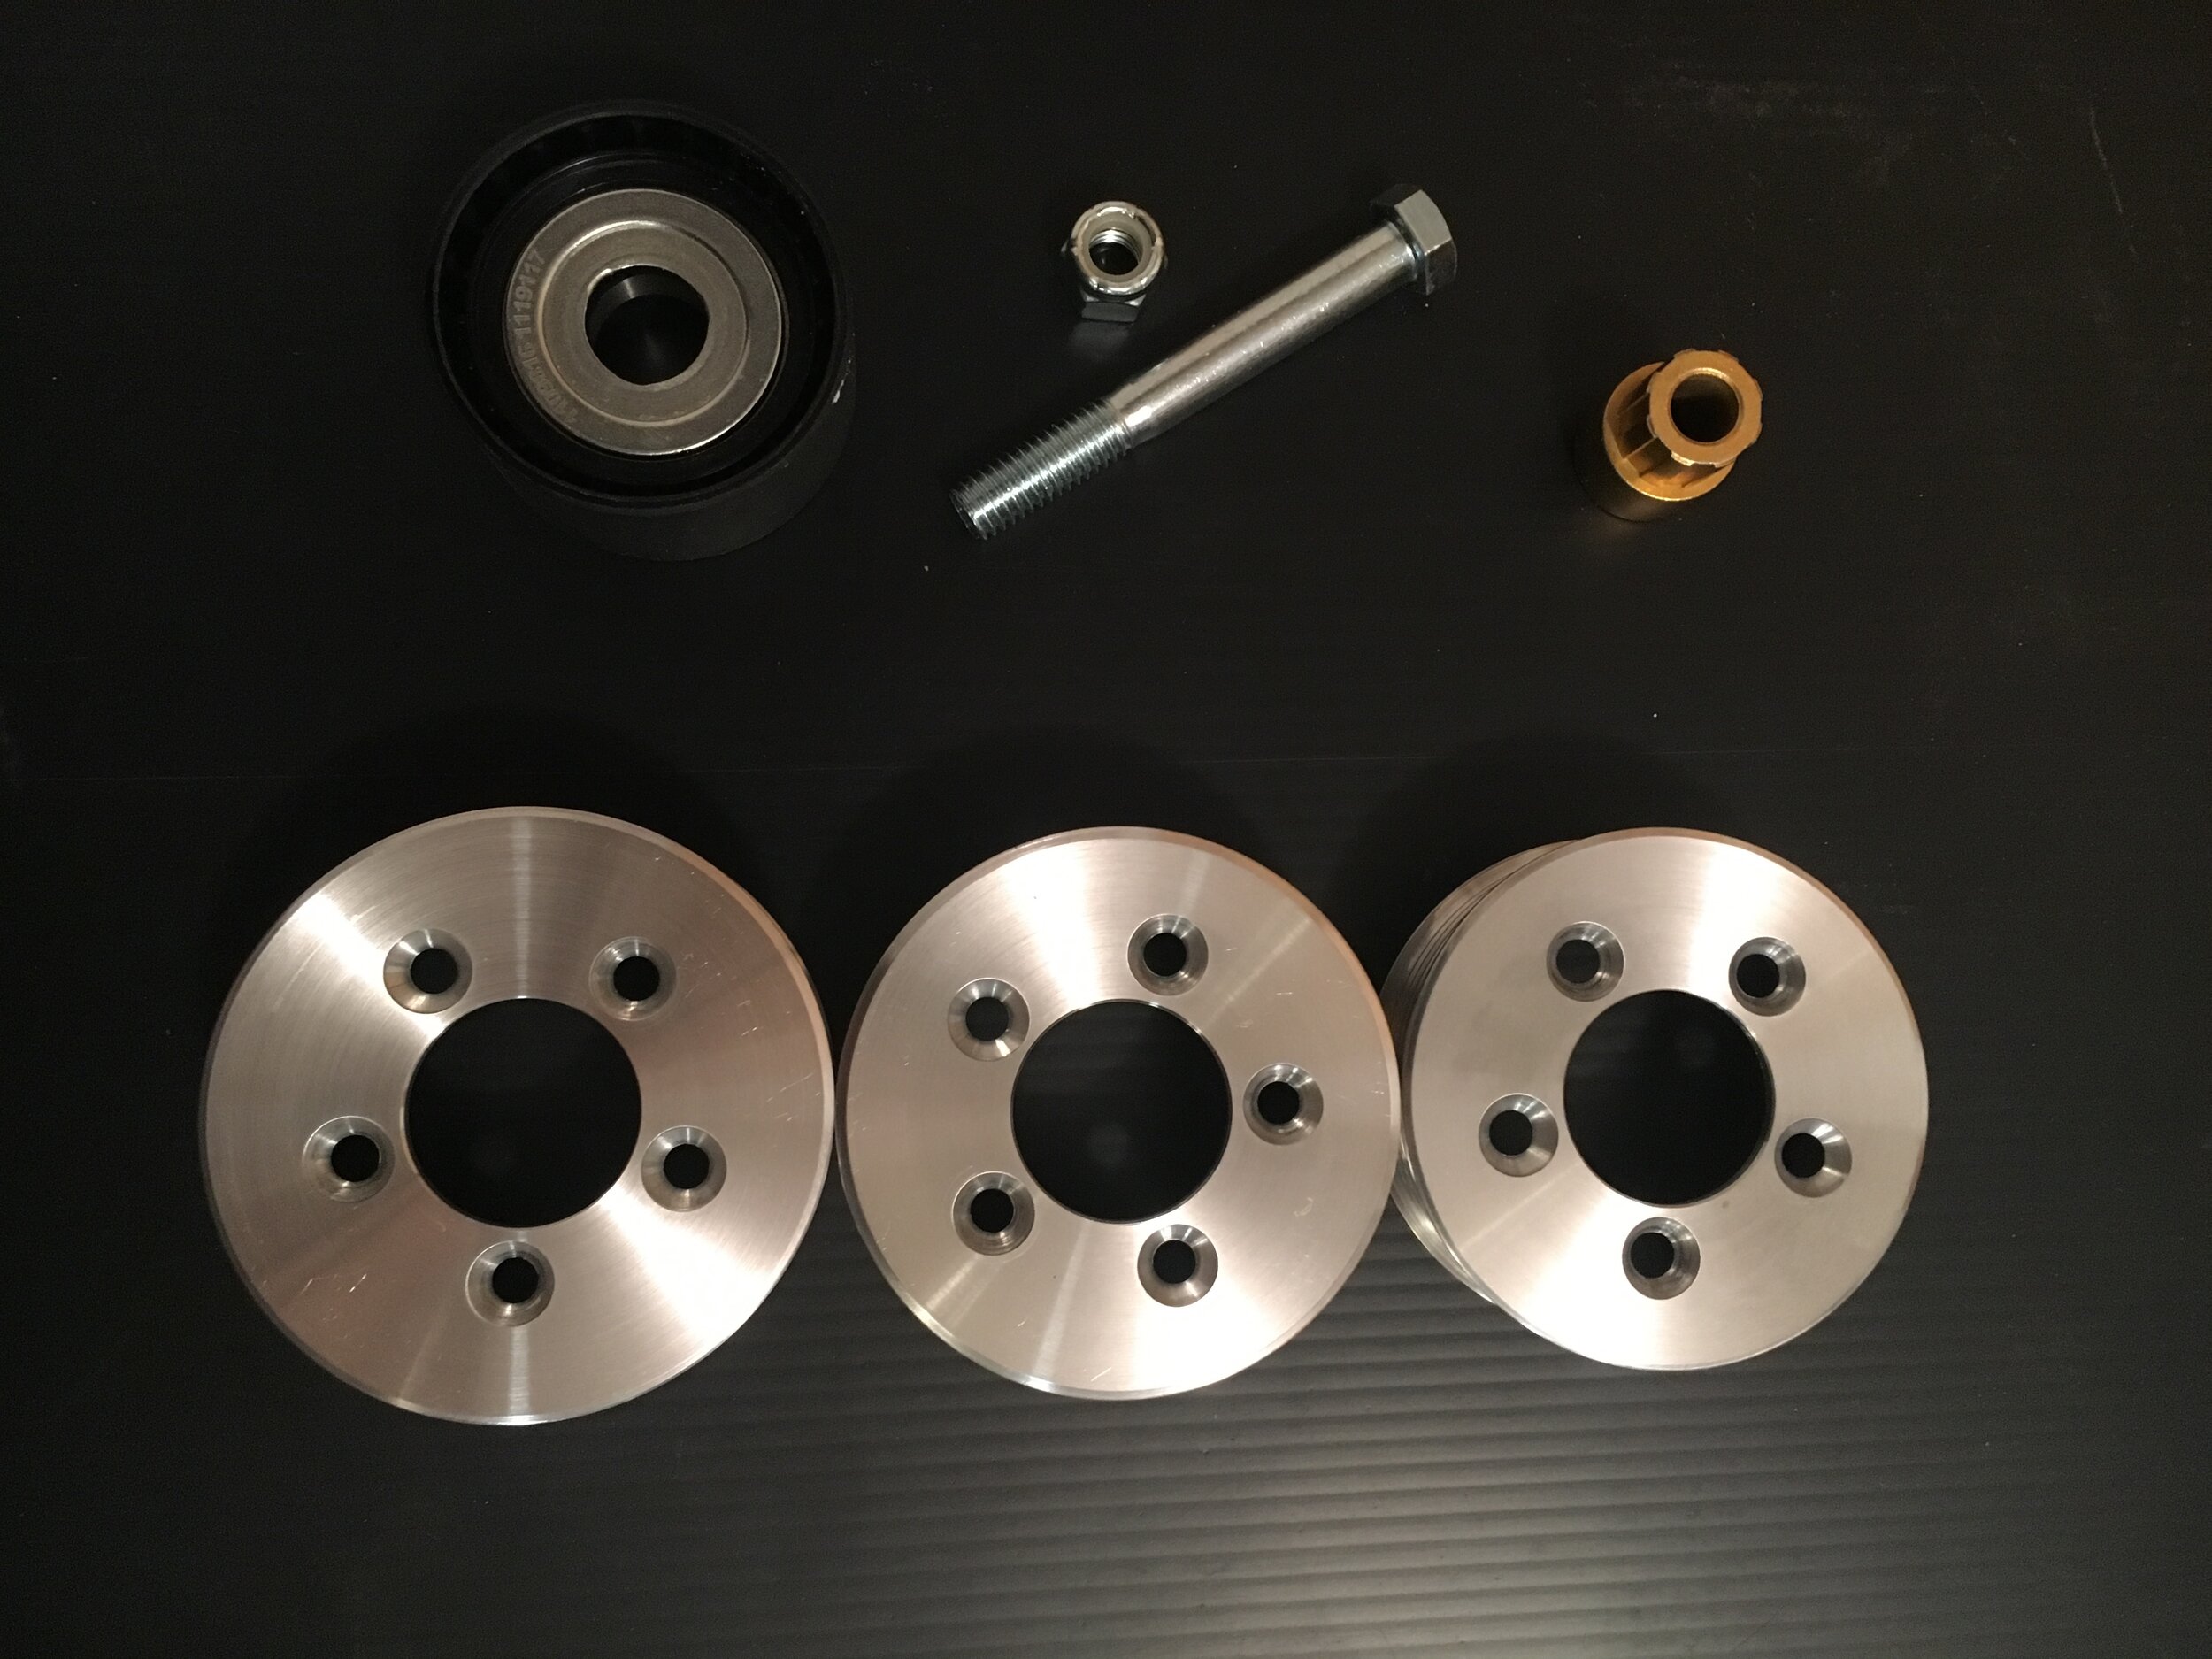
NO. We provide a handful of core components for the conversion that cannot be fabricated by DIYers, as they are CNC-machined from aircraft-grade aluminum to exacting tolerances.
We offer free downloadable PDF diagrams to fabricate the mild steel supercharger mounts and this simple aluminum mounting block for the serpentine belt conversion on our purchase page:

See our online instructions with photographs and fabrication tips.
The first step in the conversion is to install a serpentine belt drive to replace the OEM ‘V-belt’ drive. You can then drive your naturally-aspirated Spridget or Morris Minor while completing the remaining stages of the conversion to suit your budget and available tinkering time.
what is the benefit of a blow-through supercharger conversion?
A ‘blow-through’ conversion allows use of an intercooler. Every modern production vehicle running a turbocharger or supercharger incorporates an intercooler to increase power, combat detonation, and increase the engine’s durability.
The ‘draw-through’ design of the classic Judson blower and the supercharger kits offered by Moss Motors and High Performance Products of Australia mounts the blower directly to the cylinder head via a short manifold, prohibiting use of an intercooler. The result is backfiring during warm-up and the need to retard the timing or install low-compression pistons to avoid detonation.
Our conversion uses an inexpensive Audi A4 Turbo intercooler which, as seen below, even hidden behind the grille with no vents cut in the lower valance sheet metal reduced intake charge temperature by as much as 127.8 F., allowing us to retain full ignition advance using standard 8.8:1 pistons and 91 octane gasoline without experiencing detonation:

A ‘blow-through’ system enables a dedicated, dynamic bypass circuit. This conversion uses a vacuum-actuated bypass valve from a 2002 Mini Cooper, which reduces supercharger wear, increases fuel economy, and improves drivability. The car operates as it always has, until you hit the accelerator!
will this conversion work on 948cc and 1098cc engines?
Yes. The only differences are:
(i) the inner portion of the supercharger mount, which must be configured slightly differently due to the more limited space between the valve cover and thermostat well. Contact us for details if the installation instructions do not make this clear; and
(ii) the thermostat housing spacer we’ve designed to clear the front blower mount will not fit the smaller engines’ head because it will contact the valve cover. You can get around this by routing the upper radiator hose toward the left-hand side using a later model crossflow housing, and then back to your radiator—or simply install a crossflow radiator.
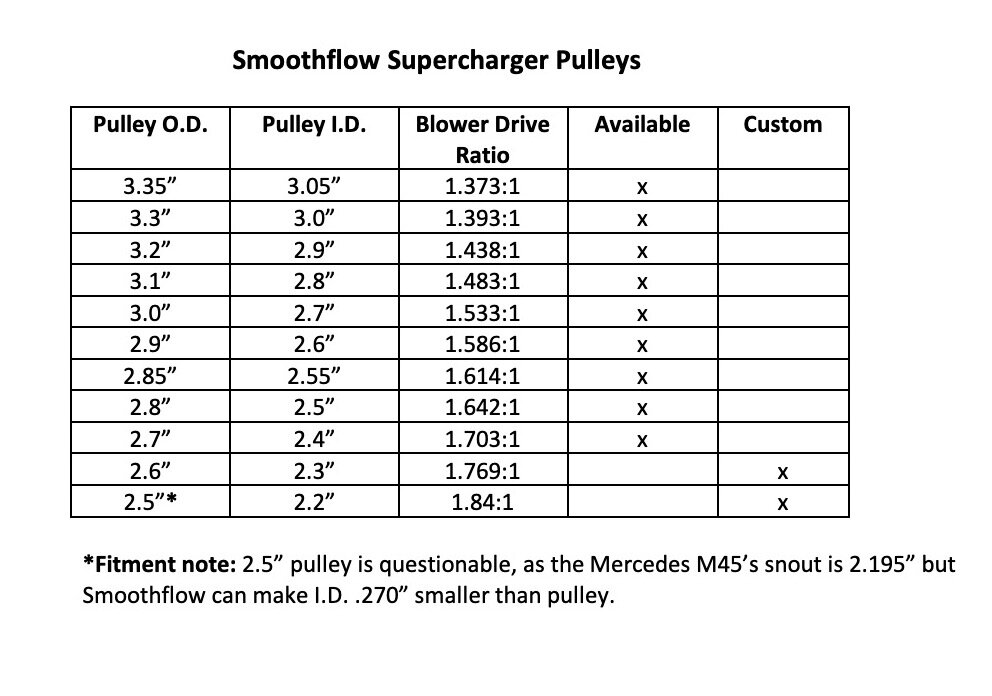
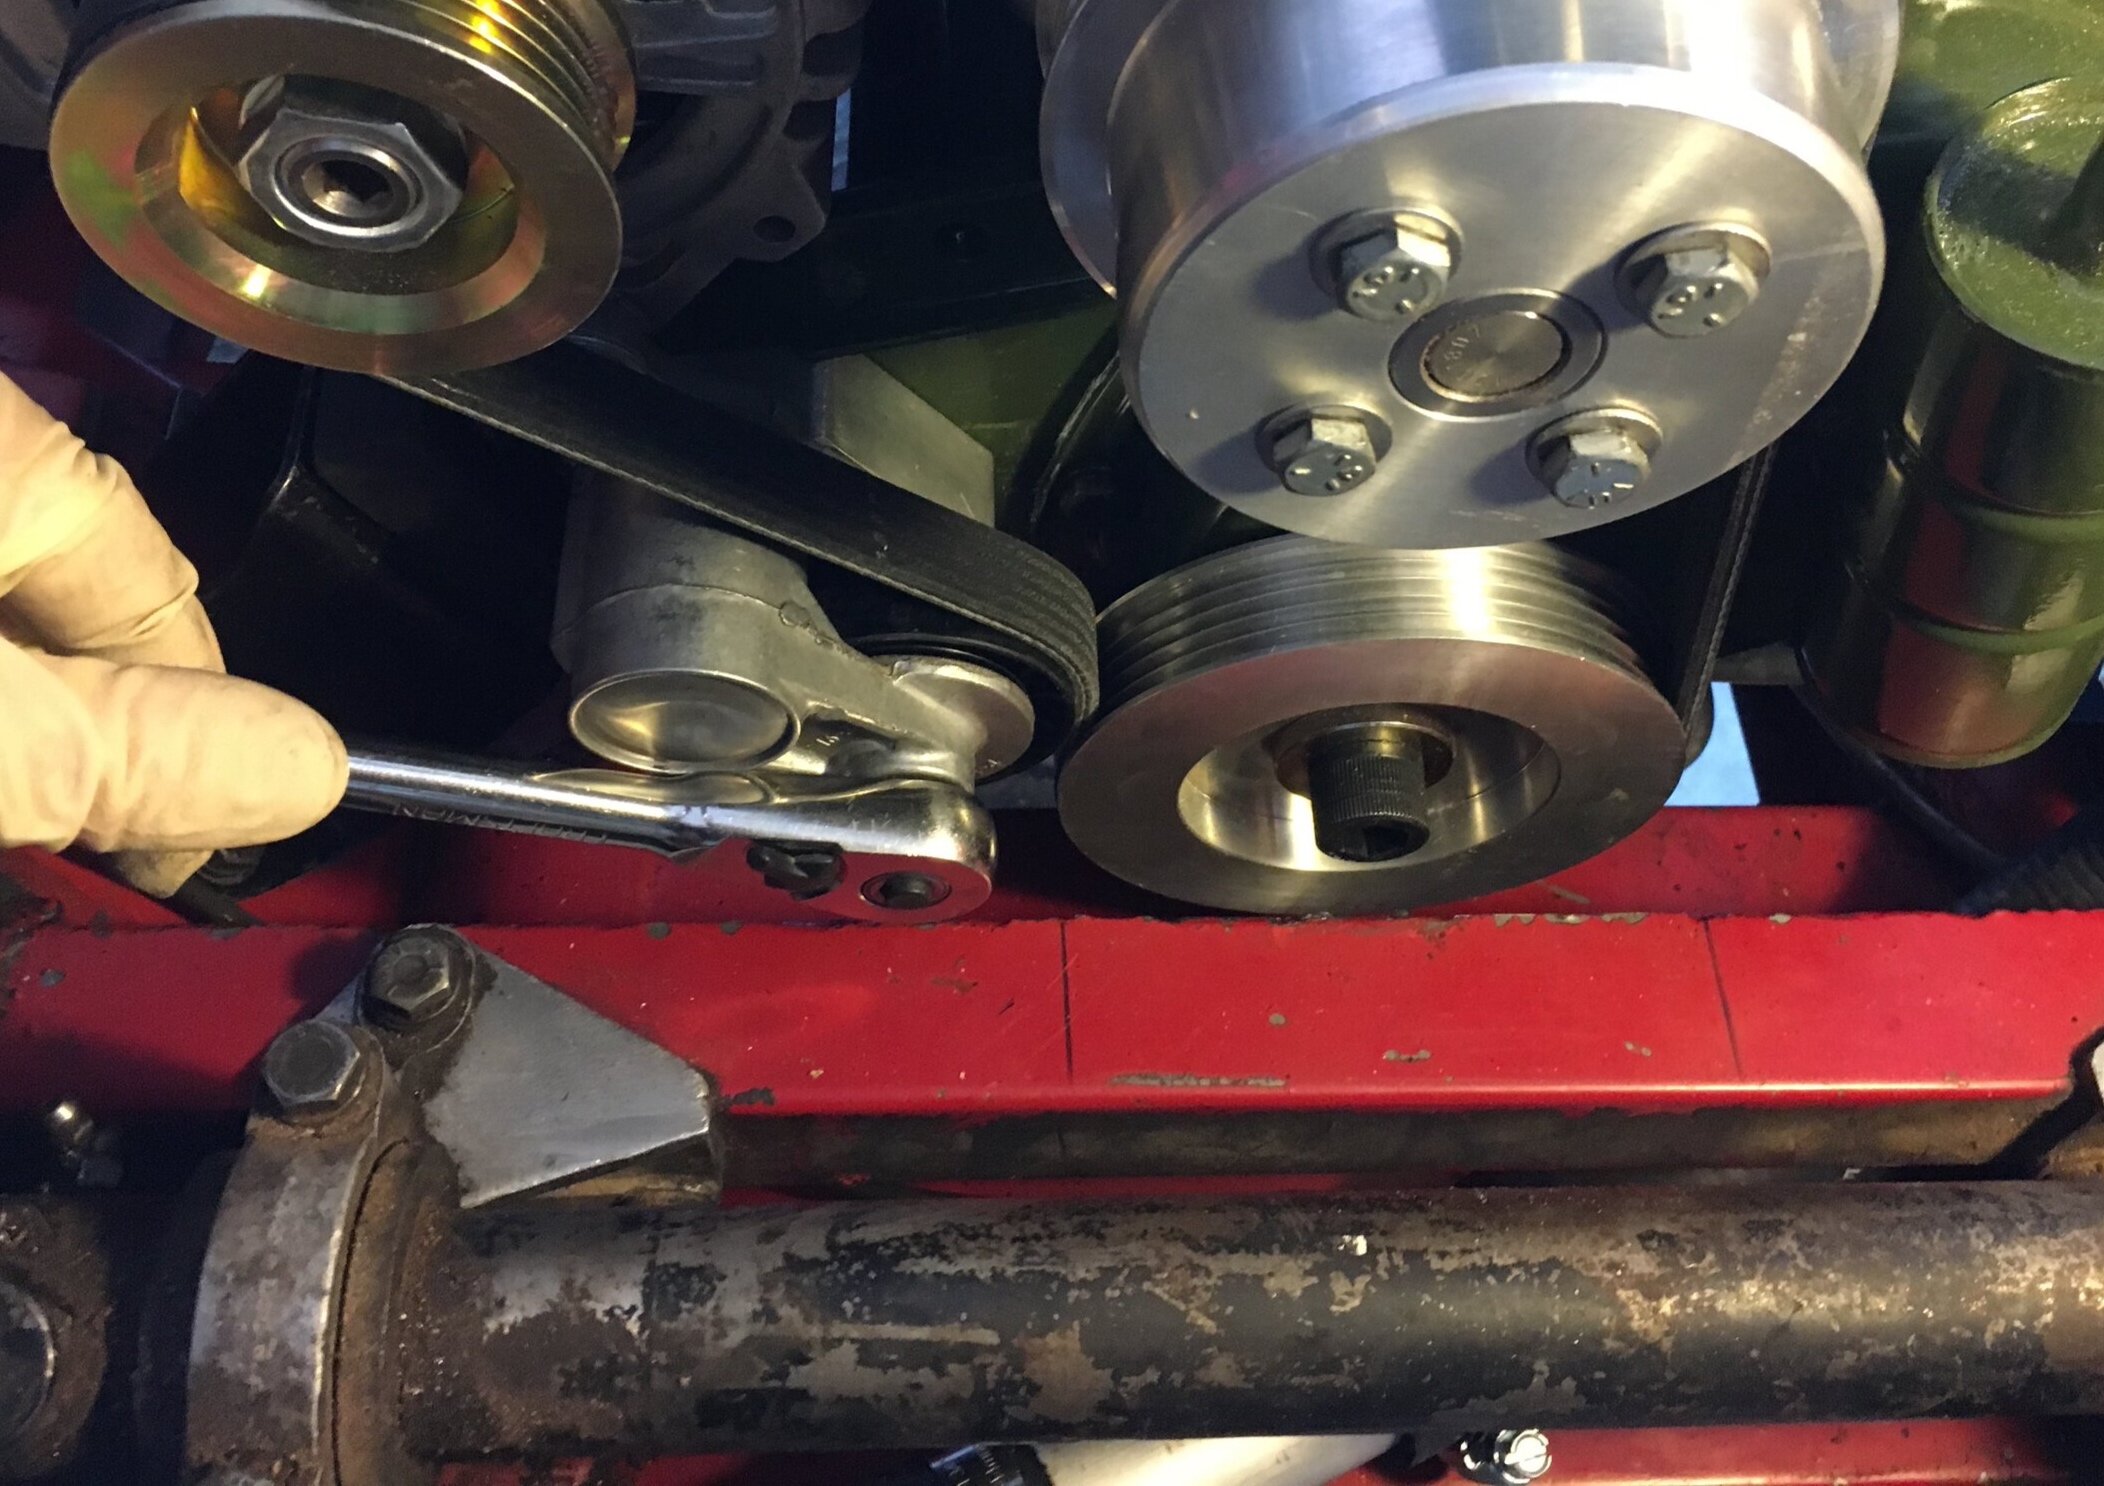
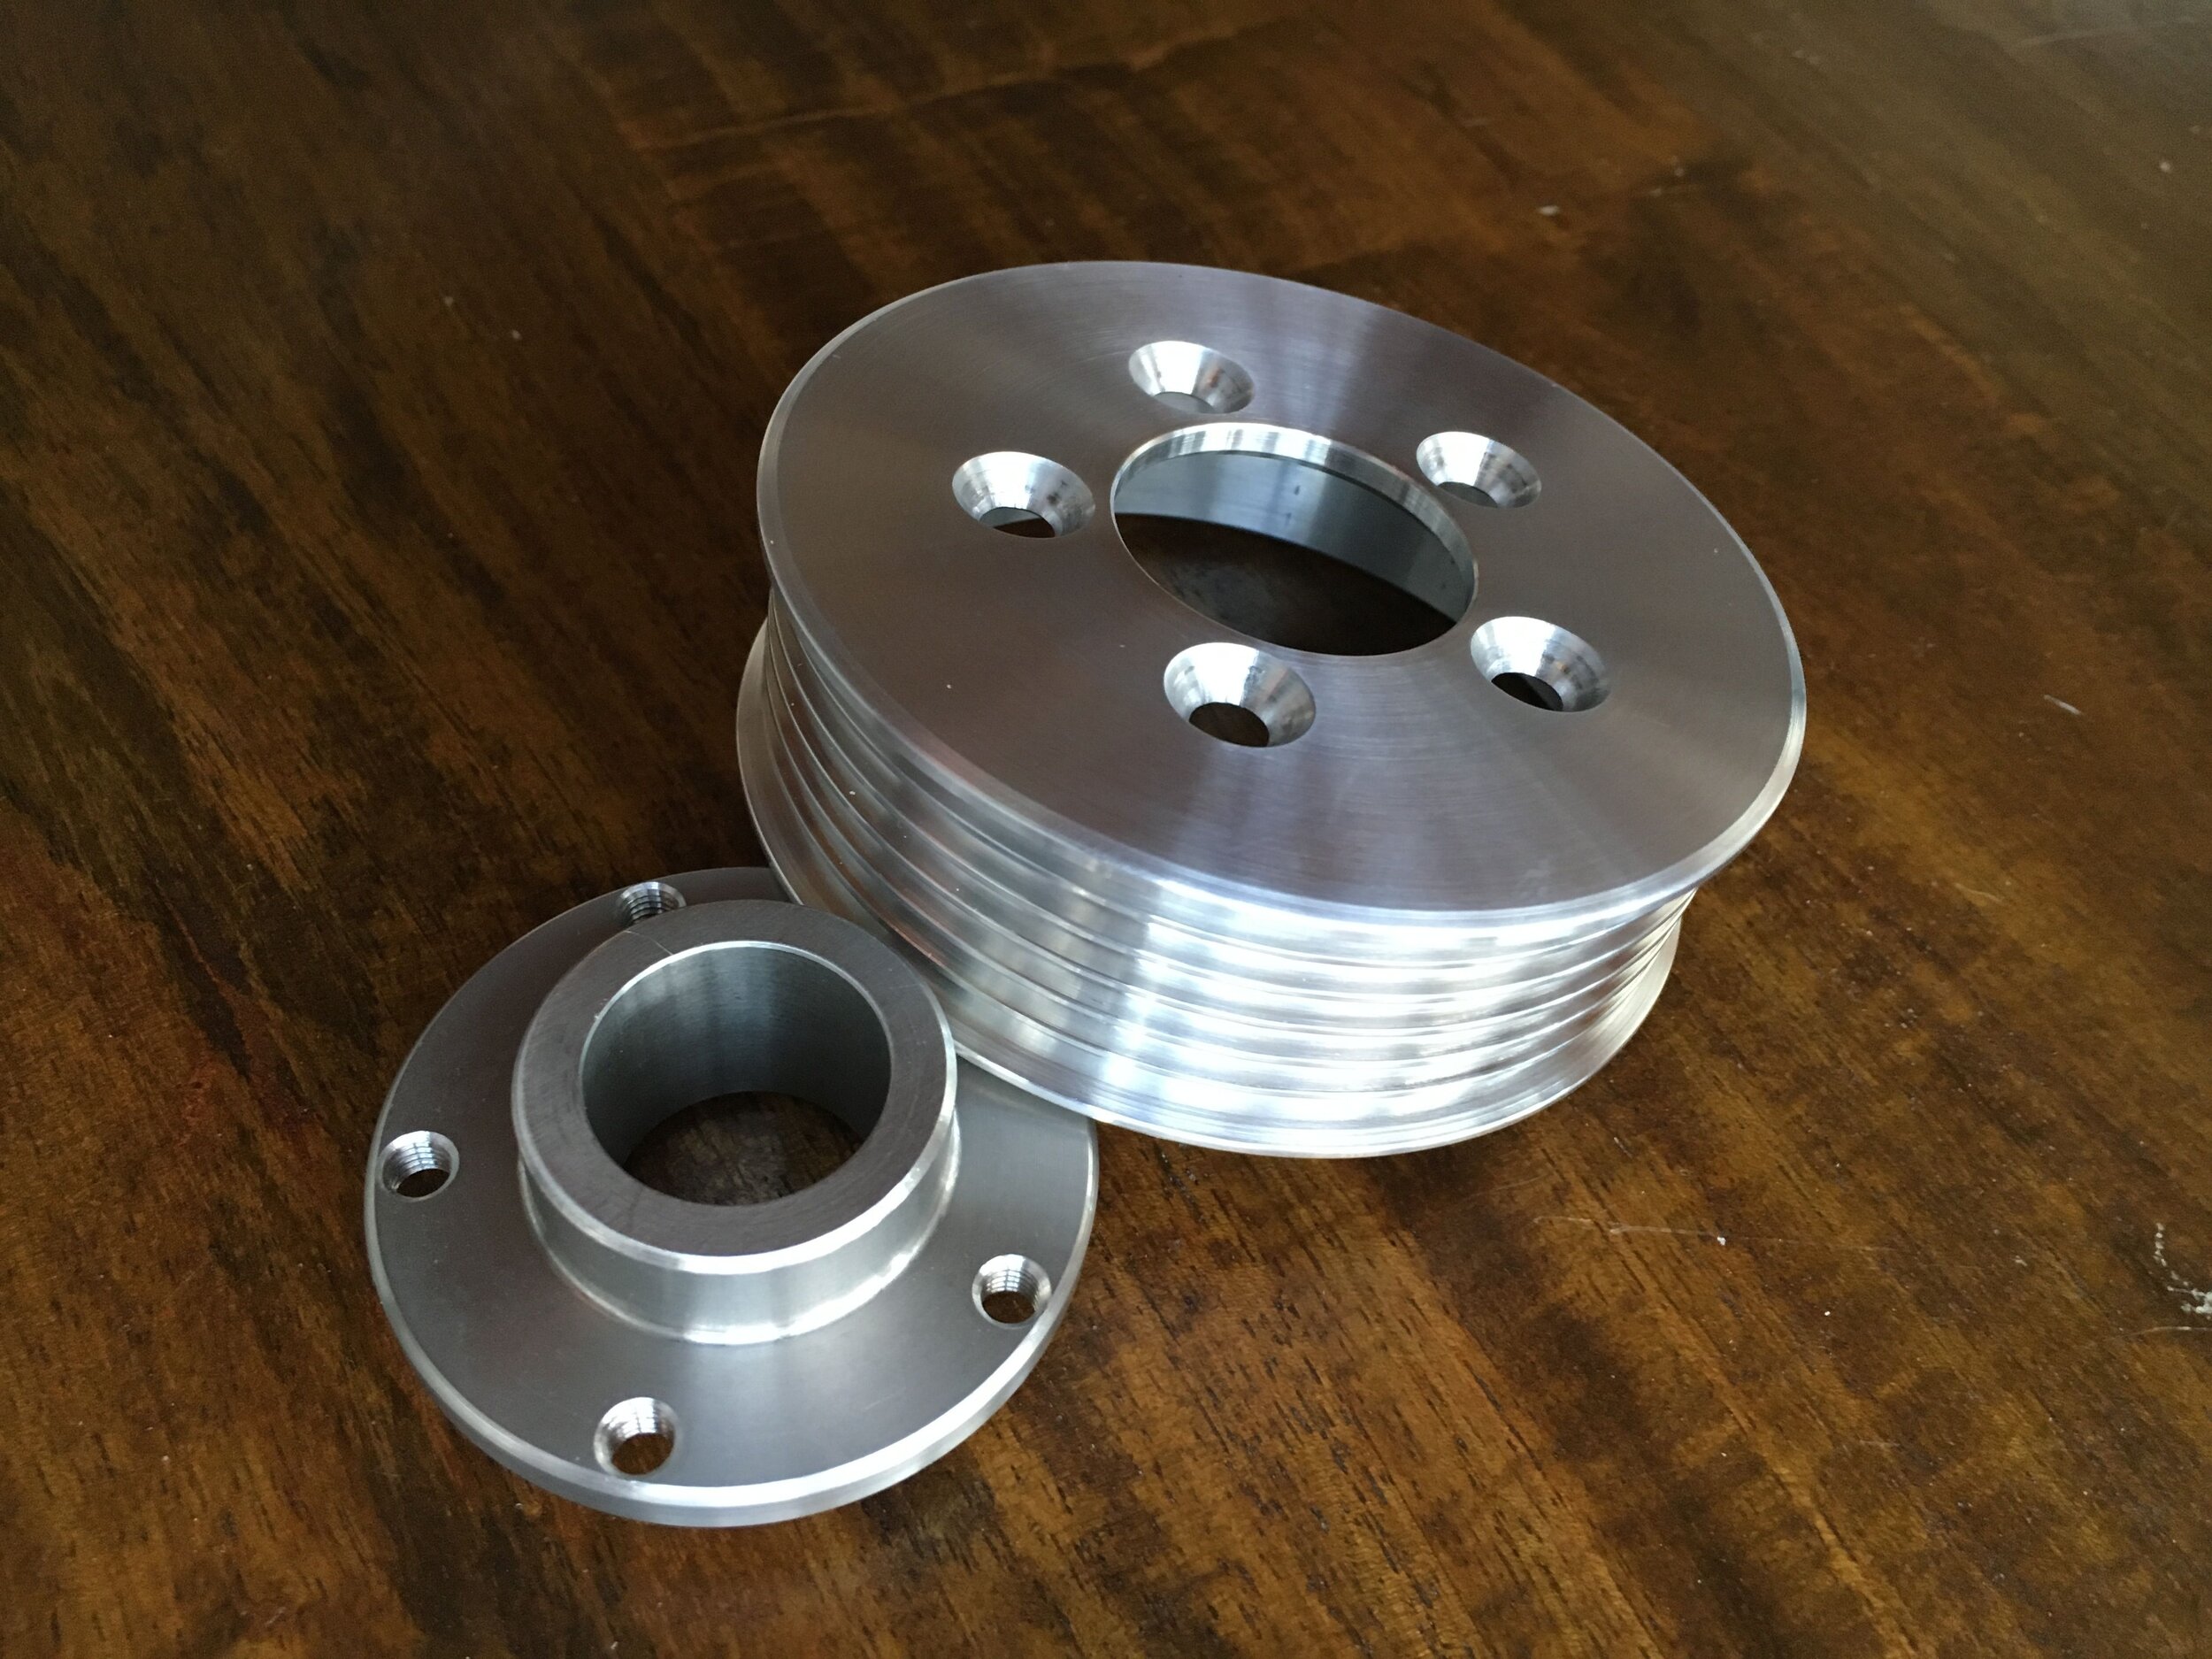
As for boost levels, the modular supercharger pulley system used in this conversion enables your choice of no fewer than eleven (11) different pulley sizes. Within a matter of moments, you can change pulleys to dial in the amount of desired boost to suit your engine’s displacement and modifications:
What about high-compression pistons?
Basically, supercharging achieves a more powerful burn via a different route from a naturally aspirated, high-compression engine. Squeezing the intake charge harder with high-compression pistons, a stroker crankshaft, or by skimming the head effectively achieves the same thing as ramming more mixture into the stock-sized combustion chambers.
If you use high compression together with significant boost, you will quickly get to the point where fuel of sufficient octane isn’t available—certainly not at the pump. Think of a blown, top fuel drag racer.
If you currently run high-compression pistons or have skimmed the head to reduce combustion chamber area, you can install an MLS (multi-layer steel) head gasket from Cometic, which can be ordered with a custom-thickness middle layer to reduce the compression ratio sufficiently to run gas station premium ‘on the boost.’
Regardless, a chief benefit of this intercooled, blow-through system is that you can purchase up to 11 different blower pulleys to achieve just the right amount of boost for your particular engine, as discussed here.
how difficult is the conversion?
Moderate to advanced. Most of the tasks involve bolting on various parts, but you or someone you hire will have to weld up the mounts for the supercharger. This involves an hour or less of welding after the components are fashioned from mild steel bar and angle iron in 3/16” and 1/8” thickness.
We have now posted free downloadable drawings of the components here and on our purchasing page, so you can fashion them yourself to weld together or carry to a welder to do that for you (~1 hr of labor).
You must also make a simple mounting block for the GM belt tensioner from aluminum bar available on the internet (the online instructions will show you how), install a high-pressure fuel-delivery system (fuel pressure in the float bowl must exceed maximum boost), and convert an SU HIF44 carburetor to run under boost conditions as explained here.
The system is compatible with throttle body fuel injection—using the same intake manifold used in this conversion.
You will need:
(i) a set of mechanic’s hand tools, including flat and round files, scribe or scratch awl, measuring tape and 24” carpenter’s square or straight-edge to align the pulleys;
(ii) bimetal hole saw and hack saw or (preferable) handheld band saw or plasma cutter;
(iii) 4” to 6” bench vise (bigger is better—you will use this countless times on your Spridget or Minor);
(iv) compressed air and an inexpensive rotary grinder (ours cost $13.00 on Amazon) to run a carbide rotary bit, although you can use a drill motor to do that;
(v) a drill motor or Dremel to slot the adjustment holes in the supercharger mounts;
(vi) a handheld tubing bender and a mini tubing cutter for the fuel lines;
(vii) a drill or ideally a drill press. A smaller, inexpensive bench-mounted press works fine, and is what we used to produce consistent results; and
(viii) an inexpensive combination vacuum and fuel pressure gauge (there is one pictured in the instructions) or single-function fuel pressure gauge.
what do i have to buy?
You will need certain core components, together with a host of widely-available parts including silicone snorkel elbows, a K&N-style performance air cleaner, ‘T-bar’ style hose clamps and aluminum connecting tubes (an inexpensive kit is in the parts list), steel or aluminum fuel delivery and return lines (the OEM 1/4” fuel line is too small and may be removed or left in place and merely bypassed), a high-pressure fuel pump and aluminum swirl tank, and various fasteners.
An inexpensive vacuum/boost gauge helps in tuning and is fun to monitor while operating the system once installed, but is not vital.
We are working on a complete parts list, which is available in interim form by clicking here.
how much weight does the conversion add?
The supercharger, CNC-machined aluminum M45 manifold adapter, and mild steel mounts add approximately 24.25 lbs. or 11 kg. The aluminum serpentine crankshaft and water pump pulleys yield a net savings in weight over their steel counterparts, as do the single HIF44 carburetor and manifold over the dual HS2s. Including the aluminum intercooler, intake plumbing, fresh-air intake rerouting, and high-pressure fuel delivery system, plan on a net increase of less than 30 lbs. or 13.6 kg.
This modest weight gain is, of course, far outweighed by the performance gain of at least 30 h.p.
can i still access the distributor and spark plugs?
Yes. Here are images showing that the spark plugs are easily accessed with an extension and spark plug socket:
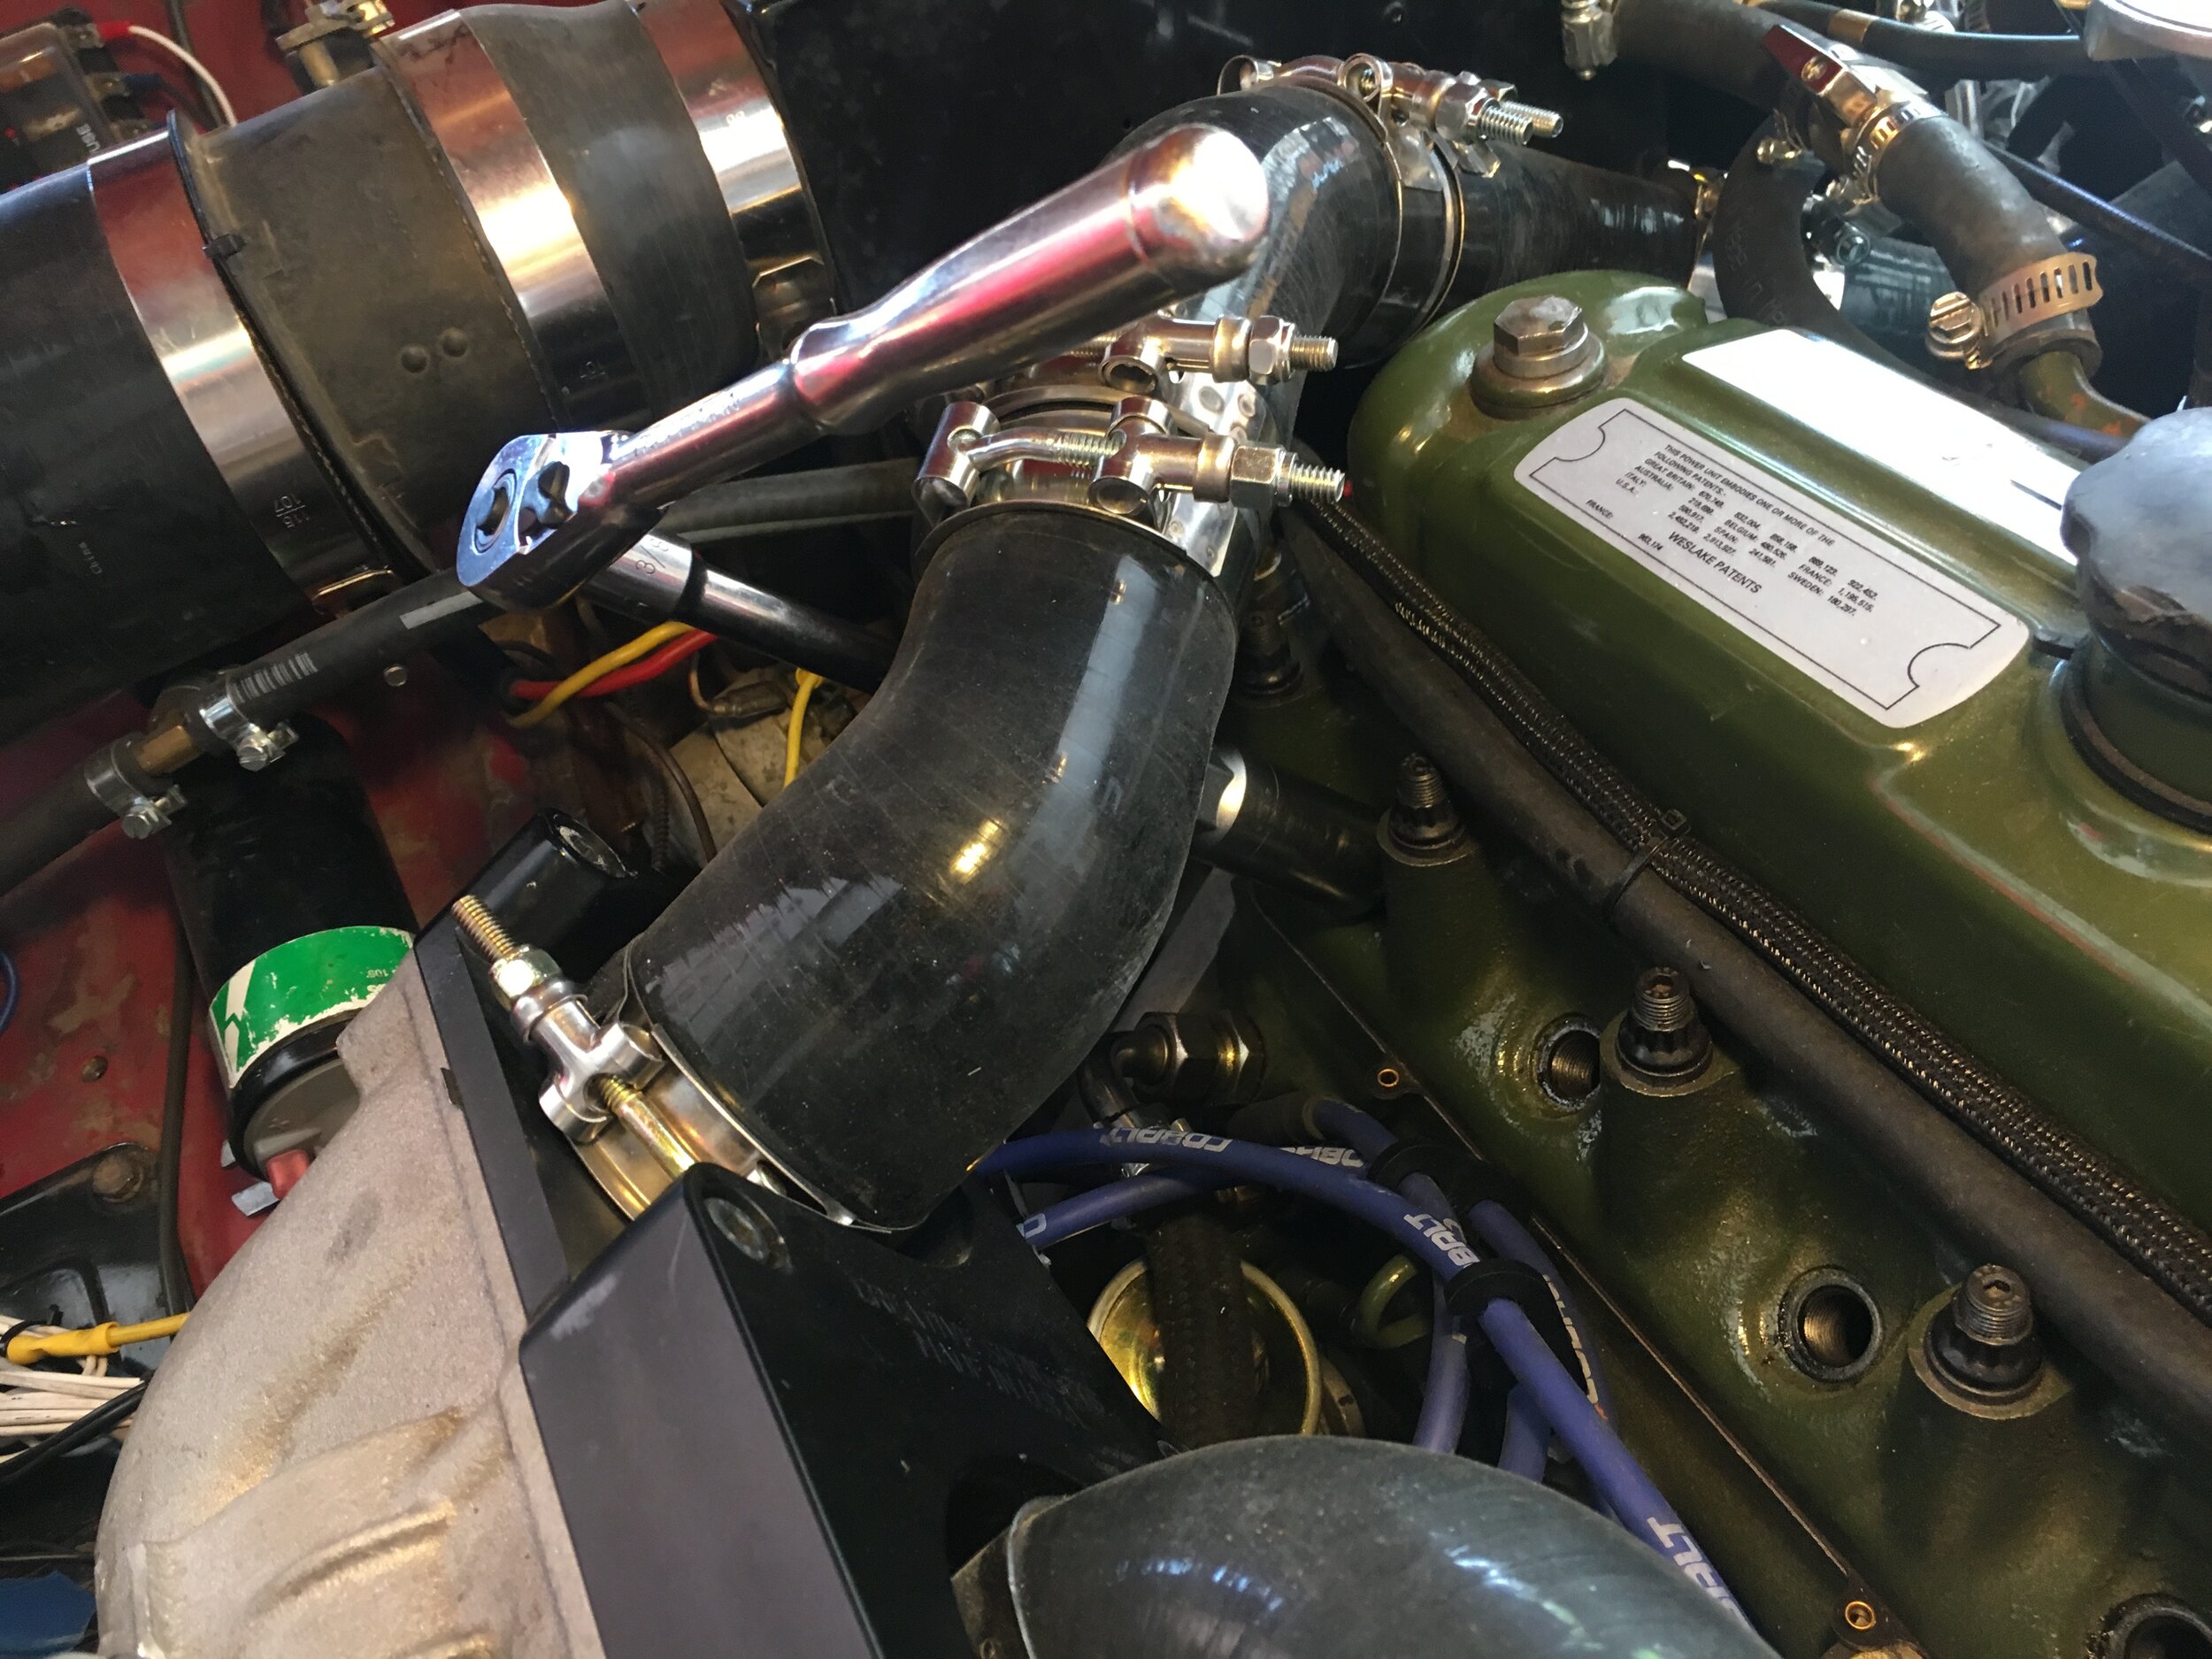
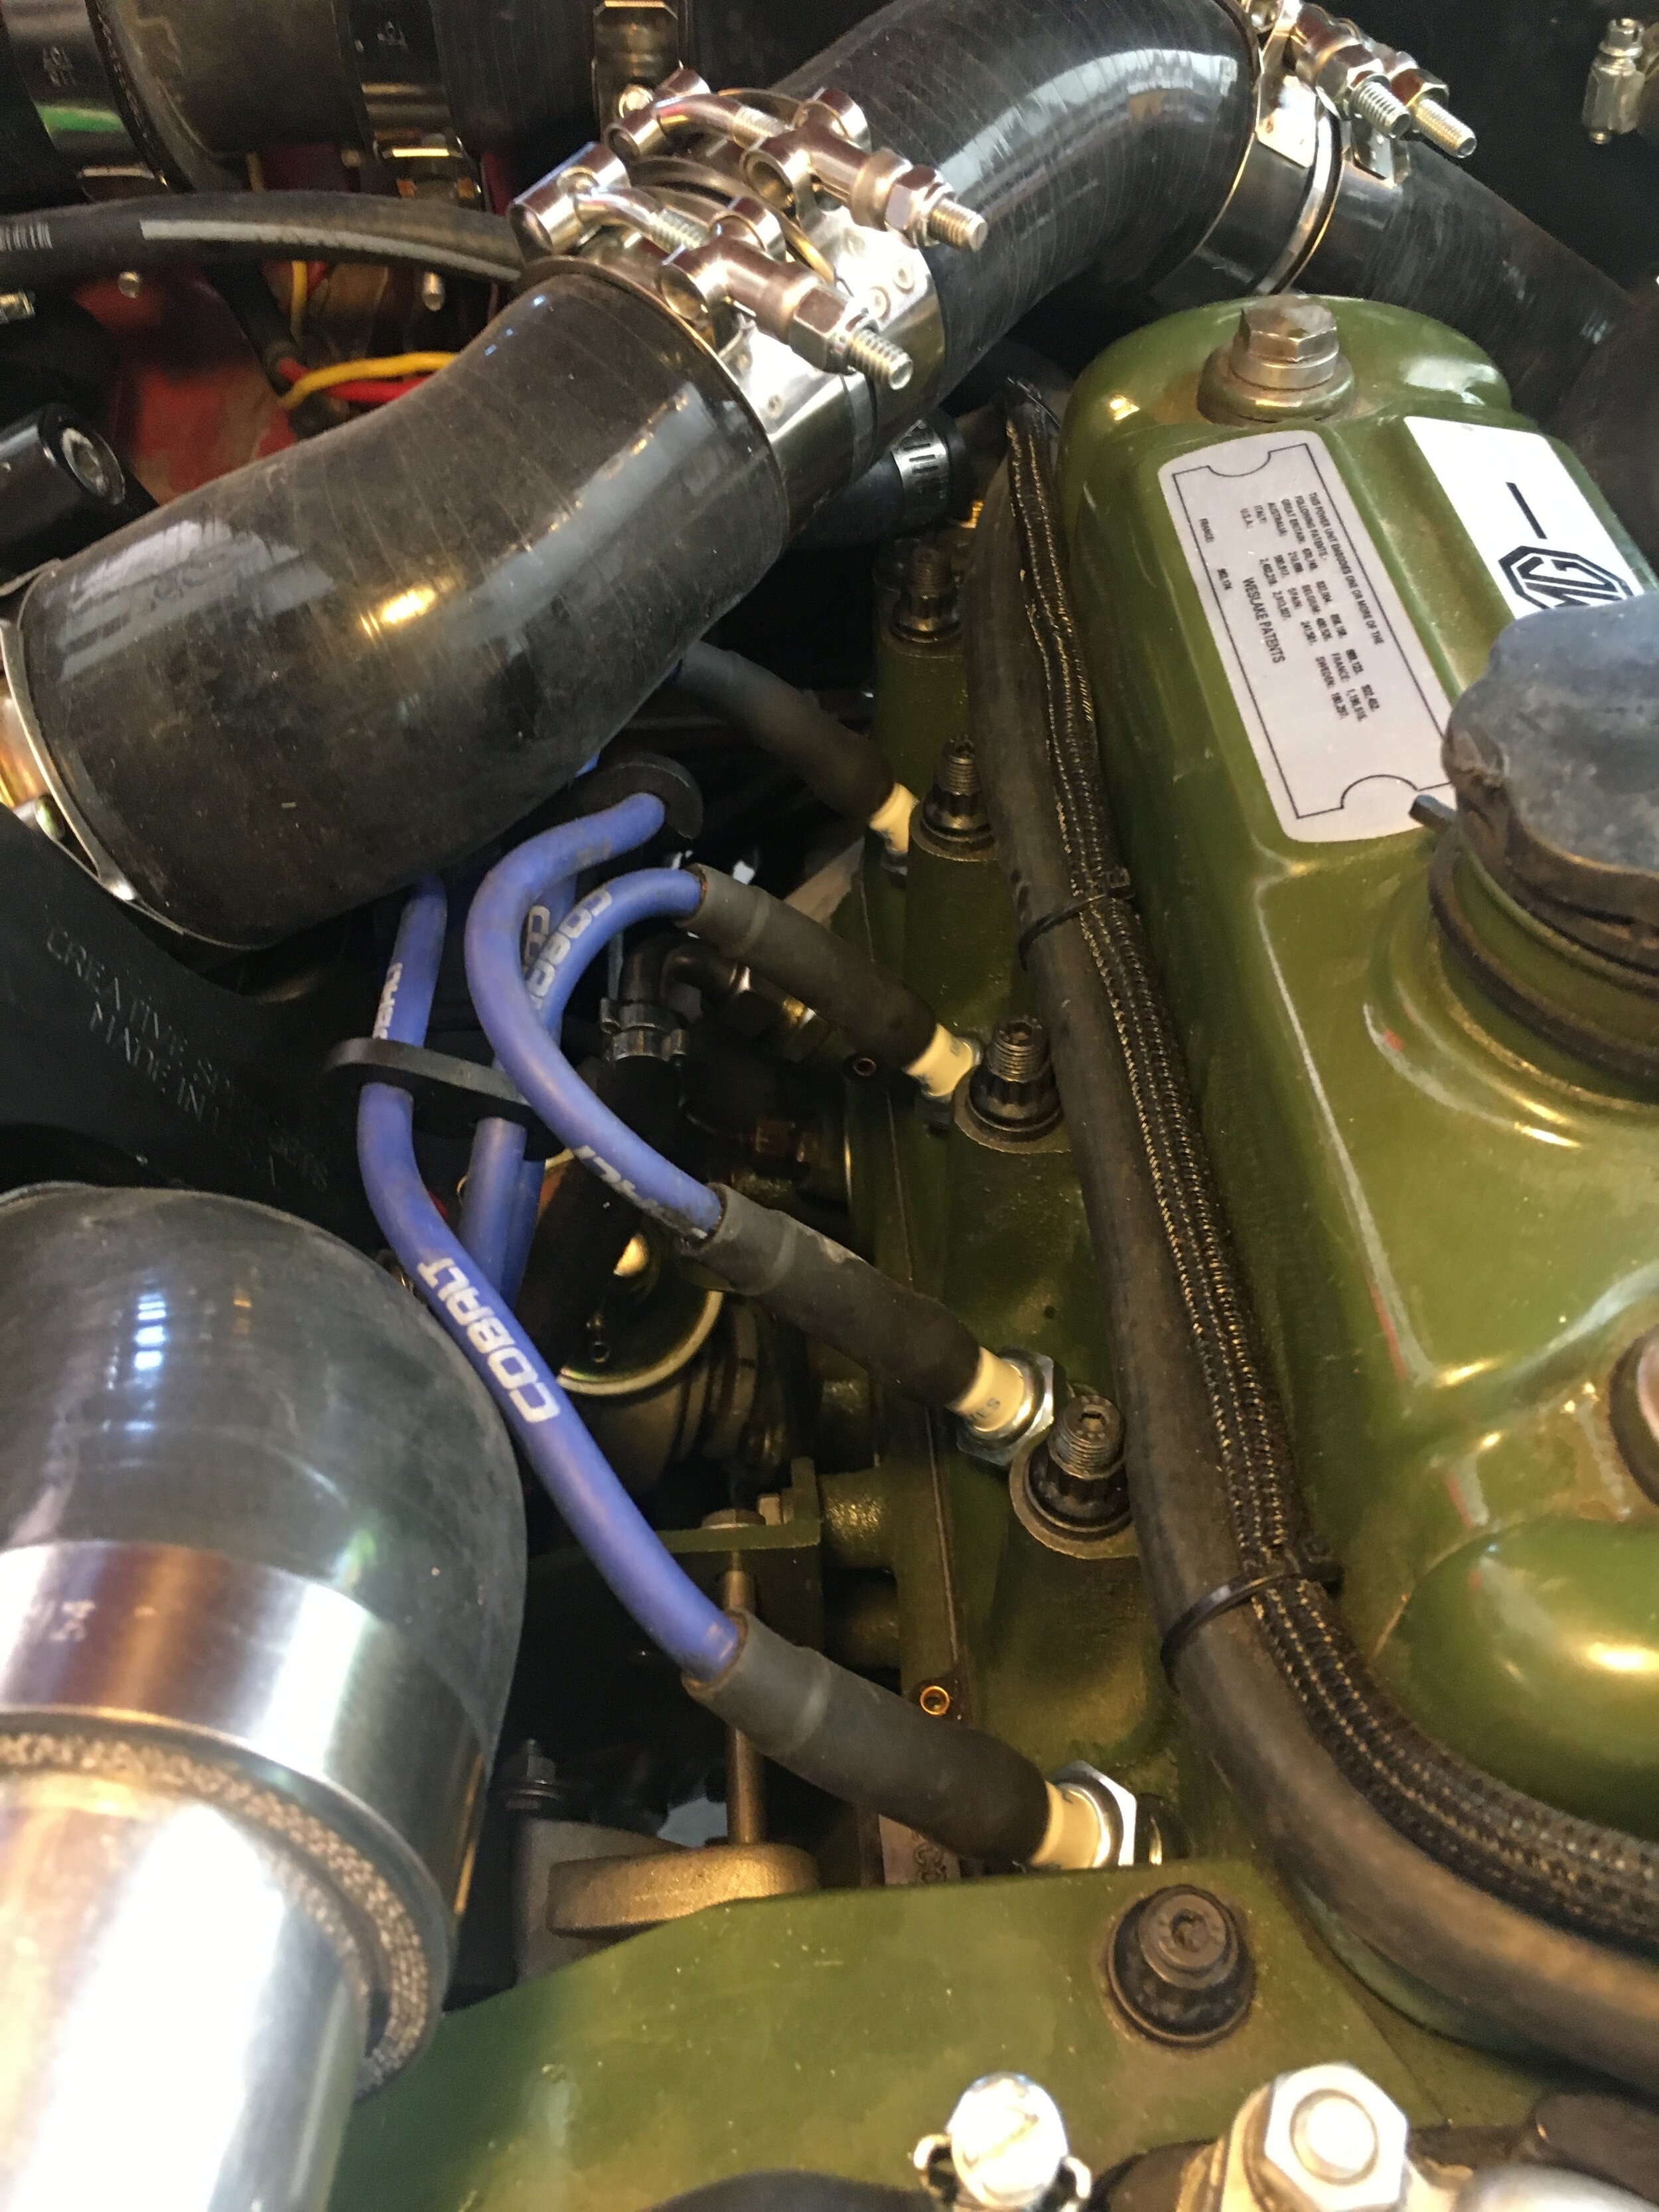
If you remove the intake snorkel—just two hose clamps—you can remove the distributor cap without disturbing the high tension wires.
From there, simply withdraw the distributor as usual. We run a Pertronix module for ‘set it and forget it’ operation:

will this conversion work with a belt camshaft drive?
Yes. However, the Mini Spares belt camshaft drive setup (for instance) puts the timing cover roughly 5.5mm or .22” forward. This requires shimming the serpentine belt crankshaft and water pump pulleys forward a corresponding amount.
The mounts for the supercharger as currently designed will yield sufficient fore-aft adjustment to accommodate the shimming, but if not it is an easy matter to shim the blower pulley with washers as well. You would just need longer, countersunk Allen screws to attach SmoothFlow Pulleys’ modular blower pulley to the stainless steel flange.
Although we did not engineer our 5-rib serpentine belt crank pulley with the belt camshaft drive in mind, as it reduces the amount of contact area between the crankshaft and pulley, at least one user has done this. He recommends using a heavy duty, extra-long Allen head screw to secure the crank pulley, available from Spridget Mania.
However, using the Allen screw means it is easier to turn the engine to adjust the valves by either putting the car in 4th gear and tugging on the bumper, or removing the spark plugs and turning the serpentine belt by hand.
(back to top)
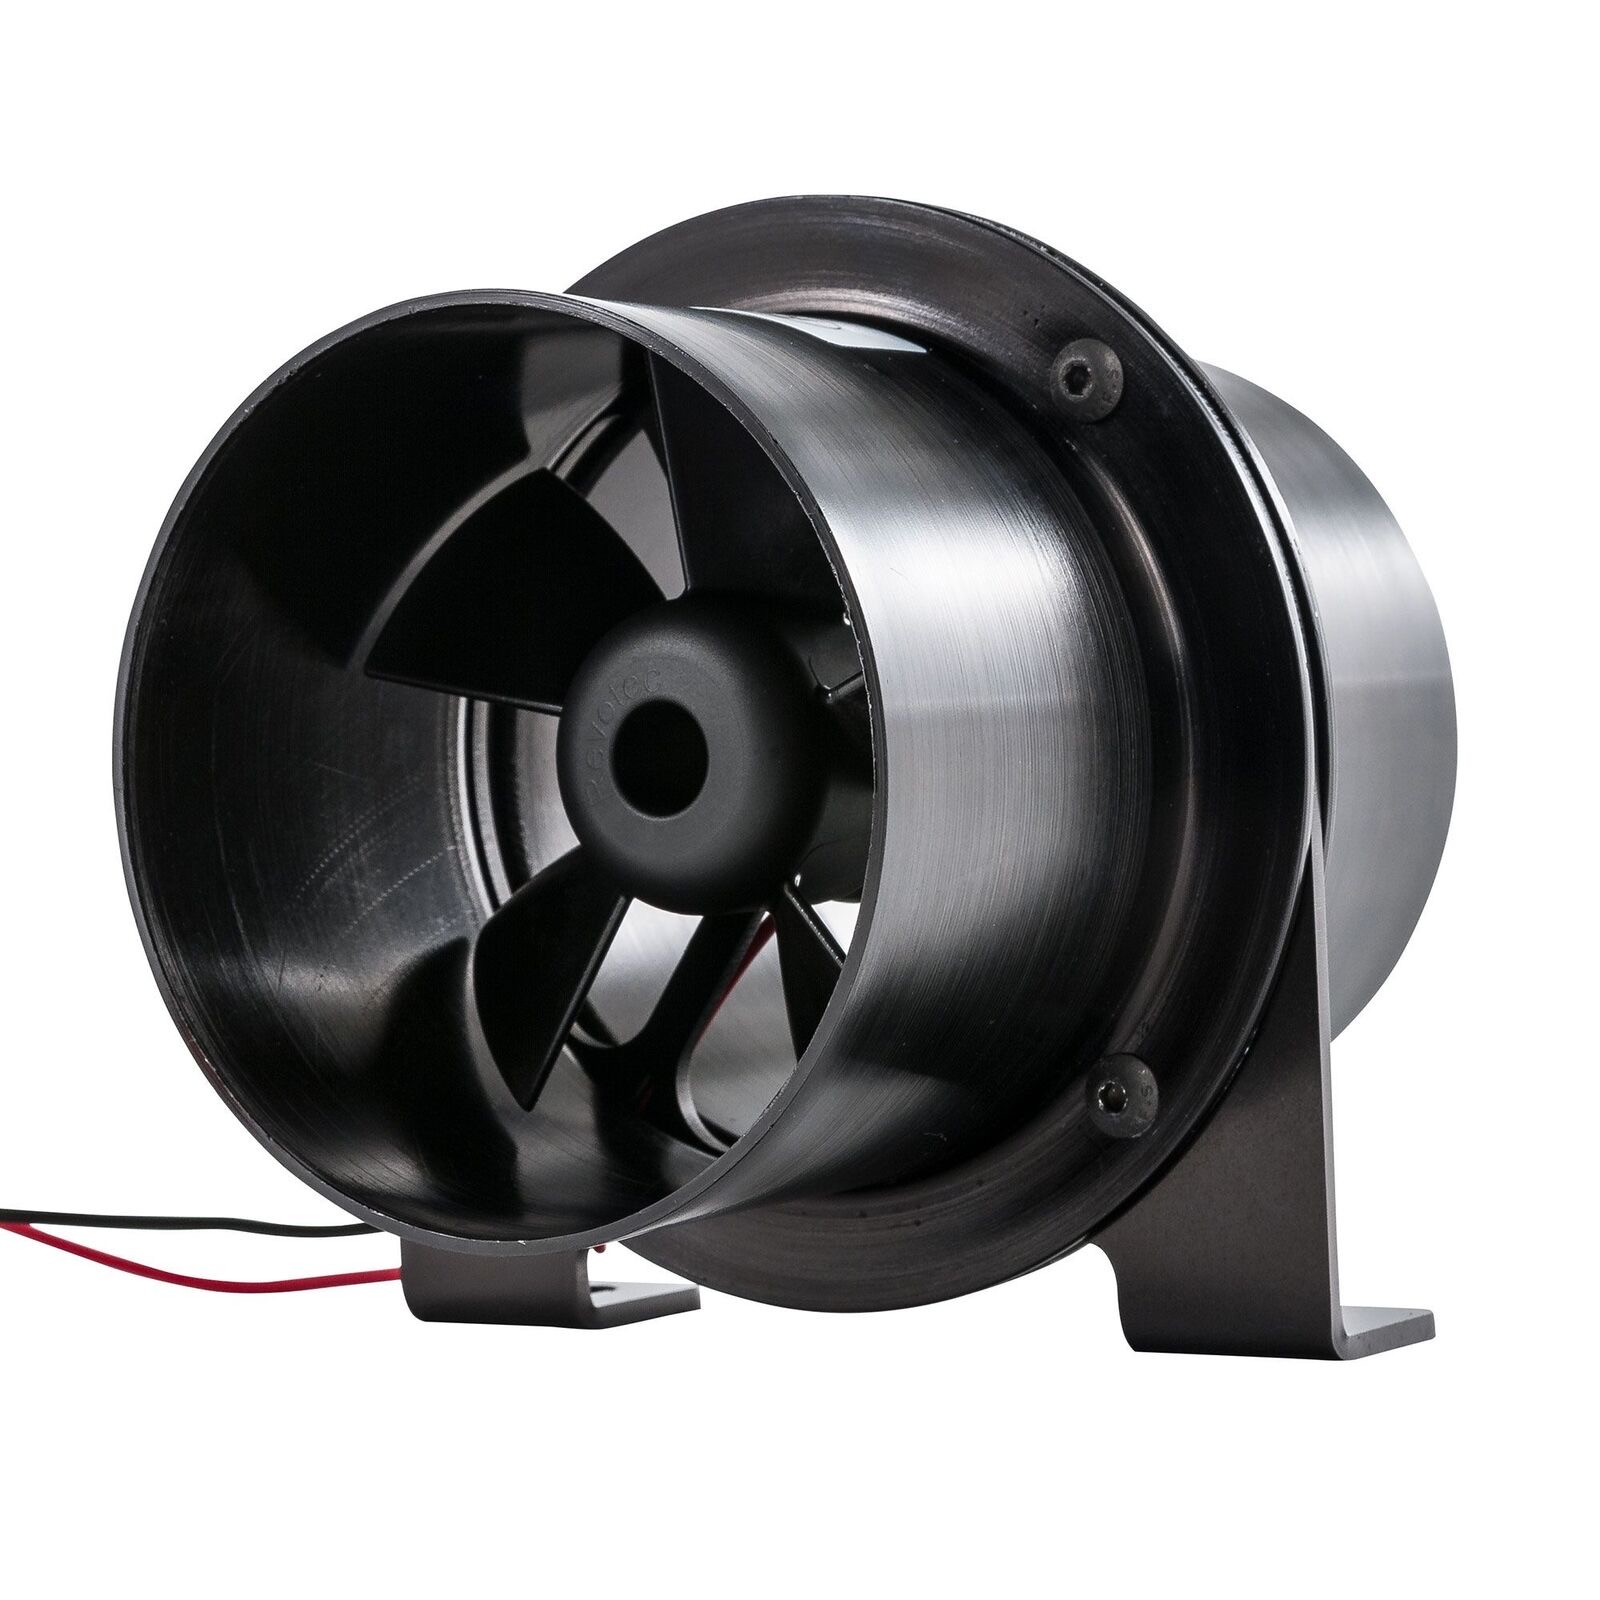
does this conversion retain the heater?
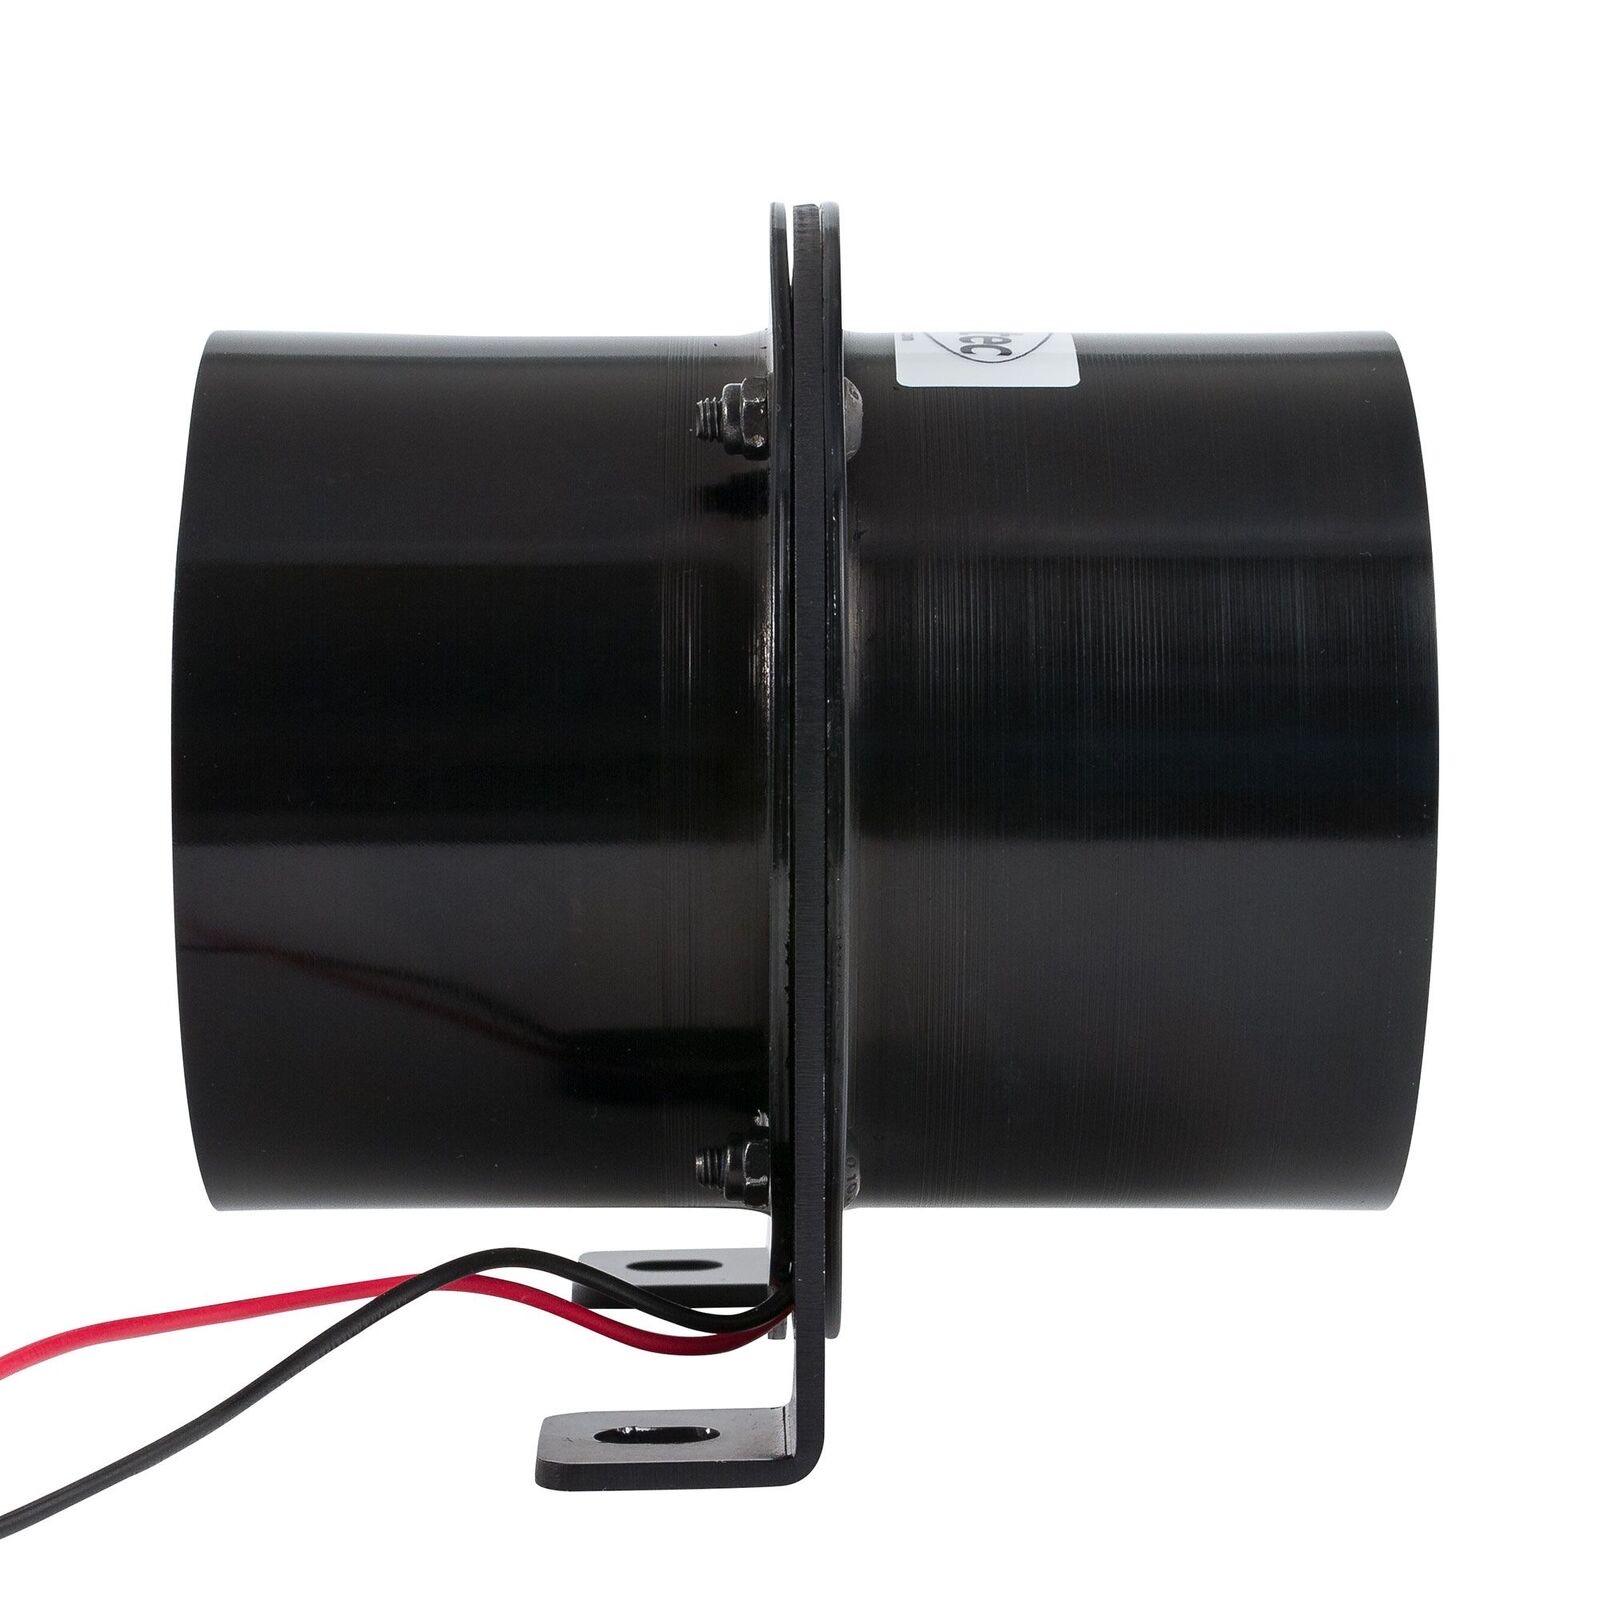
Yes. However, the intake duct must be re-routed underneath the right-hand fender as explained here, and the OEM fan replaced with an inline model, such as this aluminum racing fan from Revotec (though inexpensive plastic fans are available):
Can i retain the front bumper?
Yes. If you cut vents in the lower valance panel to direct air flow onto the lower 60% of the intercooler’s core, they will end up directly behind the OEM front bumper. However, the Audi A4 Turbo intercooler used on our test mule—and even hidden behind the grille with no vents—reduced intake charge temperature by as much as 127.8 F. You will have to make minor modifications to the bumper mounts with a half-round file or grinder, as shown on the installation page.
Here is the intercooler hiding behind a stock grille and bumper:
will this conversion fit a right-hand drive car?
Yes. The steering column should clear the rear mount by a comfortable margin, assuming you do not stray from the design in the free downloadable drawings. However, as shown in the installation instructions, one UK driver had to cut a small relief in the rear mount to clear his steering column. Thereafter, no issues.
is this conversion reversible?
Yes. Adding the intercooler requires you to cut two holes in the front valance behind the grill. Reversing that step requires welding back in the circular pieces of metal you cut out—roughly 60 minutes of prep and welding. All other steps merely involving installing or removing components.
Rear Disc Brakes
do you sell a complete kit?
CAN I HAVE SOMEONE INSTALL THE CONVERSION FOR ME?
does the conversion add unsprung weight?
WILL THE REAR DISC BRAKE ADAPTERS FIT OTHER CARS?
WHAT WHEELS ARE COMPATIBLE WITH THIS CONVERSION?
IS A PROPORTIONING OR 'BIAS' VALVE NECESSARY?
will this conversion work with heavy duty racing axle half-shafts?
WILL THESE DISC BRAKE ADAPTERS WORK WITH DOUBLE-BEARING HUBS?
WILL THESE ADAPTERS WORK WITH A REAR TRACTION LINK OR PANHARD ROD?
will this conversion accommodate separate hydraulic hand brakes for autotesting?
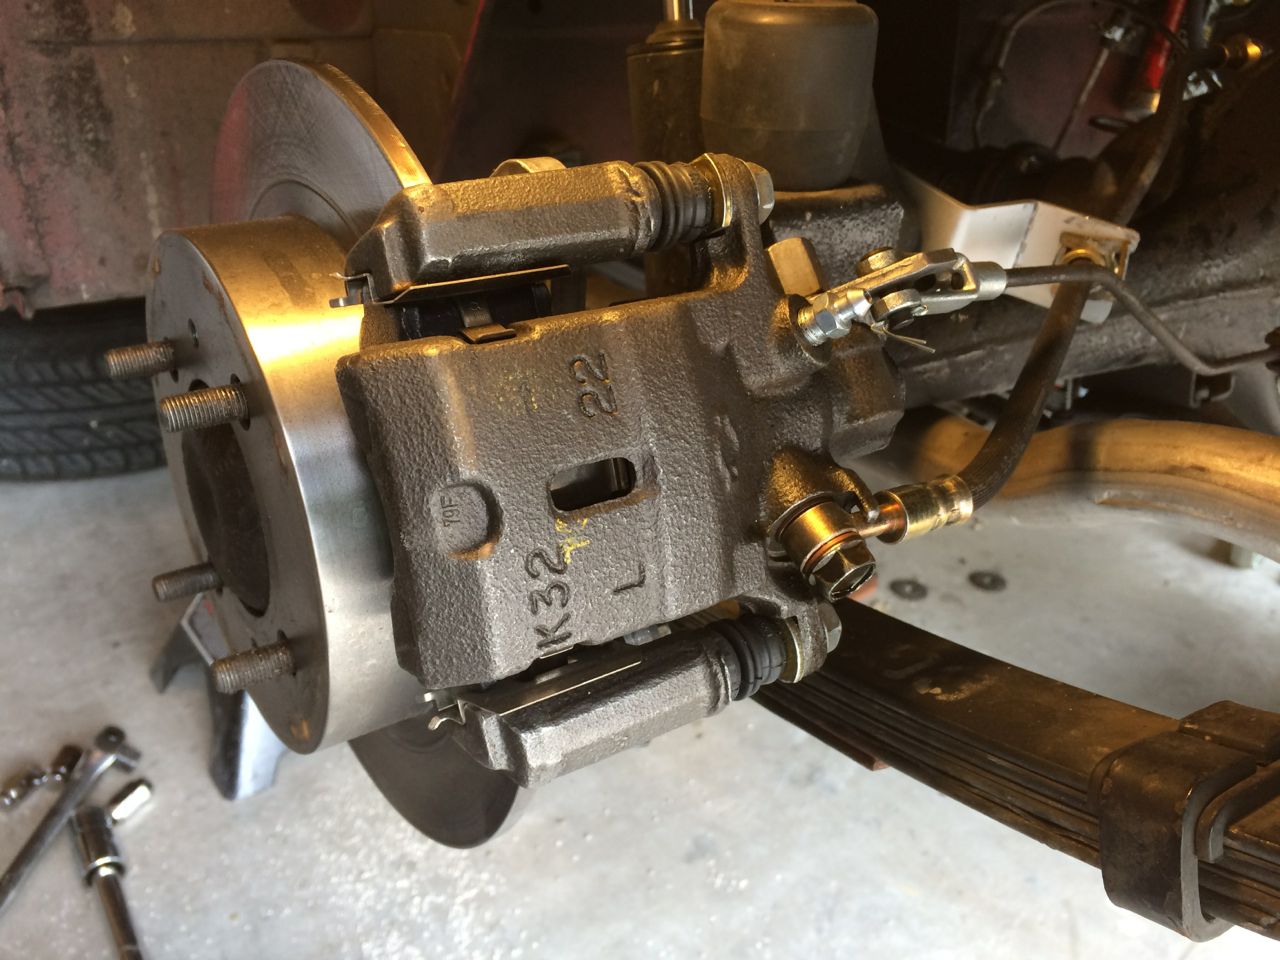
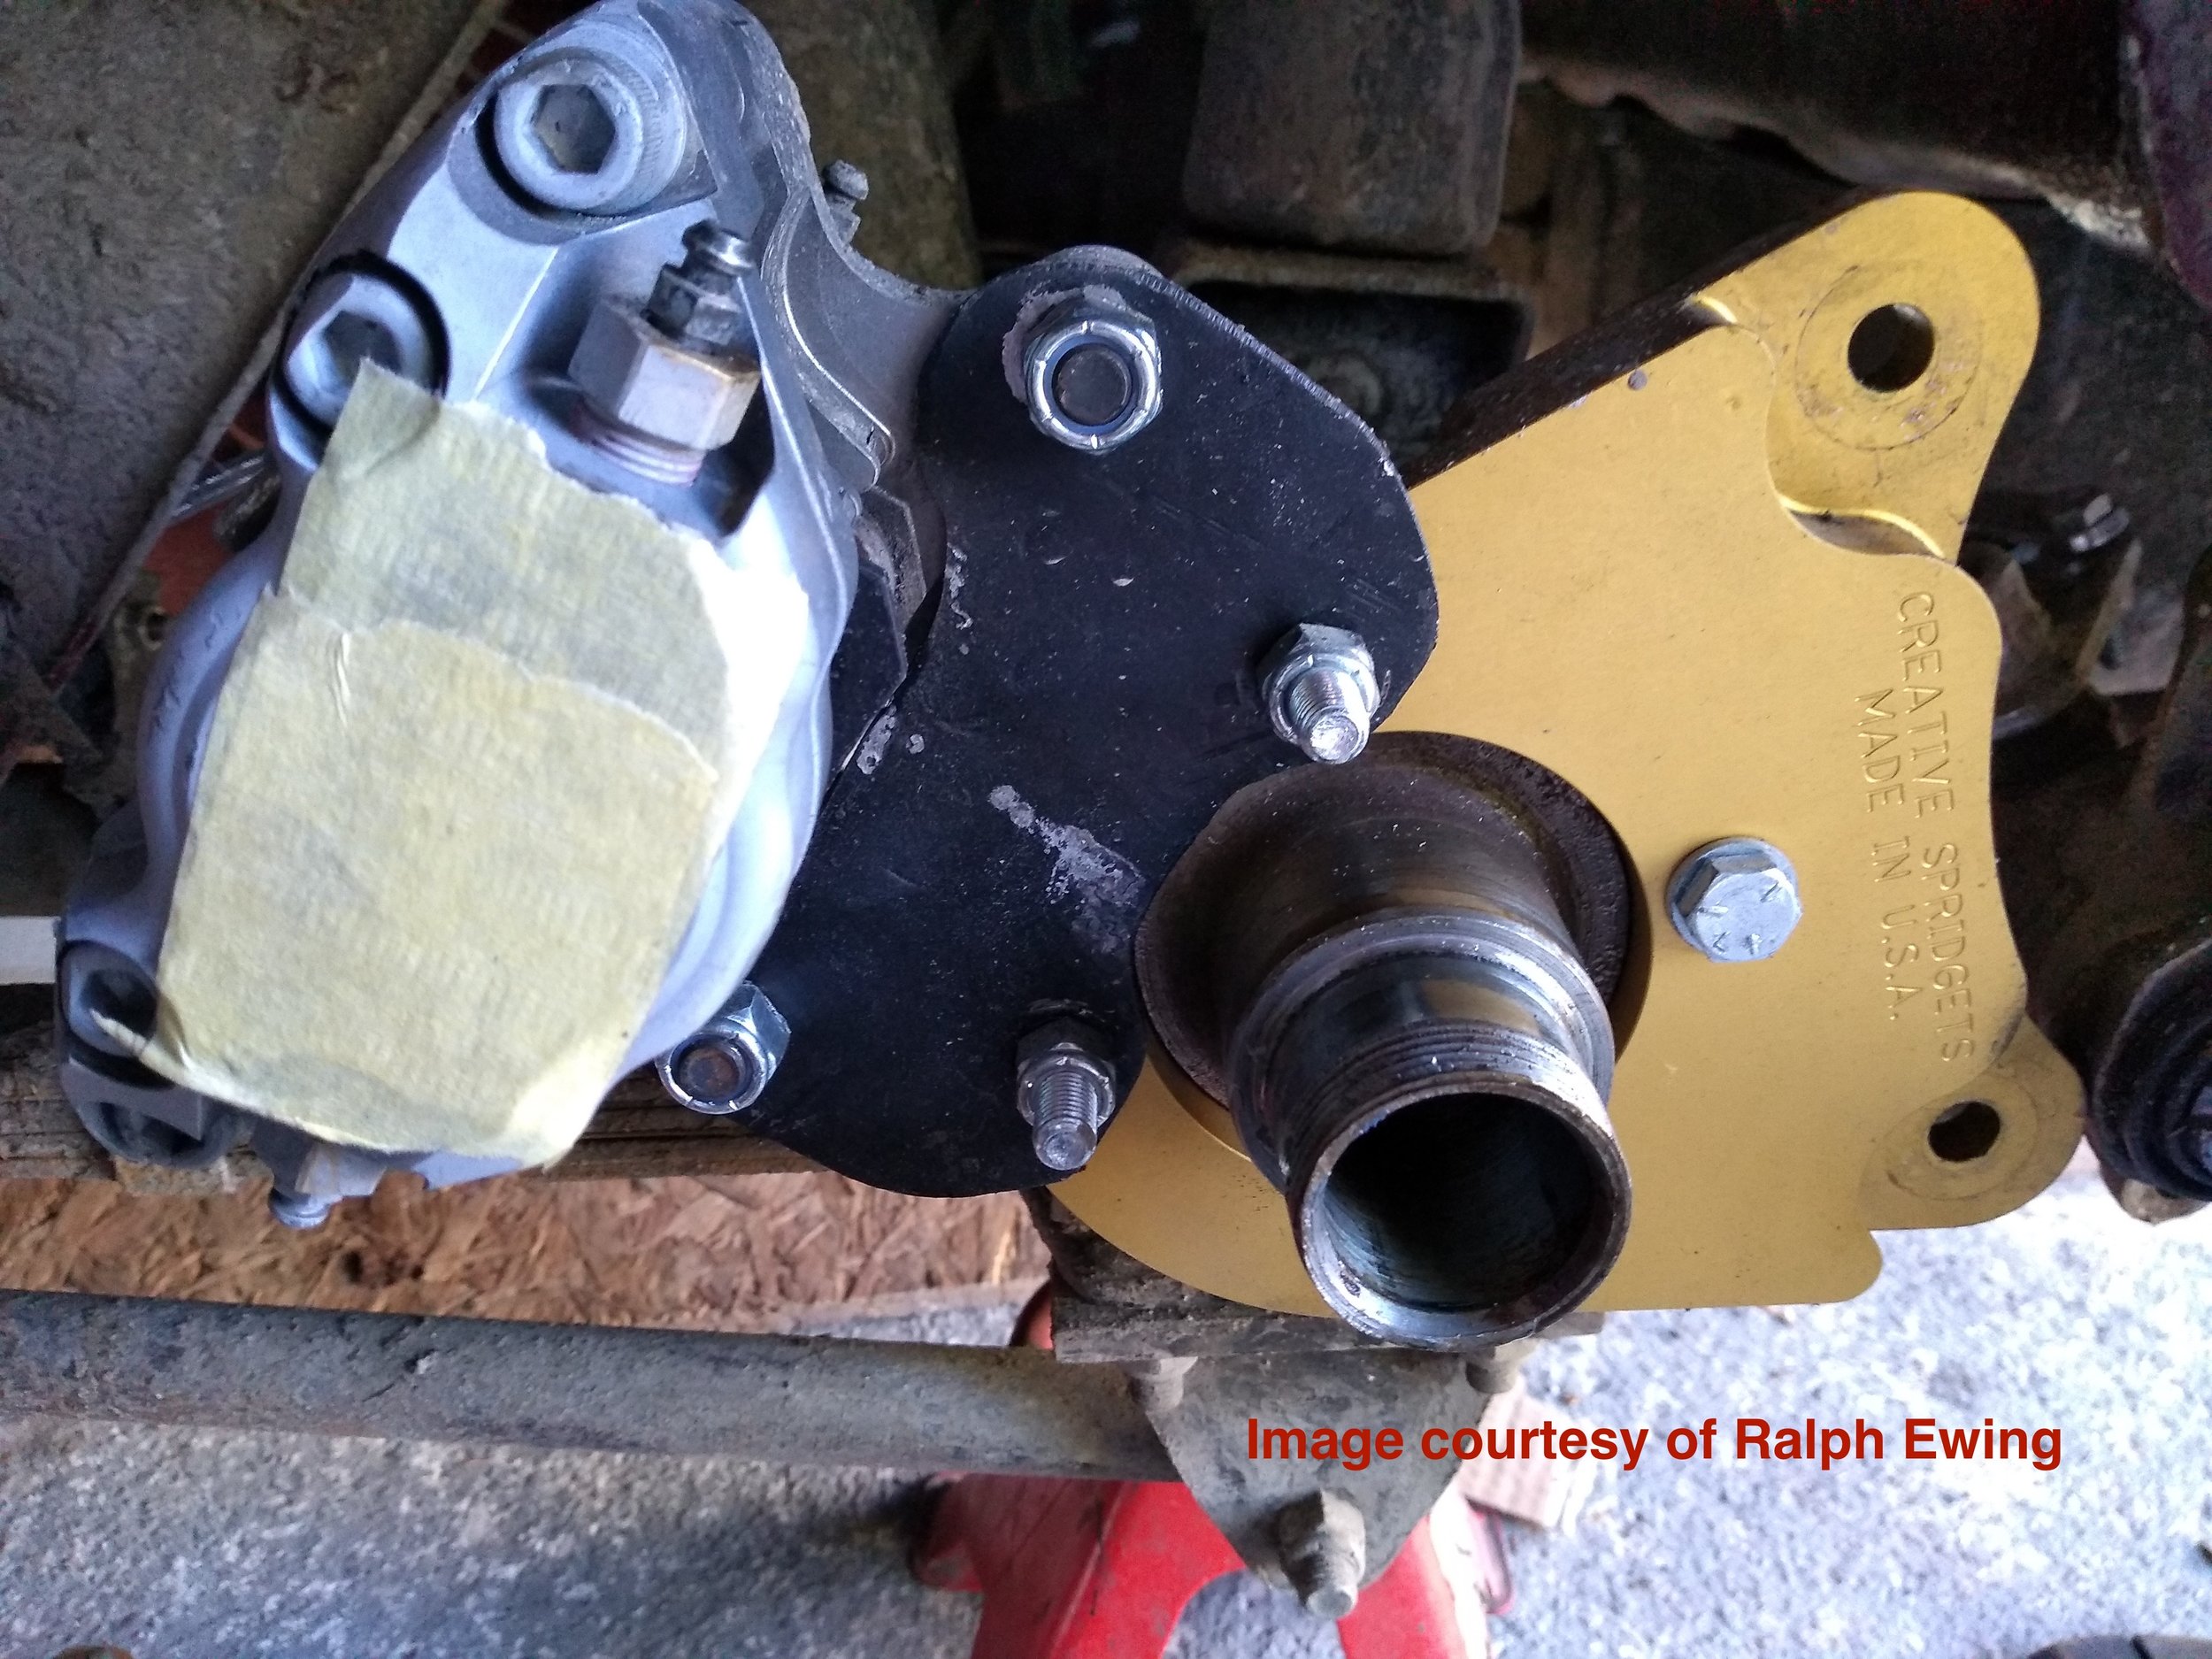
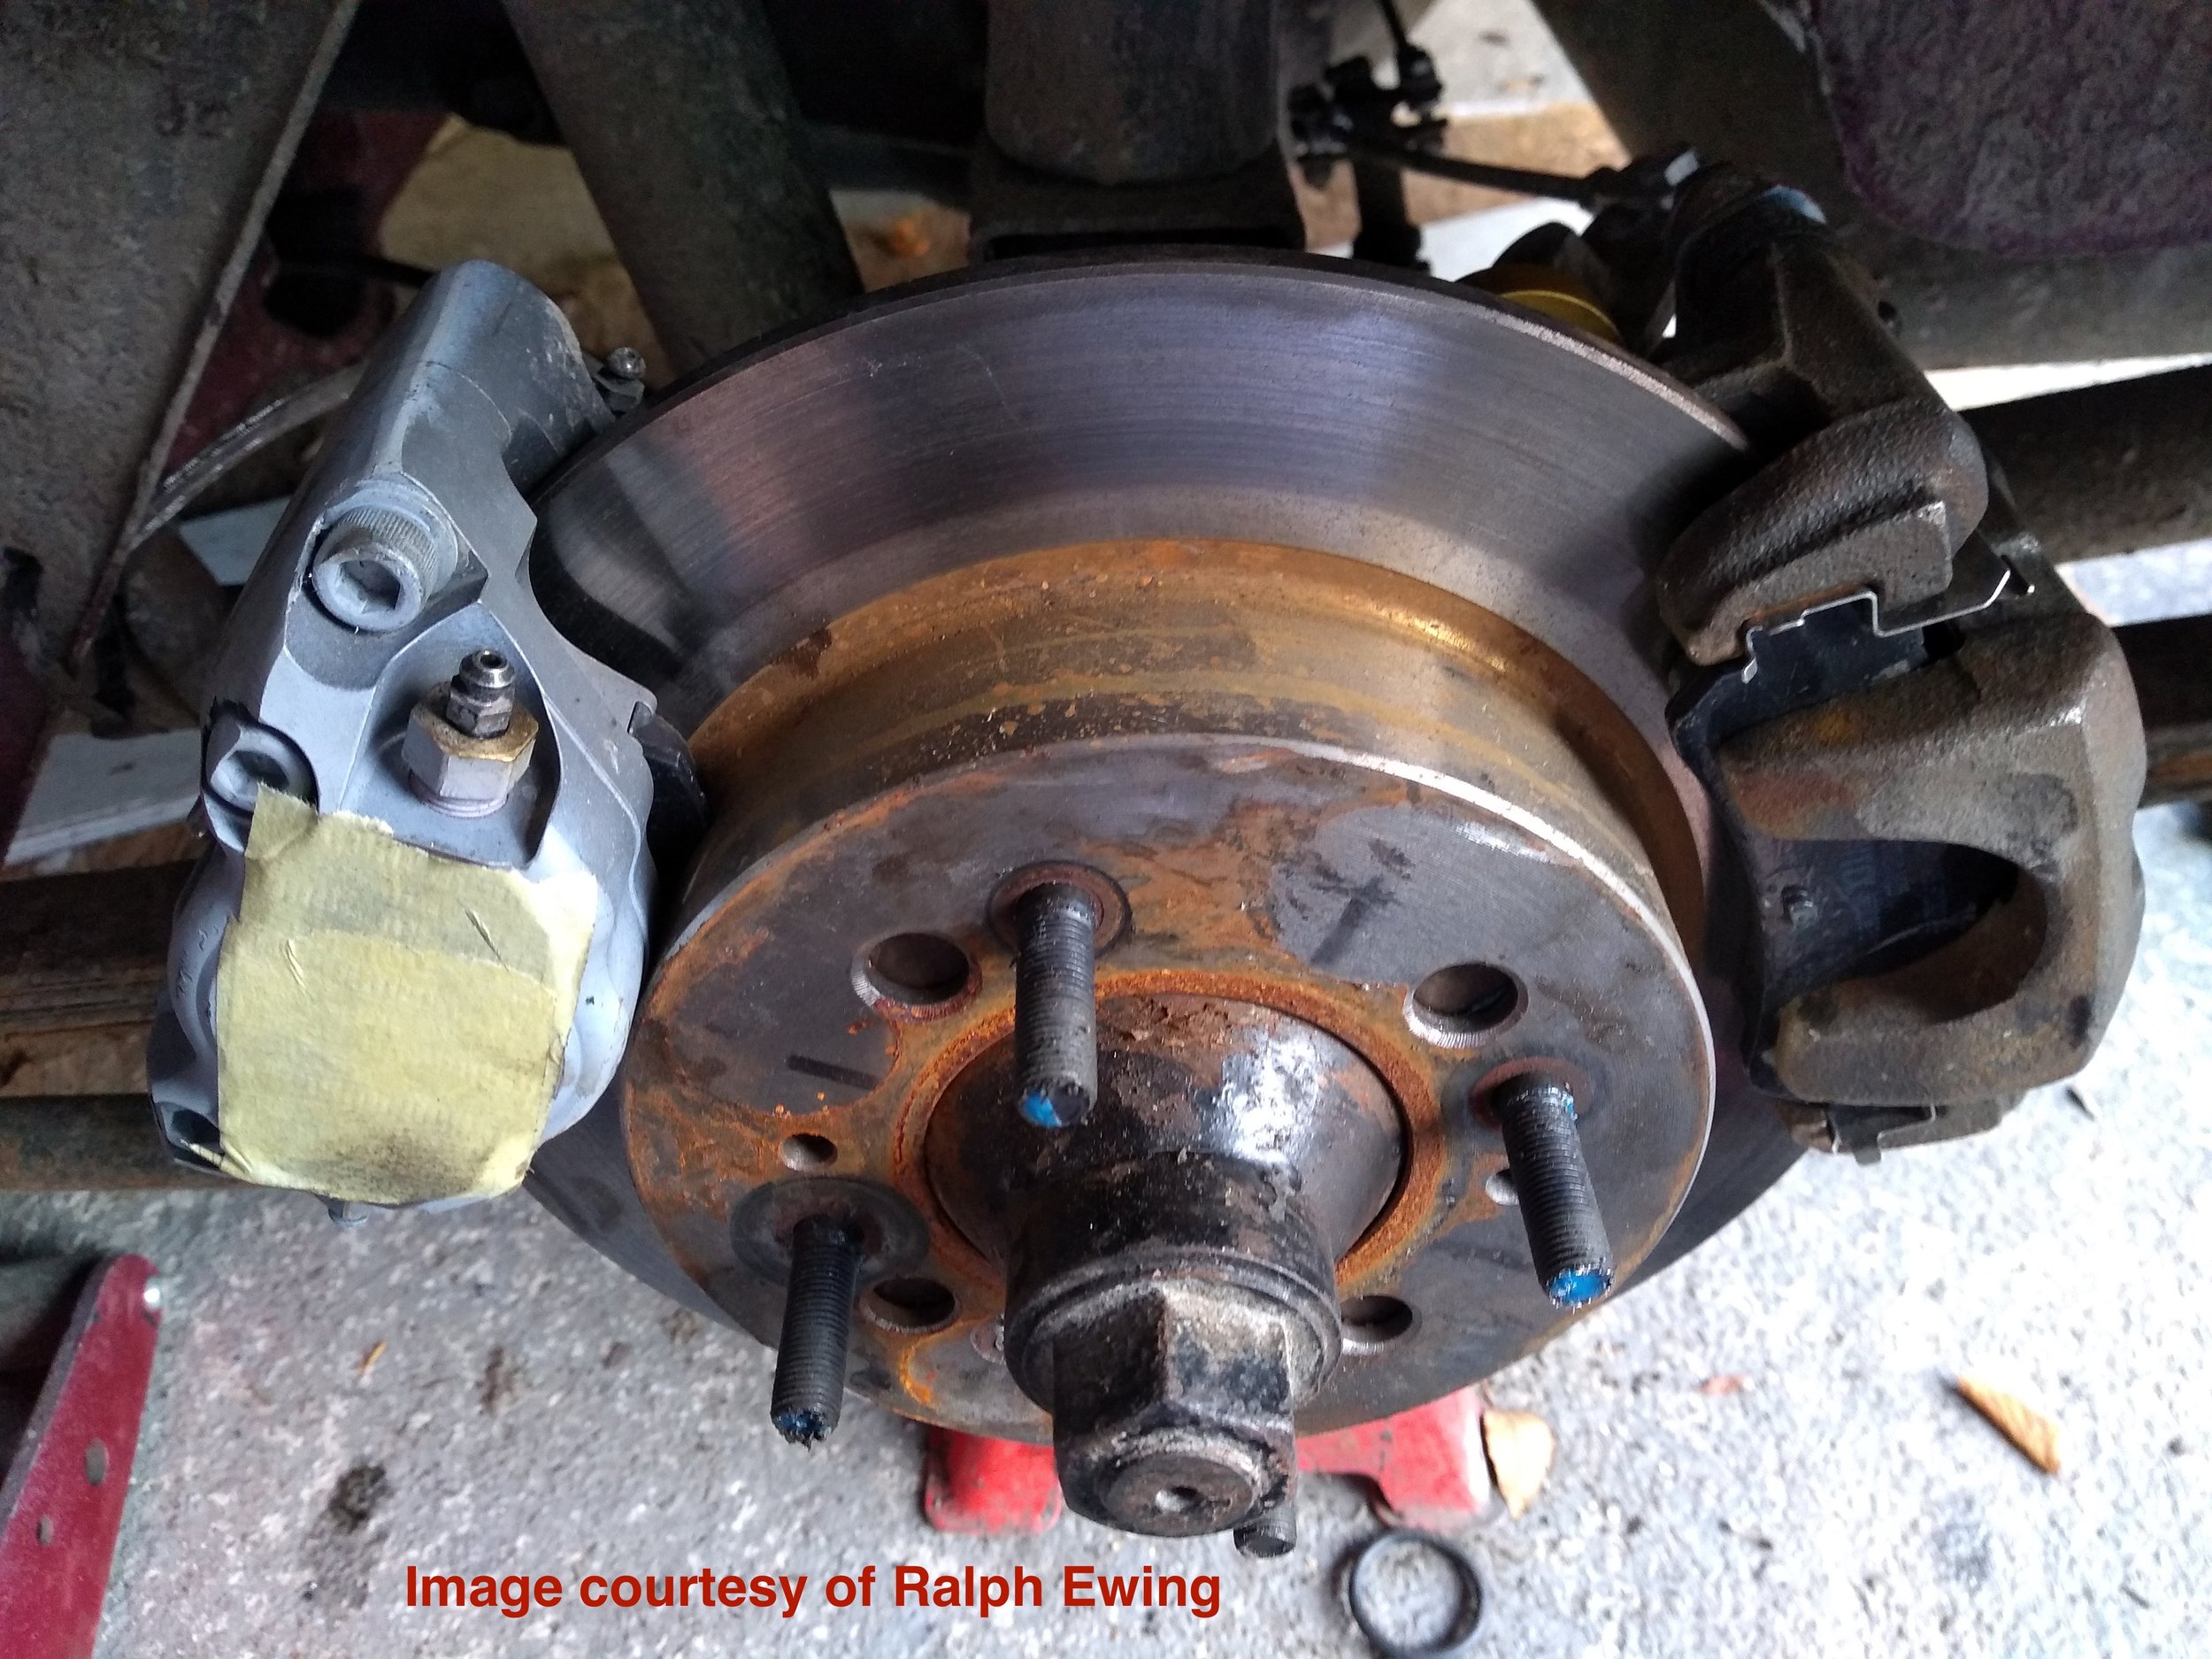
DO YOU SELL A COMPLETE KIT?
NO. We sell aluminum adapter plates and provide step-by-step instructions that allow you to perform an inexpensive DIY conversion. The first do-it-yourself task is browsing a few websites or going to the store or auto recycling facility to obtain the remaining components in the parts list. This eliminates our ability to make a profit on the remaining parts, but it also reduces our overhead dramatically. We pass the savings on to you.
can i have someone do the conversion for me?
YES. Any competent mechanic can perform the installation. CC Motorsports is an excellent choice. Derek Chima's meticulously finished race cars have been featured on British V-8 magazine:

does the conversion add unsprung weight?
YES - it adds 2.4 lbs. or 1.1 kg. per corner. However, we feel that the increased braking force, zero adjustments, and greatly simplified lining replacement is well worth it.
Will the rear disc brake adapters fit other cars?
This conversion will work on all 1/2 and 1/4 elliptical spring Spridgets. You will have to perform one additional step on Bugeye Sprites, which is described in the installation instructions, but otherwise the process is identical.
ALSO, one resourceful owner has discovered the adapters will fit a Morris Minor, simply by rotating them a few degrees and redrilling the mounting holes. Numerous other Moggy owners have successfully followed his example. See the customer cars page and contact us for details.
what wheels are compatible with the conversion?
See the photos of compatible wheels and measurements for those with custom or racing wheels on the disc brakes page.
Is a proportioning or 'bias' valve necessary?
YES. With original Spridget Lockheed discs on the front, this conversion produces a definite rear-wheel bias, and a proportioning valve is needed. See the proportioning valve section on the disc brakes page.
WILL THIS CONVERSION WORK WITH HEAVY DUTY RACING AXLE HALF-SHAFTS?
Yes, but the self-centering method for OEM half-shafts outlined on the installation page may not work. Vintage racer Simon Page overcame that obstacle by simply redrilling the rotors to match the correct PCD.
will these disc brake adapters work with double-bearing hubs?
Unfortunately, we have been informed that the double bearing hubs sold by Peter May and Spridget Mania will not clear the adapters. We do not (yet) have data on other hubs.
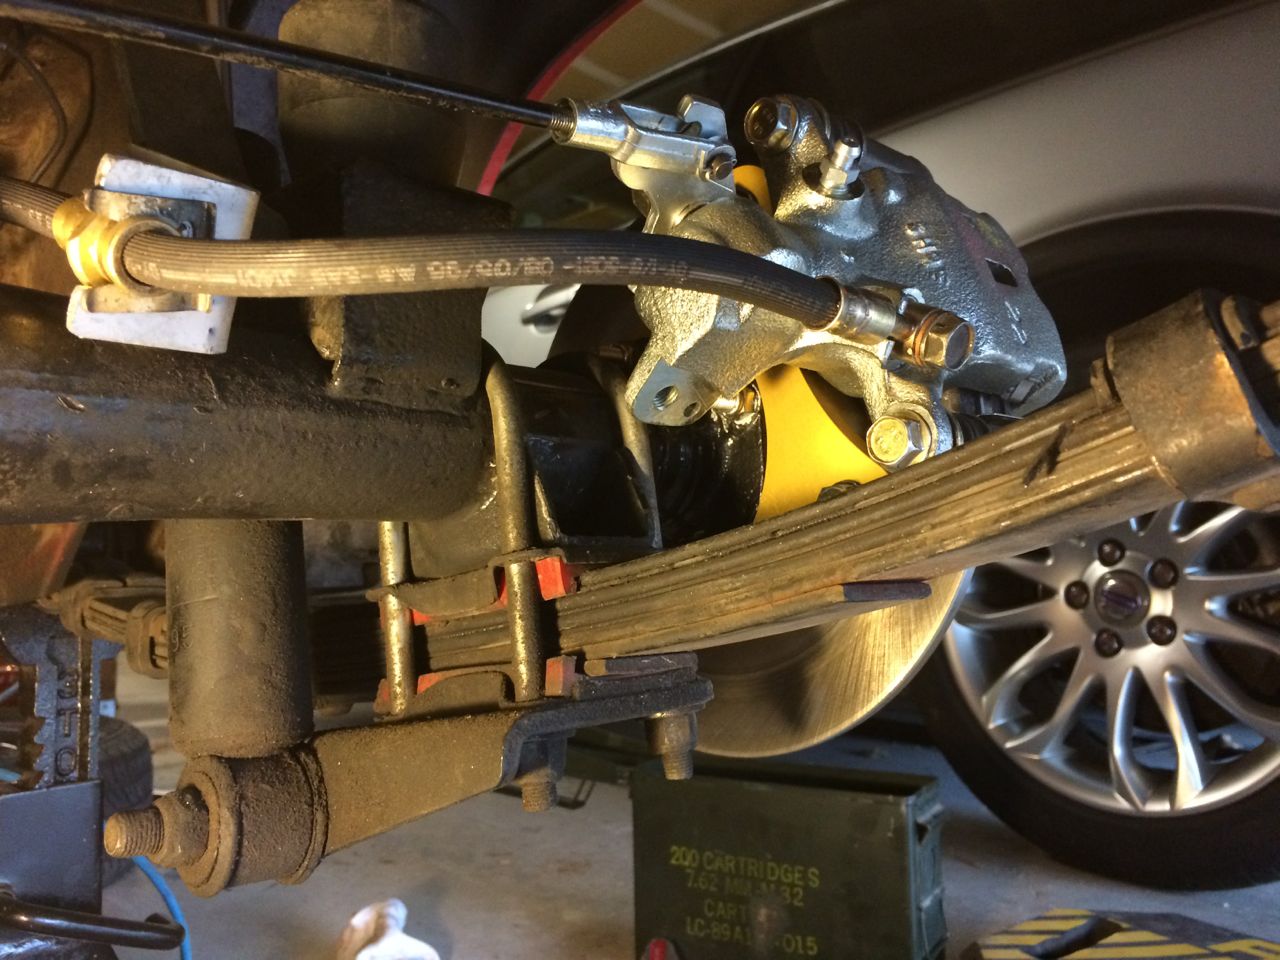
will these adapters work with a rear traction link or panhard rod?
The short answer is, it depends on the configuration.
Frontline's RTL appears to connect on the R/H side close to where the Nissan caliper ends up--aft of the axle and just above the leaf spring. That could be incompatible with this conversion.
Panhard rods vary so much in configuration and attachment method that it is impossible to answer this question without seeing yours. However, you may be able to get an idea from these photos. The remainder of the axle is unchanged from the stock setup on your Spridget:
will this conversion accommodate separate hydraulic handbrakes for autotesting?
At least one Spridget owner has installed an additional lightweight caliper for this purpose, as shown in these photos:
The OEM parking brake feature of our rear disc conversion is retained in this owner’s setup. The separate hydraulic handbrake, for competition use only, easily fits inside of 14” wheels but, with some fine tuning, can be made to work with certain 13” wheels as well.